Posts

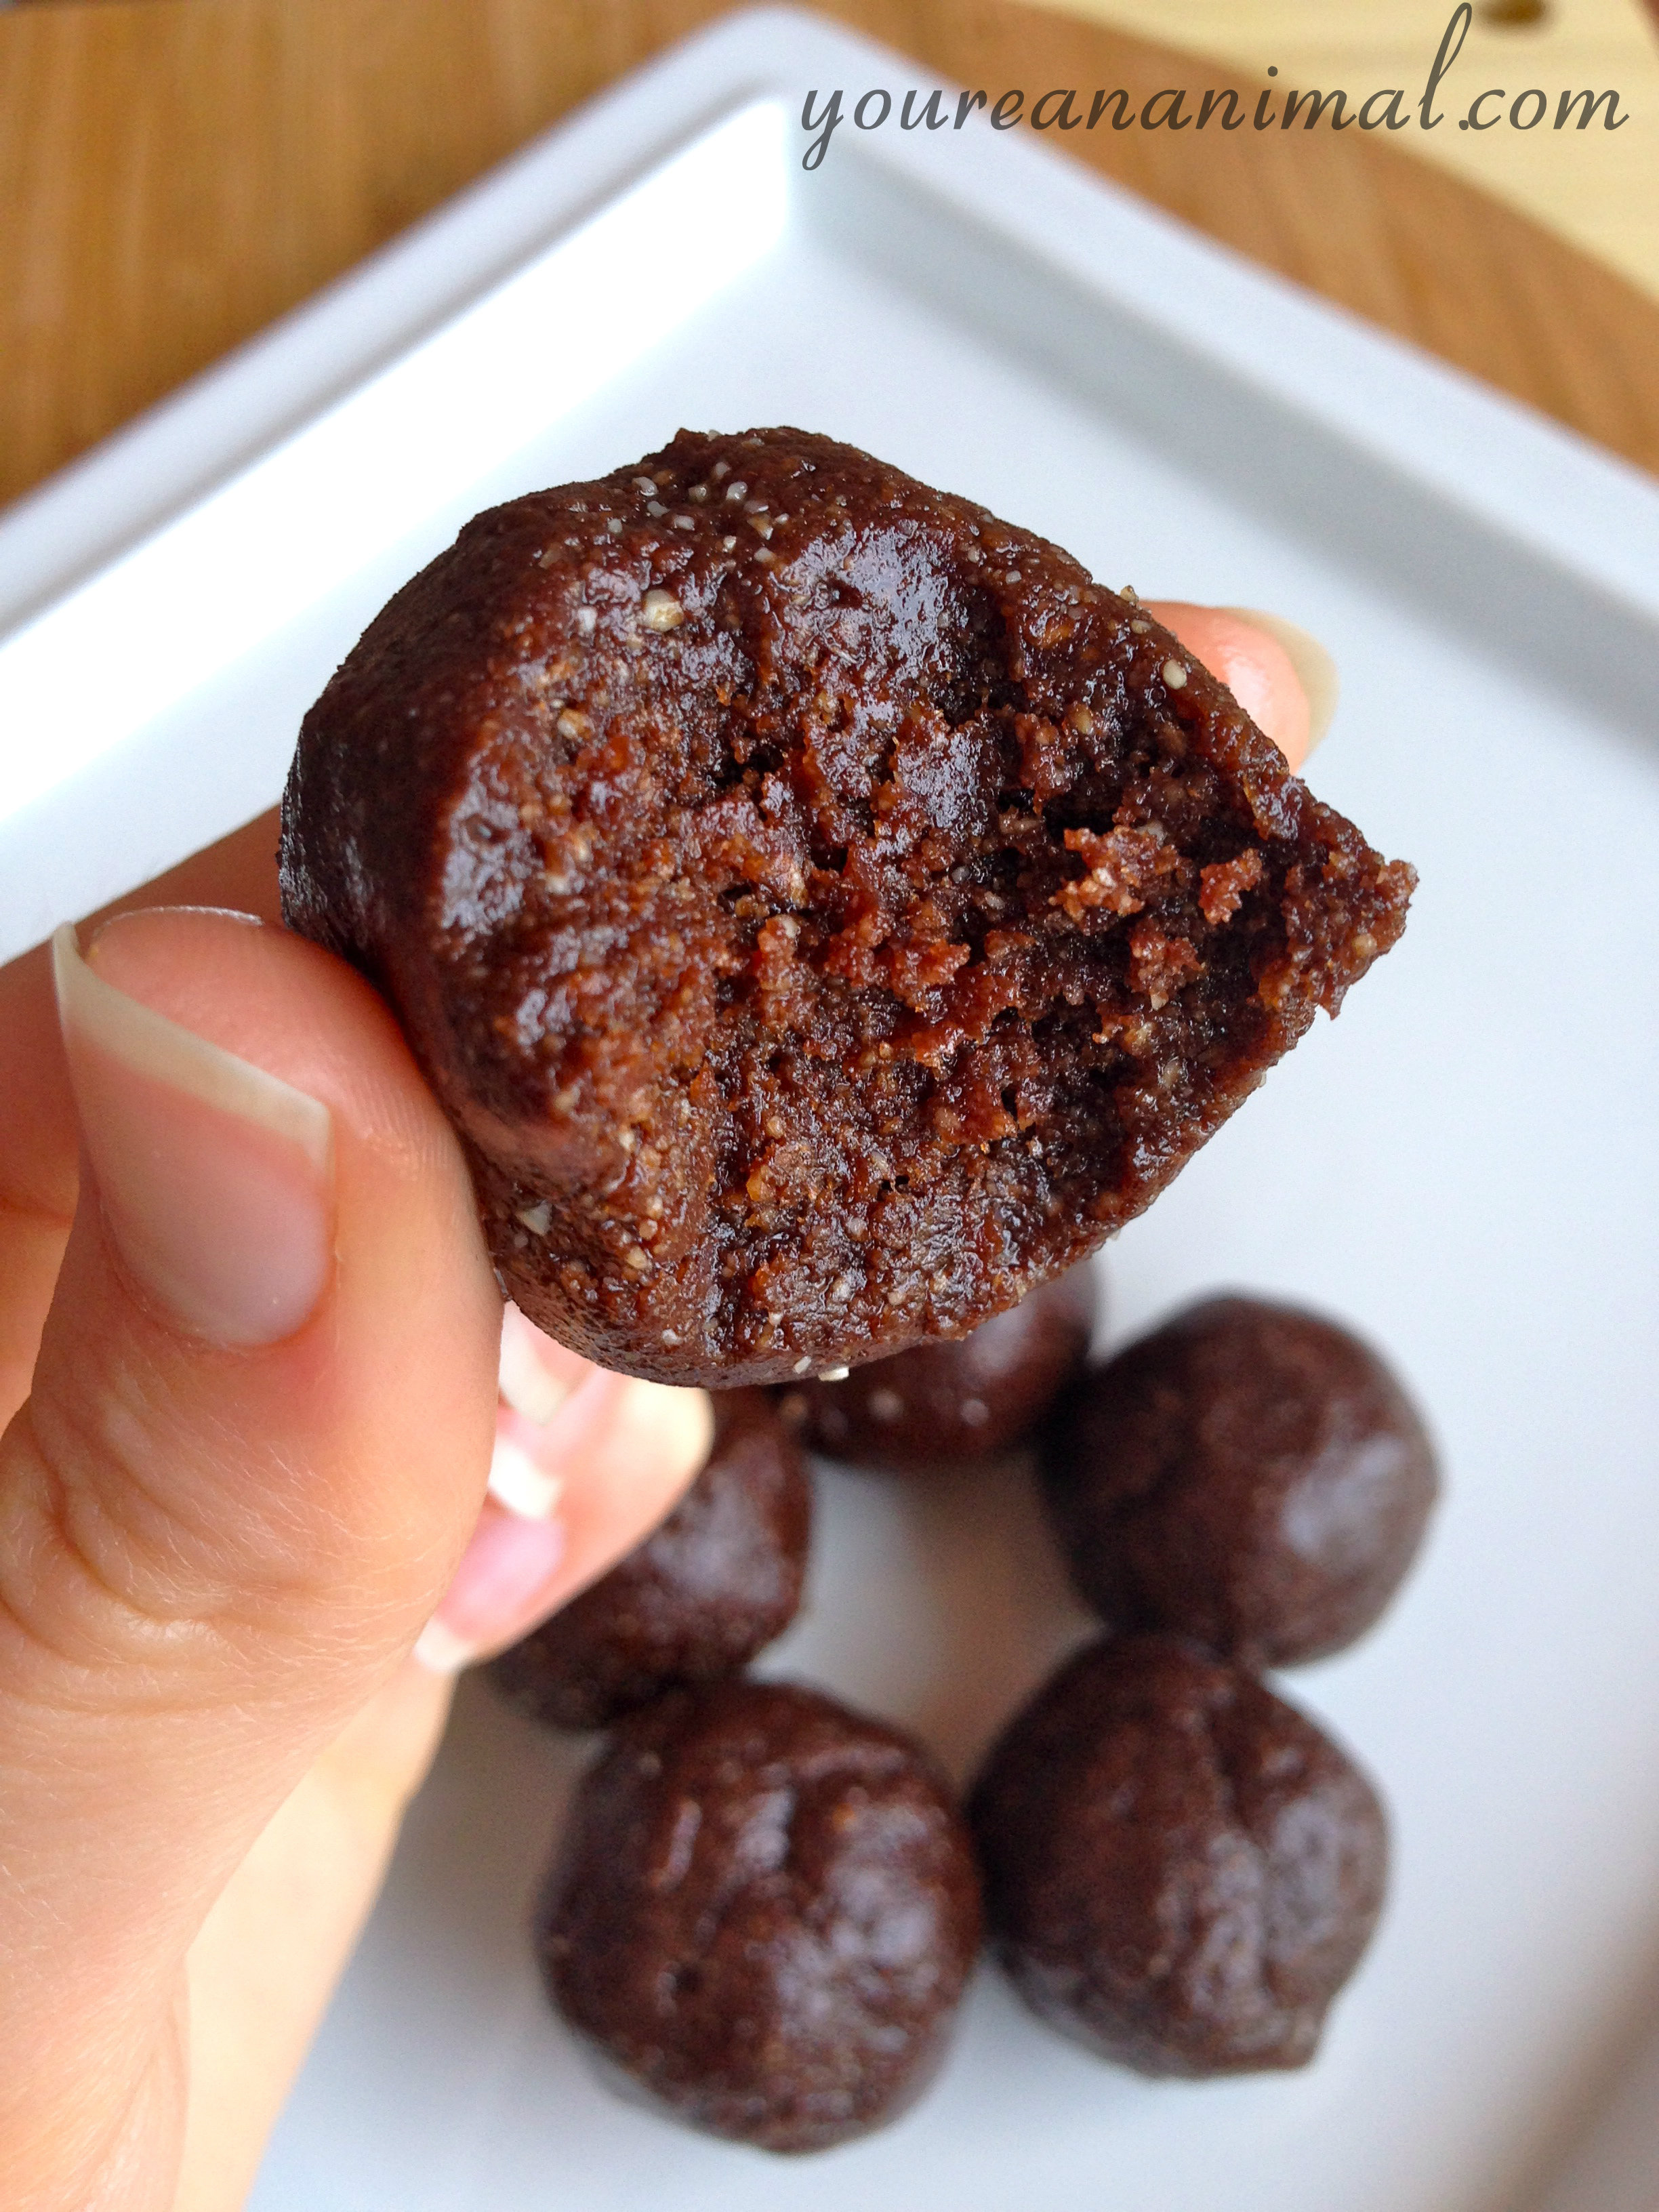
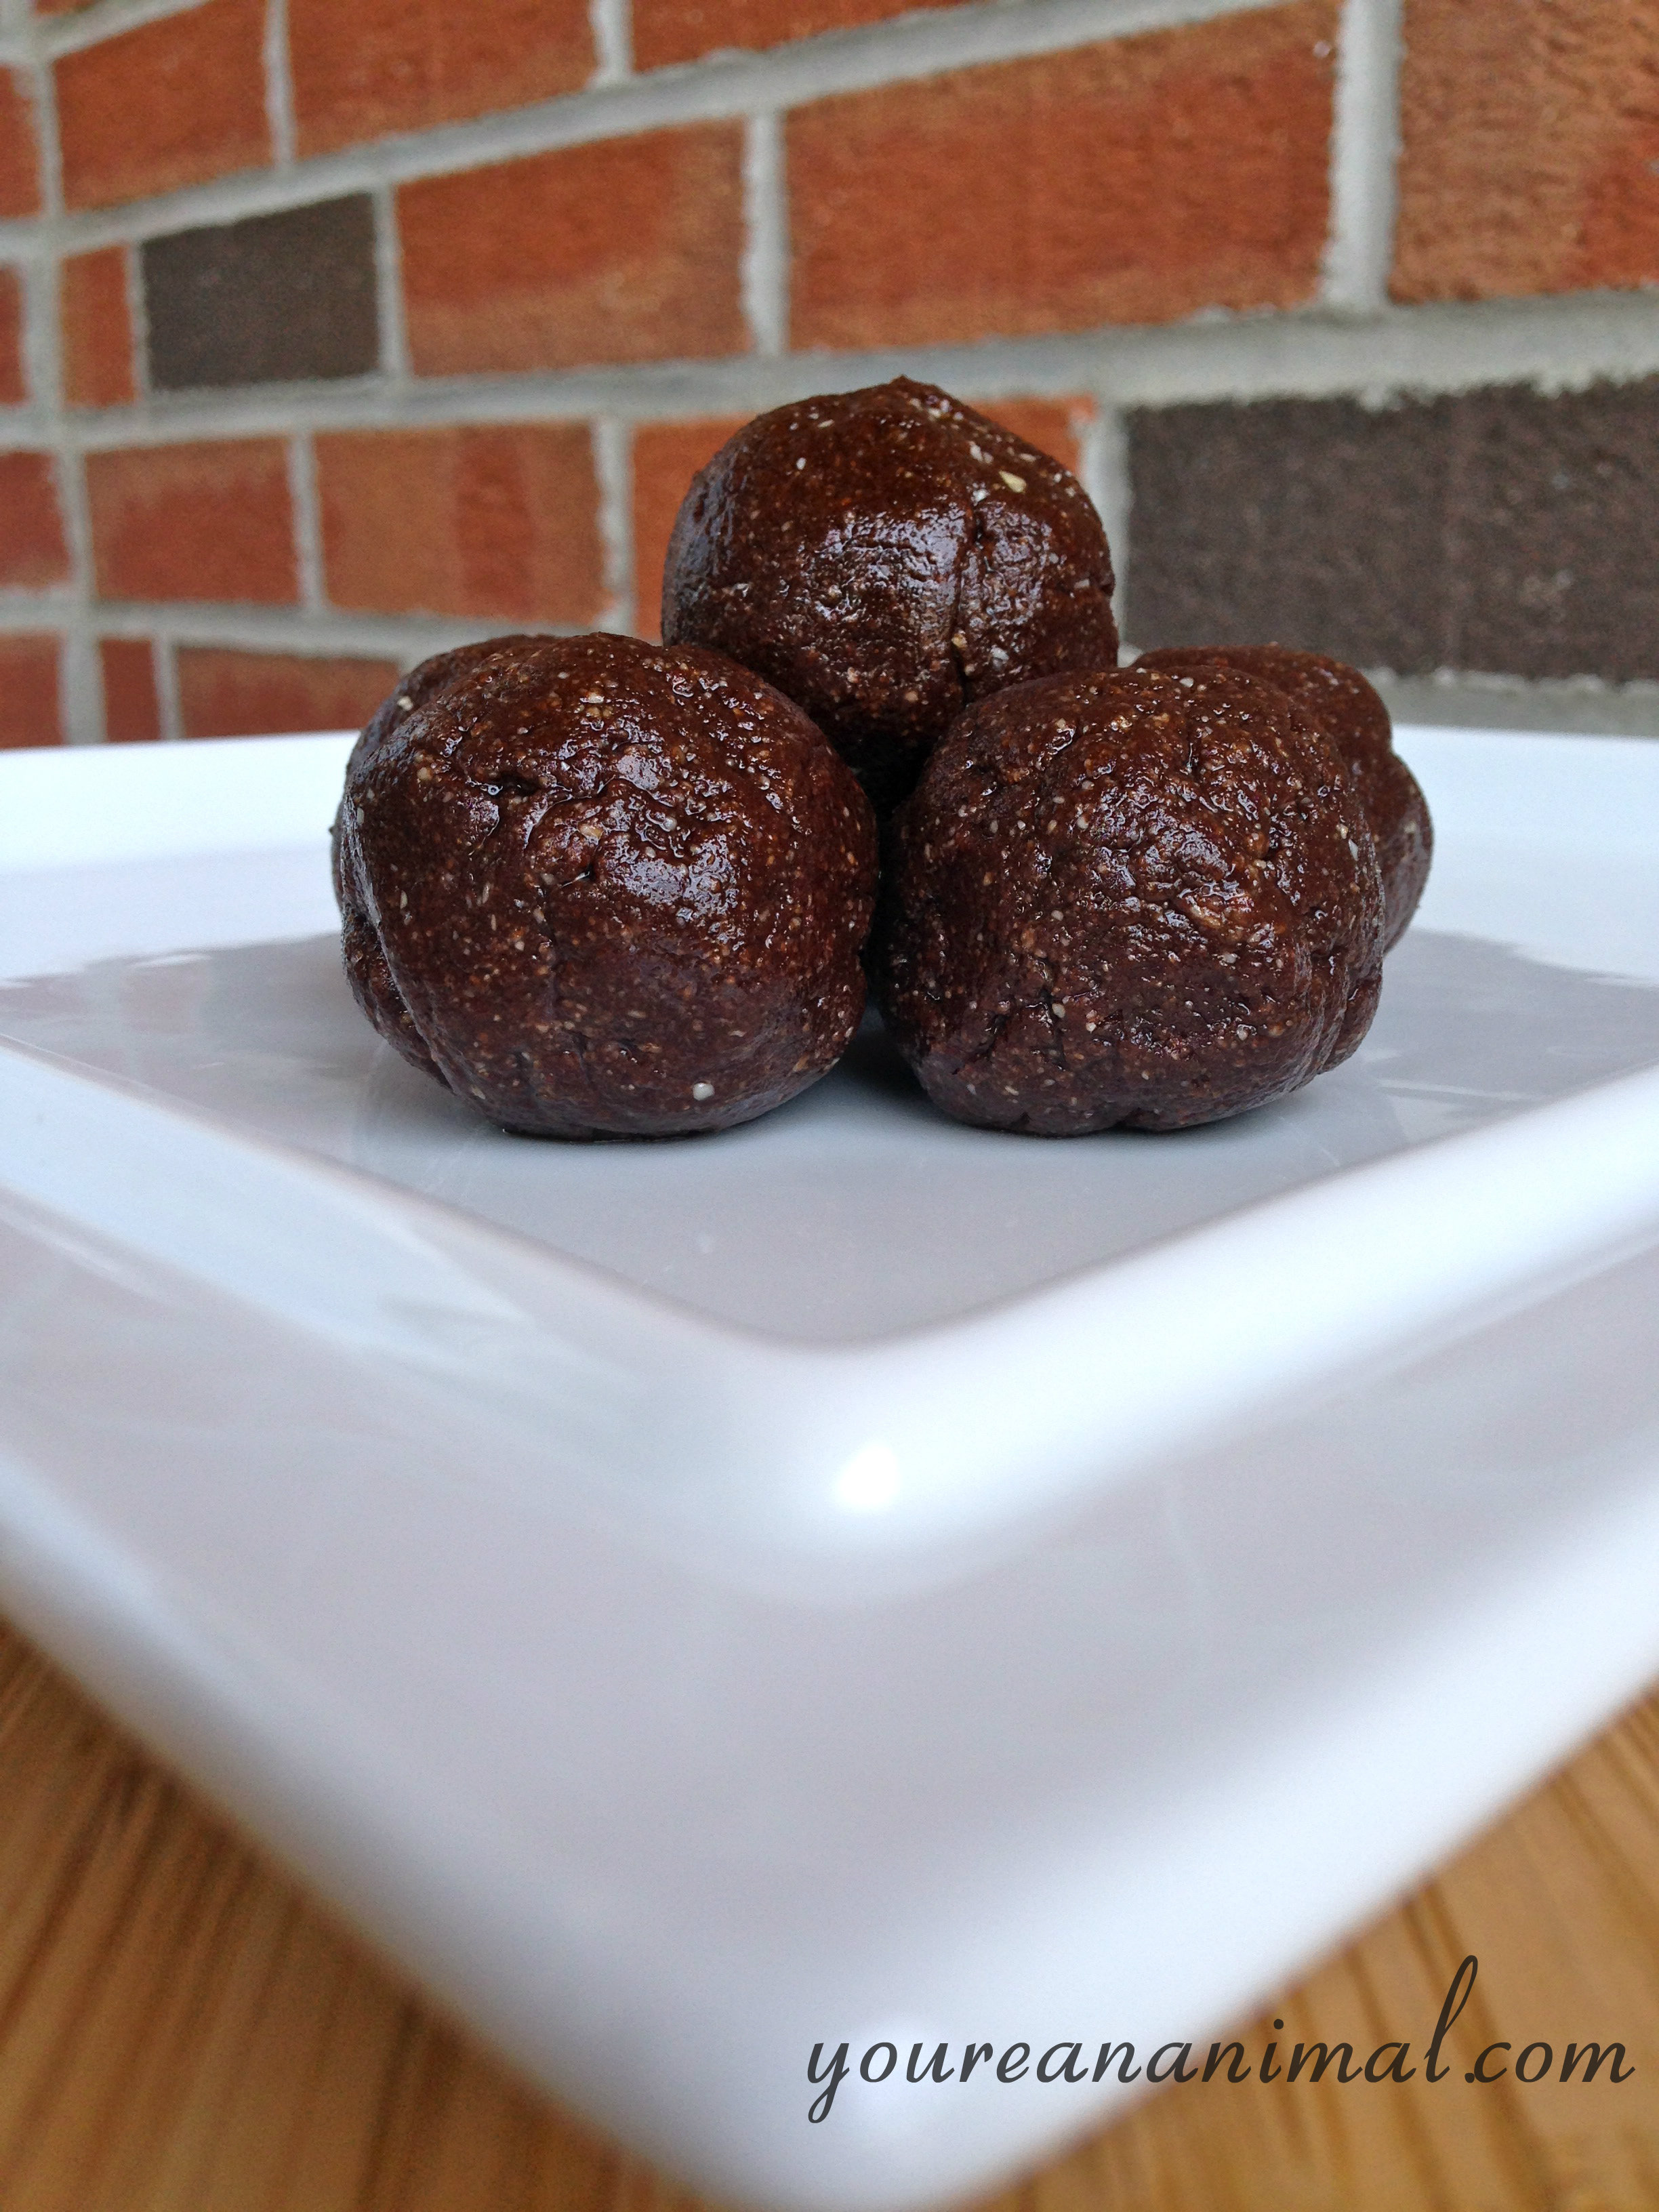
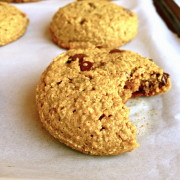
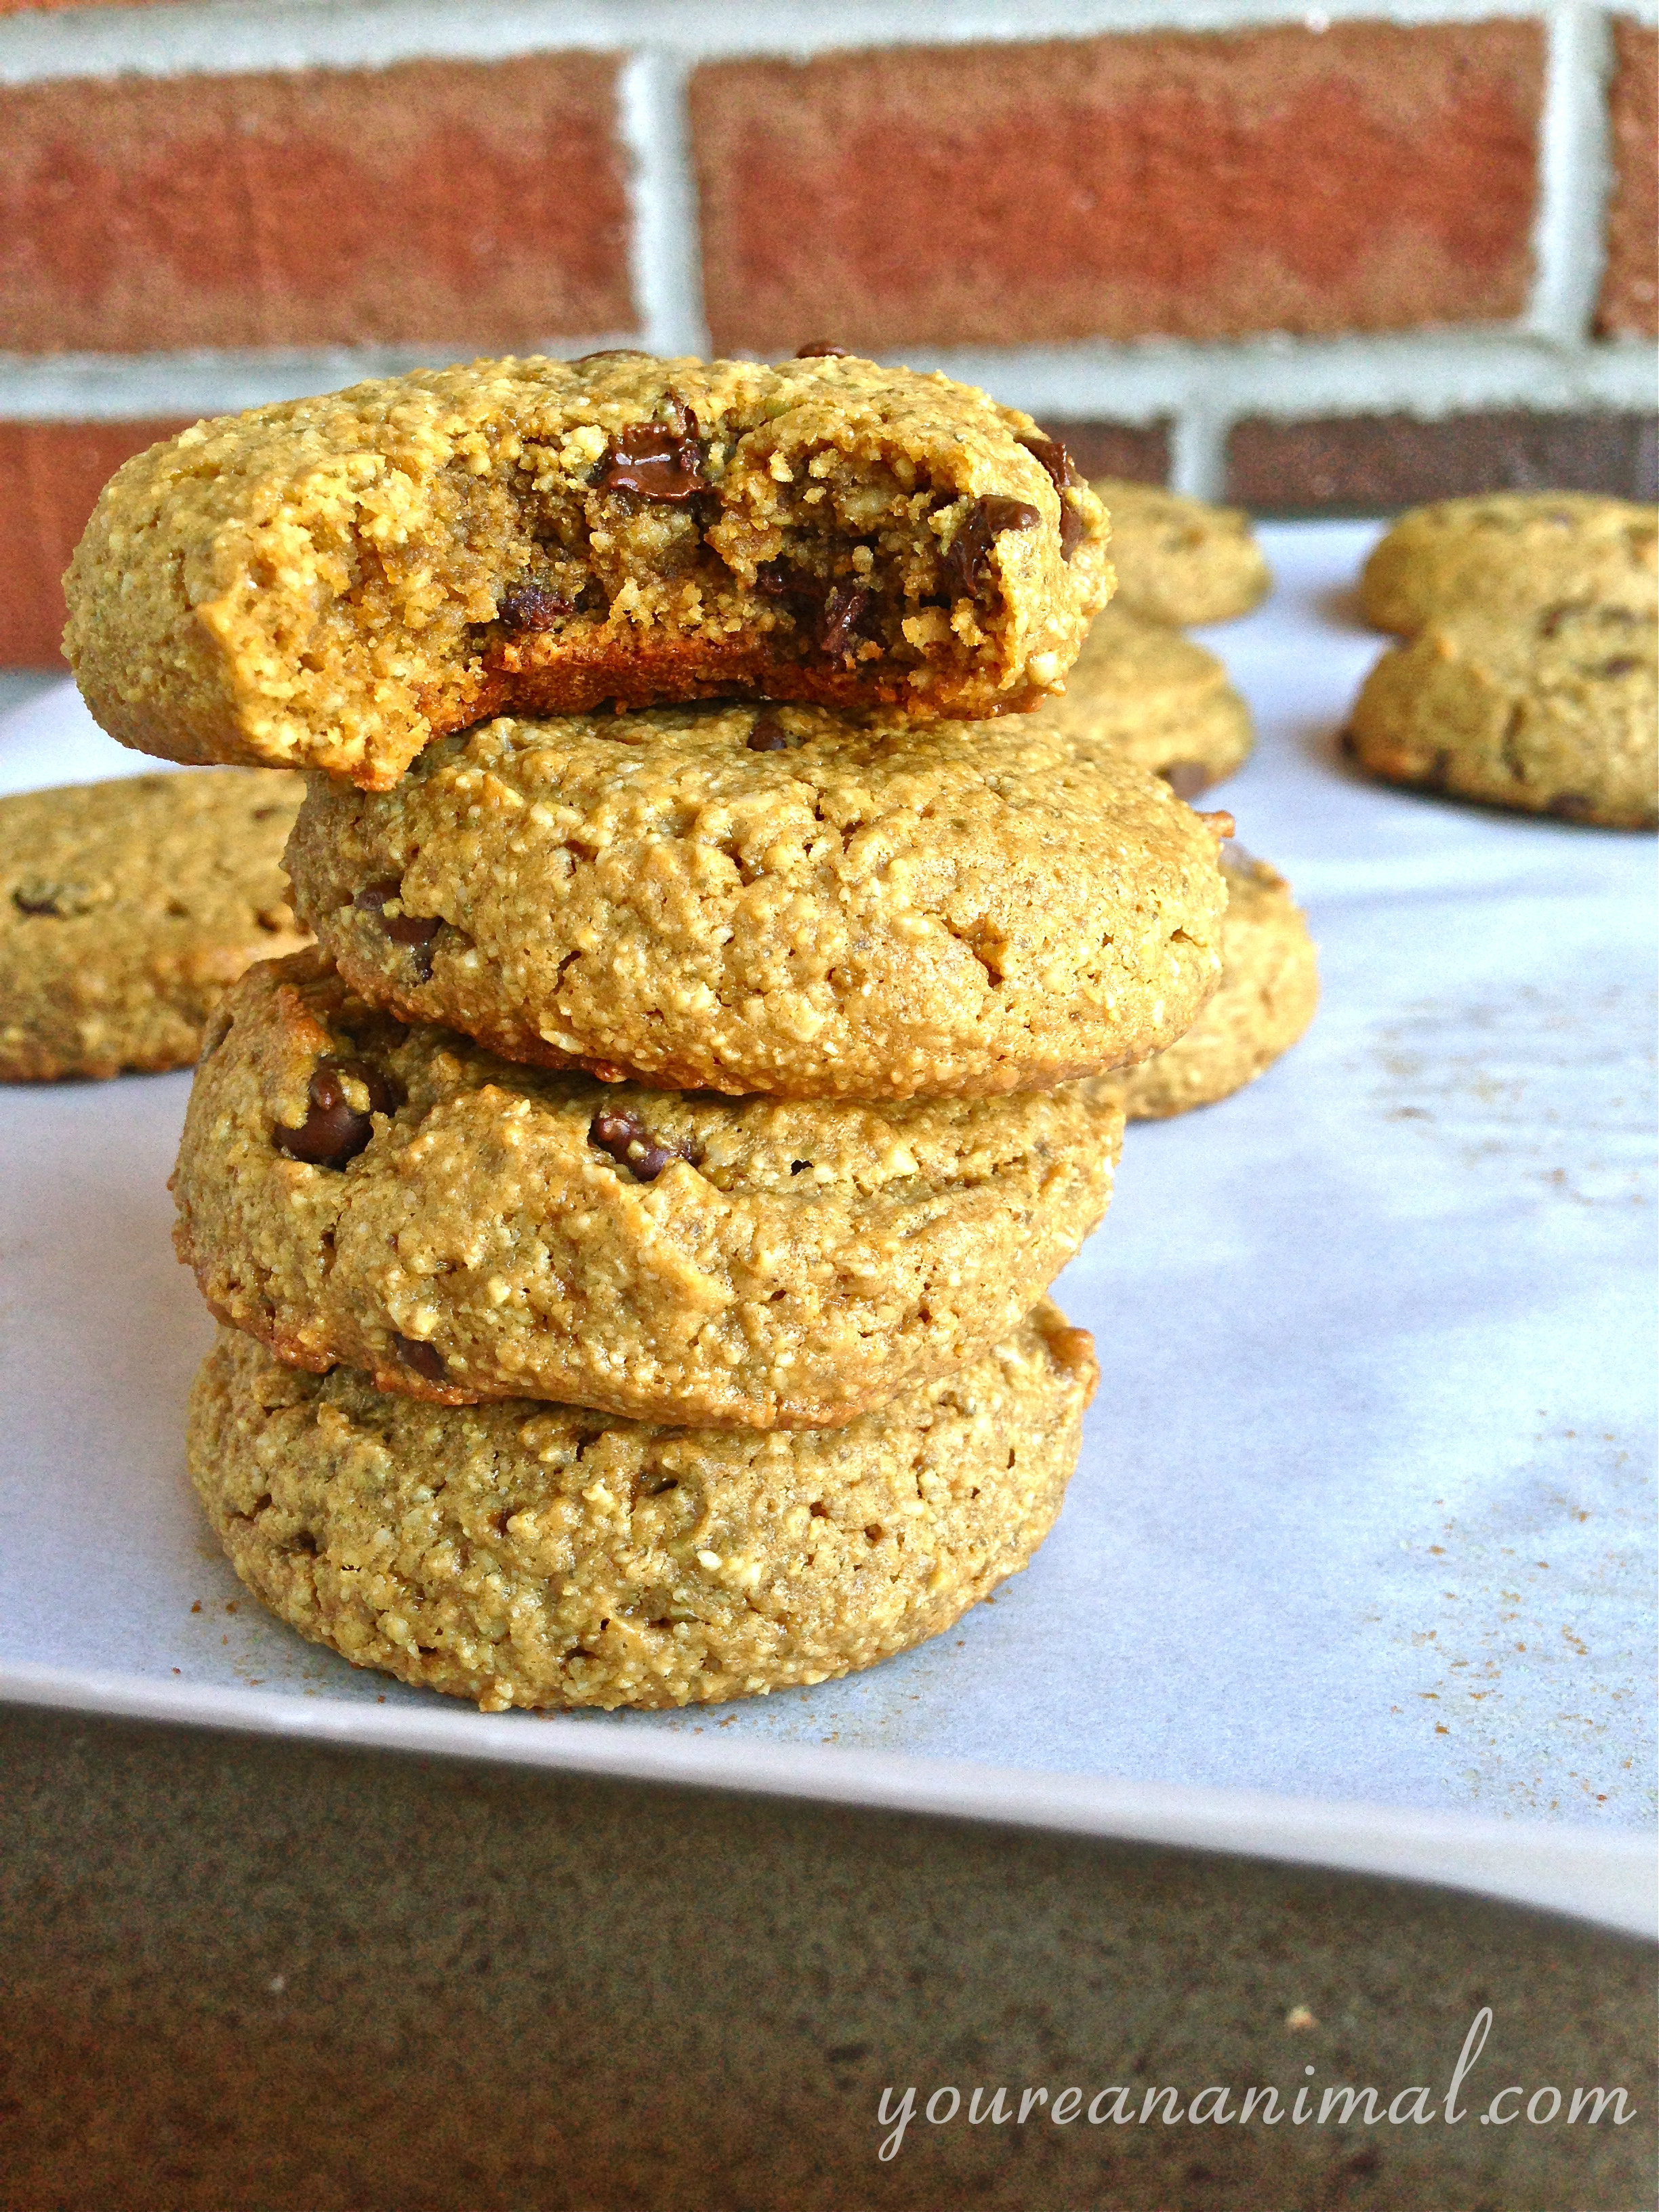
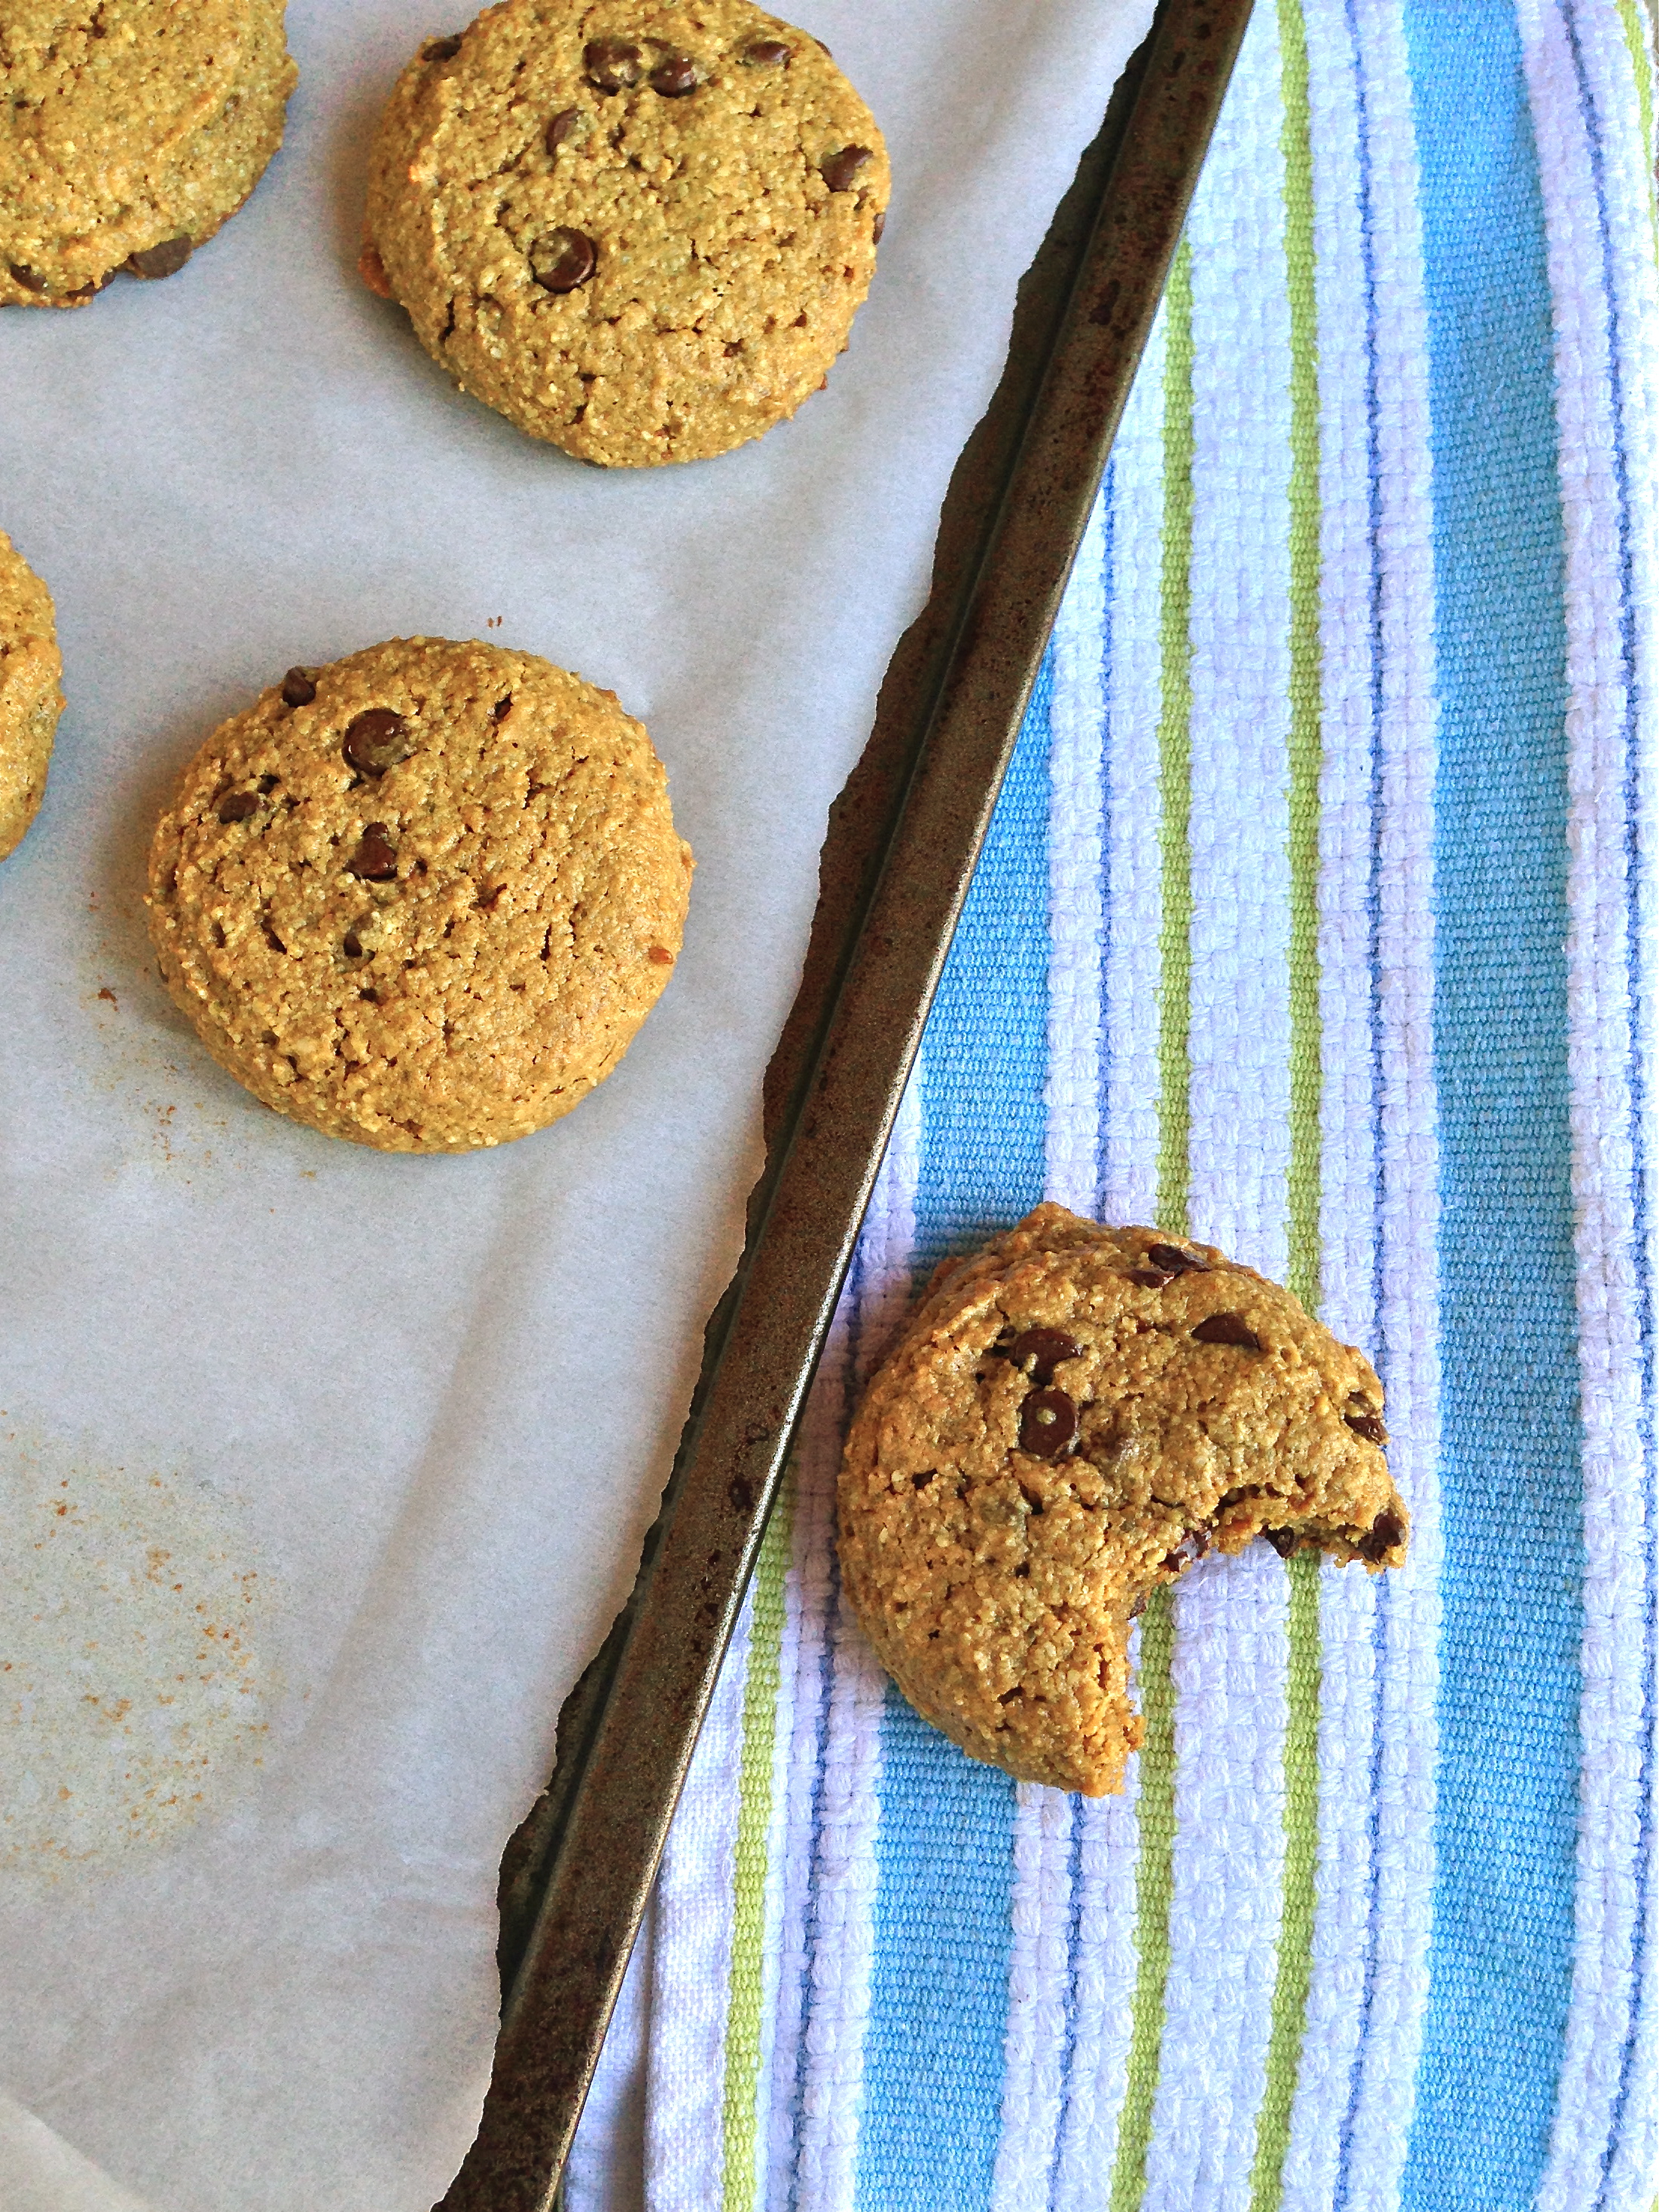
Classic Chocolate Chip Cookies (Grain-Free, Nut-Free)

CCcookie2

In my opinion, Nestle Toll House chocolate chip cookies are the perfect chocolate chip cookie. Maybe it’s my history with tub-fulls of the dough (raw and baked), but to me, that is the ultimate comfort food. But now knowing what goes into making those cookies (particularly the mounds of white sugar and white flour), my decision to break up with the Toll House was inevitable. Oh but how I miss those cookies! So I was on a mission: Create the closest flavor profile that I can, while cleaning up the ingredients. And I’ll be honest, I think I’ve come preeetty darn close. The texture is certainly different, but that’s to be expected when you change the flour from a processed, gluteny white flour to a nutrient dense seed meal. But the flavor… yeah it’s gooood. That’s good with four O’s. And the texture is pretty awesome too. Crispy on the outside, soft and chewy on the inside. Butter, vanilla, and my own creation of brown sugar meets all of my criteria for the best minimally-processed chocolate chip cookies around. For the flour, I used a combination of sunflower, pumpkin, and watermelon seeds for a protein-filled, nut-free base. However, you can certainly use almond flour as a replacement. In fact, the first batch I made of these (way too much butter, which is interesting as I was following the Nestle Toll House original recipe for inspiration… goes to show how my taste buds have changed), I used almond flour. Unfortunately, the almonds proved to get the best of me. Apparently I still haven’t gotten over my sensitivity, because for the next few days after eating (too many) cookies, my legs had red, itchy spots on them. Wahhh, I really thought a year would be enough time to recover and my body would get over it. Guess not. Back to non-almond flour recipes. Which is actually just fine, as I have grown quite fond of my seed meal anyway. Take that, almonds! I don’t need you! Even while using more natural, minimally processed ingredients, these cookies should still be considered a treat rather than a staple. Fructose and saturated fat galore… which I am actually not against by any means, but it should be on the moderation side (as with most things). That being said, every so often you definitely need to indulge and enjoy without going completely overboard (ie. whole tub of Toll House cookie dough), and this is the perfect treat to do so!

CCcookies10

Chocolate Chip Cookies

  1. Preheat the oven to 350 degrees F and line a baking sheet with parchment paper.
  2. Allow the butter to soften, coming to room temperature.
  3. Combine the coconut palm sugar with the molasses in a small bowl to create your “brown sugar.” You can use a fork, but I found it most effective just to use my fingers to combine. Combine until the molasses is completely incorporated, and the mixture is the same texture as regular brown sugar. It should be packable, like wet sand.
  4. Once the butter is softened, use a hand mixer to combine the butter, egg and brown sugar until evenly mixed.
  5. Continually mixing with the hand mixer, slowly add in the nut/seed meal and coconut flour. Add the baking powder and vanilla. Continue to mix with the hand mixer until the mixture is completely uniform. The text of the dough will be slightly less solidified than a “regular” cookie dough, but should form balls when rolled in the palms of your hands.
  6. Fold in the chocolate chips.
  7. Chill the dough in the refrigerator for 5-10 minutes, to allow the butter to re-solidify slightly.
  8. Roll the dough into balls. I got about a dozen 1 Tbsp balls from this recipe.
  9. Place each dough ball on the parchment-lined baking sheet, about 1-2 inches apart. Flatten each ball slightly so they are more of a disk shape than a sphere.
  10. Place the baking sheet in the pre-heated oven, and bake for 13-15 minutes, or until the cookies are golden brown and cracked on top.

CCcookies13

Please note that some of the links in the above post are affiliate links that will take you to an Amazon.com page. If you choose to purchase a product featured in this post using an affiliate link, you will be directly supporting You’re An Animal. Thanks!

Cinnamon Goat Cheese Stuffed Dates

dates6

Okay, so this is more of a concept than a recipe since it’s so simple, but it’s a darn good concept at that! Vaguely reminiscent of a cinnamon roll (Andrew says my imagination was stretching on that one… maaaybe I just really wanted a cinnamon roll), this sweet treat is easy to whip up by the army-full. Just be careful, dates are only of the most sugar-filled fruits you can eat– about 5 grams of sugar per date. And trust me, it would be easy to go wild with these. These sweet, creamy, spicy bites were part of my post-workout routine a couple of days ago (the other part included a big ol’ hunk of grass-fed sirloin, ohhh yeahhhh), and they hit the spot perfectly. The slightly sour, creamy bite of the goat cheese pairs perfectly with the cloyingly sweet dates, and the cinnamon brings both flavors together perfectly for an addictive, small snack, appetizer or dessert. By the way, have you noticed a theme in the recipes lately? Lots of goat cheese… LOTS O’ GOAT CHEESE. Our fridge and freezer has been filled with it lately, because a friend of Andrew’s went out to a local goat farm and brought us back several tubs. I’m not complaining though, the stuff is amazingly fresh (straight from the source is always the best tasting!), and the exact consistency of ricotta but without the lactose and casein. Plus a lot of good stuff, like calcium. So, hang with me on the goat cheese recipes, I promise they will run out… eventually.

Cinnamon Goat Cheese Stuffed Dates

  • 4 pitted dates
  • 1/4 cup soft goat cheese (like Chev)
  • cinnamon for dusting
  1. Using about 1 tbsp of goat cheese per date, use a butter knife to stuff the dates with the goat cheese.
  2. Dust the stuffed dates with cinnamon, or you can alternatively mix the cinnamon into the goat cheese prior to stuffing the dates.
  3. That’s it.

dates5


Wilted Spinach Quinoa with Avocado Pesto (Gluten-Free)

quinoa7tagged

Oh quinoa. What a trendy little tasty item you are. I know we have all caught the quinoa bug in the last couple of years, don’t even try to lie to yourself. You can’t read any quinoa recipe without attaching the word “healthy” to it, but I know some people would argue against that buzzword. Truth be told, as far as I can tell, the verdict is still out on quinoa. Is it a grain? Is it a seed? Is it here to stay, or just a passerby? Here’s my response: Who cares… it tastes good and doesn’t throw my digestive system into a tizzy. So every once in a while when I need something to throw together quickly for a hot lunch, I’ll grab the quinoa. Fifteen minutes, one pot, good to go. I do opt for the sprouted version (you can read more about sprouting in my watermelon seed post), which is meant to make digestion of seeds/grains easier (technically you’re eating a very infantile plant). So yesterday, when I was driving home and 100% focused what can I make for lunch that was quick, easy, and not a salad (hey, sometimes you can only handle so many salad lunches… I know you feel me on that) I went for the quinoa and whatever we had in the fridge. Luckily, I already had my avocado pesto made (I was serious when I said I almost always have some in the fridge), so all I needed to do was cook the quinoa, throw in some spinach while the quinoa was still hot so it would wilt, and the top it with the pesto and a little goat cheese if you want the extra creaminess and slightly sour bite. And bonus! It fed me for lunch yesterday AND today! Wowee I love when I don’t have to think about making something for lunch. Now, quinoa does have some protein in it (about 6 grams per 1/4 cup, which is one reason the healthfoodie world has rejoiced over the prevalence of quinoa), but if you want to add some more protein I say yes! Chicken or shrimp would be good with this for sure. So there ya go, your next easy meal, ready and waiting!

Wilted Spinach Quinoa with Avocado Pesto

  1. Cook the quinoa according the the package directions.
  2. Once the quinoa is finished cooking and still very hot, throw in the spinach and let the heat of the quinoa wilt the greens. Stir the spinach into the quinoa, and cover the pot if needed to let the spinach fully wilt.
  3. Stir in the pesto, until the mixture is covered in the sauce.
  4. Top with goat cheese if you choose.

quinoa1

quinoa4

Seared Ahi Tuna Salad with Goat Cheese Balsamic Vinaigrette

Strawberrysalad3

This salad is our #1 go-to meal when I need a quick-fix meal. Our jobs often have us working late (trainer lyyyfe), which means I most certainly do not feel like making a big, involved meal when I get home around 9pm on a Monday. It’s so simple, yet the flavors are huge: the perfect mix of salty, sweet, creamy and spicy. I actually stole this recipe idea from a meal I had at Firebirds (thanks, yo!), which uses shrimp. Because of that, I too often use shrimp in this recipe, but I just happened to want seared tuna the other night and voila! It worked like a charm! Sub any protein you can imagine, but so far I’ve really liked it with the seafood flavors. Okay, okay, enough building it up for ya, let me break it down: Starts with the greens, to make you feel especially health-nutty (or maybe just nutty?). Then it gets a nice coat of the most perfectly blended homemade dressing. Goat cheese and balsamic explosion right on those taste buds. Salty, creamy, acidic. Which just so happens to marry perfectly with some sliced strawberries. Sweet to cut the sour and all of that, ya know? And then seared ahi tuna for that tender, lean yet hearty protein. Have I sold it yet? You better just go and make it to find out for yourself what an easy yet powerful meal this is!

Seared Ahi Tuna Salad with Goat Cheese Balsamic Vinaigrette

  • 1 Wild Ahi (Yellowfin) Tuna Steak
  • 2 large handfuls of greens (I use a powerblend)
  • 6-8 sliced strawberries
  • Goat Cheese Balsamic Vinaigrette:
  • 3 tbsp avocado or olive oil
  • 1 tbsp balsamic vinegar
  • 1/2 tbsp of soft goat cheese
  • a pinch each of salt, pepper, onion powder, garlic powder, and dried yellow mustard powder
  1. Heat a grill pan on medium high heat.
  2. Place the tuna on the pan once hot, and cook the tuna steak about 2-3 minutes on each side. The middle will still be raw.
  3. Remove the tuna from the heat, and allow to cool. Once cool enough to touch, cut into slices.
  4. In a large mixing bowl, combine the vinaigrette ingredients with a fork until thoroughly mixed.
  5. Add the greens to the dressing mixture, and toss the greens with tongs until all of the greens are coated with the dressing.
  6. You can either toss the strawberries with the greens, or plate the greens and add the strawberries on top separately.
  7. Place the tuna slices on top of the dressed greens, and serve.

This recipe makes two entree-sized salads.


Superfood Green Smoothie (Dairy-Free)

smoothie9

Ah the Green Smoothie. Something that healthfoodies swear by, yet is still so misunderstood. Yes, it looks gross. I get it. But I can promise you, it will surprise you. And luckily, if you use berries it’s not even green in color. HA! No excuses anymore, people! So I’ve been making these for a while, and in fact try to make one almost every day. This is usually my breakfast, so that’s why I’m putting it under the category of “Breakfast.” (See how that works? Organization master right hurr.) On the days that I have to be at work super early (6 a.m., welcome to the life of a fitness trainer) I make this the night before and leave in the fridge so I can grab and go. But of course, this can be eaten any time, anywhere, any day. You all are smoothie champs in the making, I see it now. The beauty of this smoothie is that I’ve given you a base formula, but the flavor is really up to you depending on which fruit you want to use. Again, no excuses! My two favorite flavors, which are pictured above, are mixed berry (purple), and pineapple mango (green).

This smoothie features flax meal for added fiber, chia seeds for the anti-inflammatory omega-3 fatty acids, coconut water for the electrolytes, coconut oil for some good fat to help the solubility and absorption of the vitamins and nutrients in this smoothie, plus protein to keep you full and not to mention the green leaves and fruit (we all know the benefits of these by now). Oh and if you haven’t heard, I’m slightly obsessed with my blender. If you’re in the market for a new one, I would definitely recommend this Ninja. Now, go on and make your own superfood smoothie!

Superfood Green Smoothie

  1. Combine the coconut water, protein powder, flax meal, chia seeds, coconut oil, and green in a blender and pulse until the greens are slightly chopped and don’t take up as much space in the blender.
  2. Add the frozen fruit. Blend until smooth.

This recipe makes two 16oz smoothies. You can share with someone else, or store the second in the fridge covered with plastic wrap. Or halve the recipe to make one at a time.

smoothie3

Please note that some of the links in the above post are affiliate links that will take you to an Amazon.com page. If you choose to purchase a product featured in this post using an affiliate link, you will be directly supporting You’re An Animal. Thanks!

Products Featured In This Post:

Raw Brownie Energy Bites

proteinbite7

Sometimes my kitchen turns into an episode of Chopped. “I’m hungry, I have these ingredients, GO.” Interestingly, sometimes these spontaneous ventures turn out to be a hit on the first try. Such is the case with these bites. Okay… balls. There I said it… we were all thinking it, let’s move on. I really wanted something sweet, but also filling, and TAADAA. Brownie bites. That are raw. And proteiny. (Read: filling.) Emphasis on the brownie, because yum. Reminiscent of a Lara Bar, or energy bar, these are the perfect snack to throw together to get you over the afternoon hump. I used watermelon seeds to keep these protein-filled yet nut-free, but you can sub any kind of nut or seed you want. DO NOT BE ALARMED BY THEIR APPEARANCE. Just dive right in, the brownie is divine.

Raw Brownie Energy Bites

  • 3/4 cup Watermelon Seeds (or other seeds/nuts)
  • 7 pitted dates
  • 2 tbsp cocoa powder
  • 2 tbsp tahini (sesame seed paste)
  • 2 tbsp water
  • 1/2 tsp vanilla extract
  • 1/4 tsp cinnamon
  1. Add dates, cocoa powder, watermelon seeds, vanilla and cinnamon to a small food processor. Process until finely chopped, like the consistency of wet sand.
  2. Add the tahini and water to the mixture, and process until it comes together in a thick paste/dough. If needed, you can add more water, drop by drop, until the mixture is the right consistency to be able to mold.
  3. Remove mixture from processor, and form into balls. Mine were a little over a tablespoon each.

Makes about 7 bites.

proteinbite2


Honey Maple Almond Clusters (White Sugar-Free)

almondcluster13

It’s Independence Day weekend, which for most of us east-coasters means a long weekend at the beach! So Andrew and I packed up the car last night and drove 5 hours down the coast to the NC/SC border for a much-needed mental and physical break. And then Arthur arrived… the first hurricane of the season with the worst timing. Currently we are cooped up in the beach house on our first day here, waiting for the storm to pass. It’s just grazing us here, so we’re lucky, and thinking of the people (especially our friends) in the Outer Banks who are about to get a direct hit tonight. Stay safe!

In my world, road trips only mean one thing: Car snacks. A couple years ago I would have stocked up on Sour Patch Kids and chocolate covered pretzels on our gas station stop before heading out. Those days are (thankfully) gone, but I still wanted that sweet and salty fix, so I whipped up some Honey Maple Almond Clusters before heading out! Car snack fix, done and done. And not too terrible in the nutrition department, I might add. Heavy on the nuts and seeds, with natural sugars rather than the white and brown that are in typically brittle recipes. I added grass-fed butter for the extra richness and flavor, but you could certainly leave it out if you choose. Car packed, clusters made, plus a green smoothie in the cup holder, and we were set for the hours ahead! Now just to ride out this rain…

Honey Maple Almond Clusters

  • 3/4 cup unfiltered honey
  • 3/4 cup  grade B maple syrup
  • 3/4 cup water
  • 2 cups raw almonds
  • 1 cup pumpkin seeds
  • 1/2 cup watermelon seeds
  • 2 Tbsp grass-fed butter (I used salted Kerry Gold)
  • 1/4 tsp vanilla extract
  • 1/2 tsp cinnamon
  1. In a medium saucepan, combine the honey, maple syrup, and water.
  2. Bring this mixture to a boil (about medium to medium-high heat), and use a candy thermometer to keep track of the temperature. (The thermometer is important! Sugar is very finicky.)
  3. Line an 8×8 pan with parchment paper. Measure out your add-ins beforehand, as you will need to act quickly once your sugar mixture comes to temperature.
  4. Continue to boil sugar mixture until it reaches 300 degrees F, or the “hard crack” stage, stirring frequently. Beware, it will foam up. If it foams too much, stir, or remove from heat briefly and then return. This stage takes longer than expected–anywhere from 30 min to an hour. Be patient!
  5. Once the mixture reaches the hard crack temperature, remove from heat and quickly add your butter, almonds, seeds, vanilla and cinnamon. Stir and fold in the ingredients quickly, as the sugar will start to stiffen.
  6. Add the mixture to the lined 8×8 pan, and smooth into an even layer.
  7. Allow to cool in the freezer (they will be easier to break when really cold).
  8. Once completely hardened (like hard candy), remove from the pan and break the mixture into bite-sized clusters.
  9. Helpful hints: I found it broke more easily if I flipped it over so the bottom was facing up. I used a butter knife and just went for it. Caution–this is a messy process. Expect to sweep the floor and every inch of counter within a 4-5 foot radius. Maybe invest in some protective eye wear and send small children and pets out of the room. Standard flying object precautions. Also, these got slightly chewy at room temperature, so I found that storing them in the fridge kept them super crunchy. And one more thing… Please don’t pull out a filling eating these.
  10. Enjoy!

almondcluster3


S’mores Bars (Gluten-Free, White Sugar-Free)

1

Happy official start to summer! What better way to get in the mood than with s’mores? Unfortunately the chemical-y, white sugar-y, gluten-y treats have started to sound more like a death trap than a happy summer evening. So why not make your own without the processed junk?! Okay so these are by no means the healthiest food on earth… they’ve got a ton of sugar, even if that sugar is much better quality than what you would buy in the store. So this is a once-every-so-often summertime treat made to share. By hey, I say if you’re going to do it, at least make it cleaner than it used to be! I can’t take too much credit for this recipe because I actually combined three different recipes from three different sources to create these sweet treats: Against All Grain, Lexi’s Clean Kitchen, and Urban Poser. The part that amazed me the most was being able to make my own marshmallow with honey. WHAAAT. And it came out perfectly. Until I caught it on fire. Yep, that actually happened. I put the bars under the broiler to get the marshmallow nice and toasty brown (I mean it’s a s’more, right?) and then got distracted by the World Cup annnnd there was a fire. Smoke detector went off. I had to peel off the top charred and maimed layer. And because of that, the marshmallow layer isn’t as thick as it started out. So when you make these, the marshmallow will probably be a little fluffier and taller. Just don’t make an oopsie like I did. BUT if you’re going to catch something on fire, marshmallow isn’t the worst thing because you can easily just remove it. That’s my story and I’m sticking to it. Happy summertime!

S’mores Bars

Graham Crust layer adapted from Against All Grain (original recipe here)

  • 1/4 cup almond flour
  • 1/2 cup plus 2 tablespoons coconut flour
  • 1/4 teaspoon salt
  • 1/4 teaspoon baking soda
  • 1 teaspoon cinnamon
  • 1/4 cup coconut oil, softened
  • 1/4 cup honey
  • 1 egg
  • 1 teaspoon vanilla

Chocolate Fudge Cake layer adapted from Lexi’s Clean Kitchen (original recipe here)

  • 6 oz. dark chocolate (I use Enjoy Life chocolate chips)
  • 1/4 cup unsweetened apple sauce
  • 1/4 cup coconut oil
  • 1/2 cup good quality unsweetened cocoa powder
  • 3 eggs
  • 1/2 cup raw honey
  • Pinch of himalayan sea salt
  • 1 tsp vanilla
  • 1/2 tsp cinnamon

Marshmallow Fluff layer adapted from Urban Poser (original recipe here)

1 cup filtered water (split into half cups)
2 1/2 U.S. tablespoons powdered gelatin. 225 bloom strength, same as Knox gelatin. ( I use Great Lakes brand (grass beef gelatin)
1 cup organic light colored honey, maple syrup or half of each
1 teaspoon vanilla extract

– See more at: http://urbanposer.blogspot.com/2012/11/rustic-homemade-marshmallows-whoney.html#sthash.Cj3toeYb.dpuf

  • 1/2 cup filtered water
  • 1 1/4 Tbsp gelatin (grass-fed if you can find it)
  • 1/2 cup raw honey (or grade B maple syrup)
  • 1 tsp vanilla
  1. Preheat the oven to 350 degrees F. Grease an 8×8 baking dish with coconut oil.
  2. Start with the graham layer. Combine all of the dry ingredients in a small bowl. Combine all of the wet ingredients and a separate bowl, using a mixer to blend. Slowly add your dry ingredients to the wet, using your mixer to combine until smooth. The dough should be in a moldable ball.
  3. Press your dough into the bottom of your baking dish in one even layer. No need to come up the sides. Use a fork to poke holes all over the dough to make sure it doesn’t rise.
  4. Par-bake the graham layer for 5 minutes, then remove from the oven and place in the freezer while you start making the chocolate layer.
  5. Start the chocolate fudge cake layer. Using a double boiler, melt the dark chocolate, honey and coconut oil, stirring frequently until combined and fully melted. Remove from heat.
  6. Add apple sauce and stir to combine. Add cocoa powder, cinnamon, salt and vanilla and mix thoroughly until there are no lumps. Making sure your mixture is cool enough, add the eggs. (If your mixture is too hot, it will start to cook the eggs and you will have scrambled eggs in your fudge… No good!)
  7. Remove your graham layer from the freezer, and pour your chocolate fudge layer on top of your graham layer in the baking dish. Bake for 25 minutes. I liked mine a little fudgey (read: undercooked), so when I took it out of the oven, the middle was still slightly liquidy. If you want yours to be fully cooked through, bake until the center is firm and an inserted toothpick comes out clean. I put mine in the fridge once cooked, and the center hardened right up anyway due to the chocolate and coconut oil solidifying in the cold temperature.
  8. Start your marshmallow fluff layer. Note: I used half the recipe indicated on Urban Poser’s blog. She does a much better job with the explanation and troubleshooting of this process than I ever could, so at this point I’m going to direct you to Urban Poser’s recipe (click here). Stop at step 5 and come back over here to finish up.
  9. Once you have made your fluff, immediately spread it over the top of your chocolate layer before it starts to set up. Make sure the sides of your baking dish are still greased well with coconut oil (you may need to re-grease). Allow the marshmallow time to set up before cutting or toasting (about 30 min to an hour at least). If you decide to toast and toast too soon, your marshmallow will not be as fluffy as it started out (mine deflated after toasting it).
  10. Store leftovers in the fridge.

12

4


Shrimp and Spinach Creamy Pesto Pasta (Gluten-Free, Dairy-Free)

2

I’ll be honest here, this is not a grain-free meal (although it could be– substitute zoodles [zuchini noodles] and voila!). I have gotten very strict about gluten-free, but we’re slightly more lenient on the non-gluten grains. Mainly these vices are sushi (brown rice, about once a week) and pasta (sprouted wild rice, about once a month). The pasta can sometimes upset my digestive system, so that’s why it’s a rarity, but sometimes it just feels NECESSARY, ya know? Pasta, comfort, yum. The necessity here was to comfort from the stress of the US World Cup came against Portugal. Stress. Alcohol. Soccer. Pasta. This happened. Also, it’s so quick and easy that it almost feels like a trap. What do you mean dinner is ready in 15 minutes? Too good to be true… but no! Easy peasy dinner, done and ready for cuddling up on the couch and yelling at our defensive line, and the ref, and Ronaldo, and whomever else needed to be yelled at. And the last 20 seconds of that game… yeah I don’t want to talk about it either. Soooo… pasta! Greens! Shrimp! Yum. Noms away.

Shrimp and Spinach Creamy Pesto Pasta

  1. Cook the pasta according to box, as many servings as needed.
  2. Cook the shrimp separately, sauteing them in avocado oil until pink and firm. seasoning with lemon juice, salt and pepper to taste.
  3. Make Creamy Avocado Lime Spinach Pesto as directed on separate page.
  4. Drain the pasta and return to pot, then mix in the pesto, and handfuls of spinach. Spinach will wilt slightly from the heat of the pasta.
  5. Fold shrimp into the pasta, or place on top after pasta is plated.3

 Products From This Post:

Crockpot BBQ Chicken (White Sugar-Free)

bbq5

Pulled pork/chicken is one of my greatest weaknesses, which is interesting for someone who usually couldn’t care less about meat in general. I don’t know what it is, but I could eat BBQ every single day… perhaps it’s the Virginia in me. I had yet to venture into the world of making mine own, however, until recently. I had NO idea how easy it is to throw together your own sauce. Now, I know this is one of those things that people devote their lives to: Creating the WORLD’S BEST BBQ. But I’m not too hard to please, and this one ticks all the right boxes in my book. My one necessity is that it needs to be more vinegary than tomato-y, but still have some of the tomato flavor to it. The super sweet, tomato versions just do not do it for me.  And neither do the bottle versions as they are often packed with sugar and who knows what else. The best thing about this recipe is that it is super whole-foody (as opposed to recipes that recommend ketchup or a bottle of BBQ sauce), and also super easy to just throw together and forget! Vinegar, a hint of tomato and sweetness, but also a kick of spice… sign me up! Often times we will mash up some potatoes (mixed with sauteed kale), and eat this chicken on top. THAT my friends, is a hearty meal. But for the purpose of having it in a sandwich, I baked up a couple of bun. For these I just used my Clean Eating Breadstick recipe, but formed them into two, round bun-shaped…buns. Then I cooked those for about 20 min or until cracked on top and golden on the bottom. Note that if you do use the buns for this, they do fall apart rather easily (bye bye gluten), but that kind of makes it fun. Andrew and I have competitions with who can keep their sandwich together longest. But at least you still get the sandwich feel!

Crockpot BBQ Chicken

  • 2 chicken breasts
  • 1 small onion, chopped
  • 3 oz (6 Tbsp) of tomato paste
  • 1/2 cup white vinegar
  • 1 clove of garlic, minced
  • 2 Tbsp honey
  • 1 Tbsp Coconut Aminos
  • 1/2 tsp each of dark chili powder, salt, paprika
  • pinch of cayenne, yellow mustard powder and black pepper to taste
  1. Place all ingredients except chicken into a crockpot.
  2. Stir until well-mixed.
  3. Place the chicken breasts into the crockpot. Flip once to coat in sauce.
  4. Cook on high for 4 hours. Set and forget!
  5. Shred chicken with two forks while still in the crockpot, and mix with the sauce.

This recipe usually feeds the two of us twice, once for dinner, and then once for lunch leftovers the next day. Now go make some chicken!

bbq4

bbq6