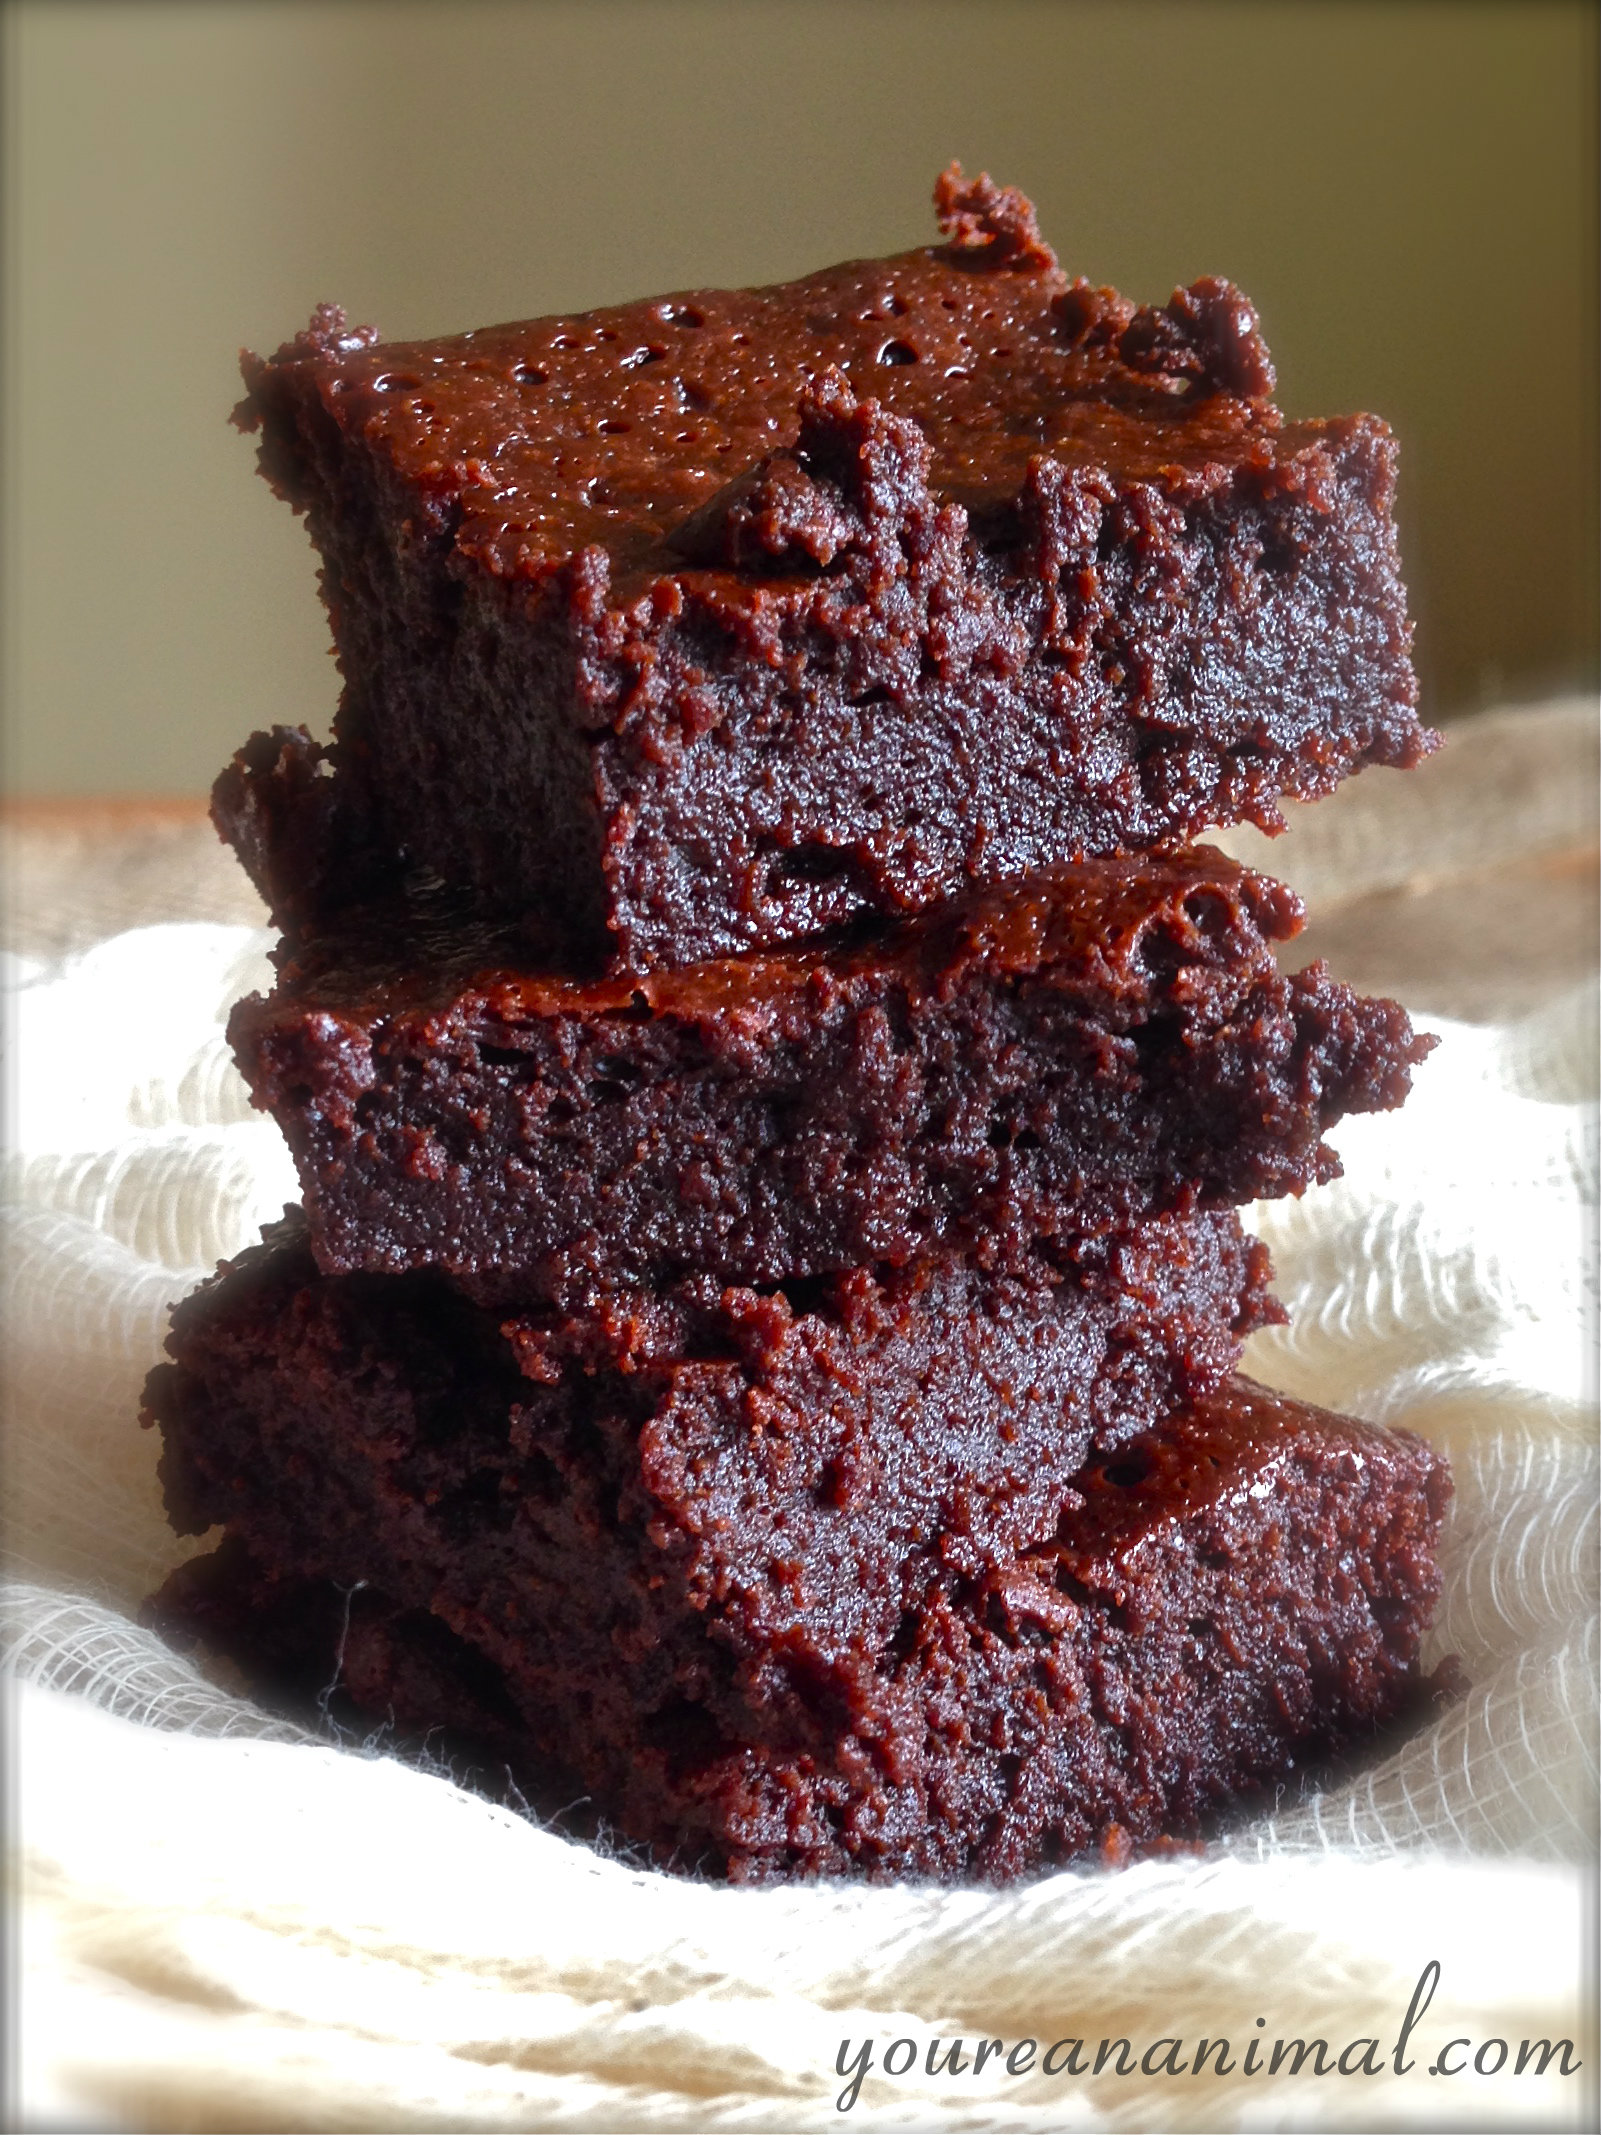
These are not healthy brownies. These are sugary, delicious, albeit minimally-processed, fudgey goodness brownies. Sometimes ladies human beings are in need of some chocolately heaven, without the stipulation of being “healthy.” This is not to say I have anything against avocado brownies or other nutrient-dense fudgey desserts, but sometimes you just need that classic brownie to dive right into. On this overcast Sunday afternoon, Andrew and I are relaxing after attending a funeral yesterday and both recovering from a minor cold. And by relaxing, I mean having a brownie ice cream sundae brunch and watching a DVR’d marathon of How To Get Away With Murder. This. Is. The. Life. Adulthood, yessss.
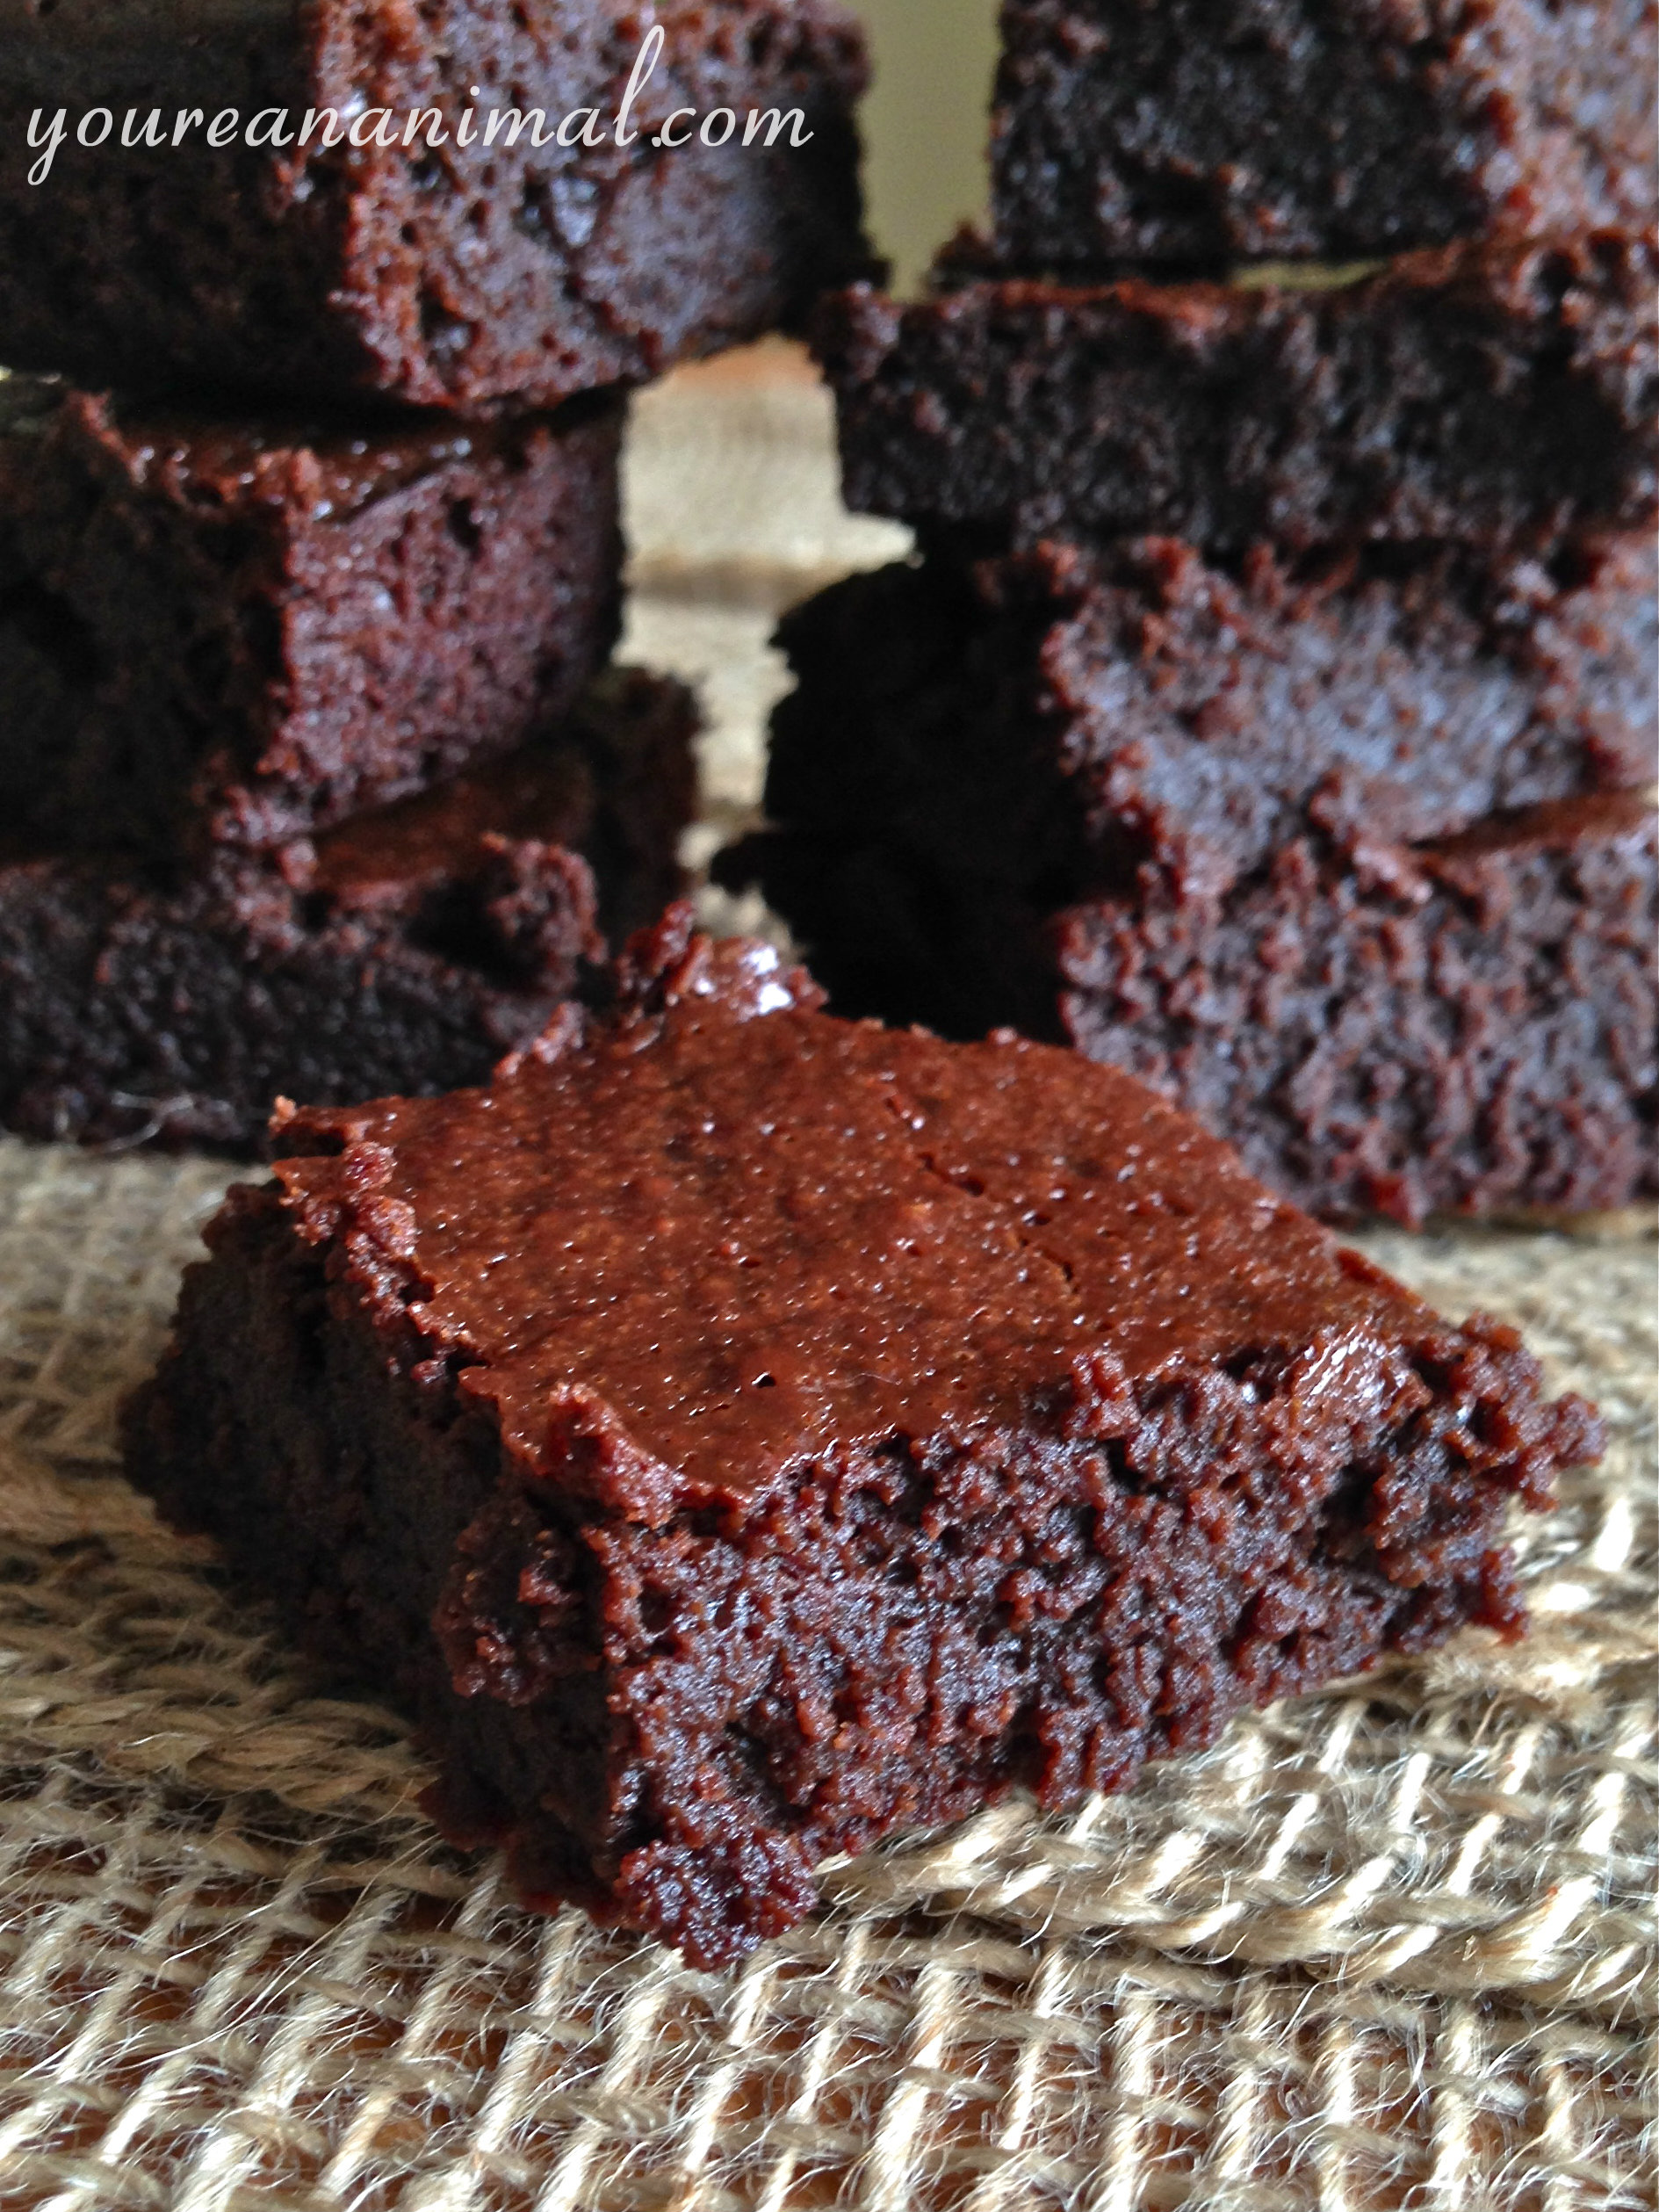
These brownies are minimally processed in that they use coconut palm sugar and unfiltered honey for the sugar, and arrowroot starch instead of flour. But like I said, they aren’t healthy, because they are about 80% sugar. So with that knowledge, it’s probably best to either share these bad boys, or make them last several days. But hey, sometimes you just need to bake up some brownies. And these are the ones that will satisfy that craving. Dense, fudgey, chewy… just the way brownies should be if you ask me!
Sinful. But not quite as sinful as they used to be.
I adapted this recipe from Life Made Simple. You can find the original recipe here.
Grease the bottom of an 8×8 glass baking dish with coconut oil or butter. (I learned from Betty Crocker that you should only grease the bottom of the pan when baking brownies. If you grease the sides, the brownies sink in the middle and rise on the sides, resulting in uneven brownies.)
In a double broiler over medium-high heat (boiling water), melt the butter. When the butter is melted, add the coconut palm sugar and honey to the butter, still in the double broiler.
Once the coconut palm sugar and honey are melted into the butter, add the chocolate chips. Stir to combine and allow the chocolate chips to melt as well. Once the chocolate chips are melted, remove the pot from the boiling water.
Add the room temperature eggs (If you’re impatient like me and can’t wait for them to come up to room temperature, you can crack the eggs into a separate bowl, and temper the eggs by added a small amount of the warm chocolate mixture to the eggs, bringing up the temperature of the eggs without cooking them. Add some of the chocolate mixture, stirring each time you add more, until the eggs are no longer cold. Then pour this mixture back into the original chocolate batter.)
Add the salt and vanilla to the batter.
Sift in the cocoa powder and arrowroot starch, and stir until well combined.
Pour the batter into the greased pan, and bake at 350 degrees for 25-30 minutes, or until an inserted toothpick comes out clean.
Please note that some of the links in the above post are affiliate links that will take you to an Amazon.com page. If you choose to purchase a product featured in this post using an affiliate link, you will be directly supporting You’re An Animal. Thanks!
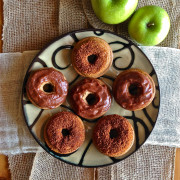
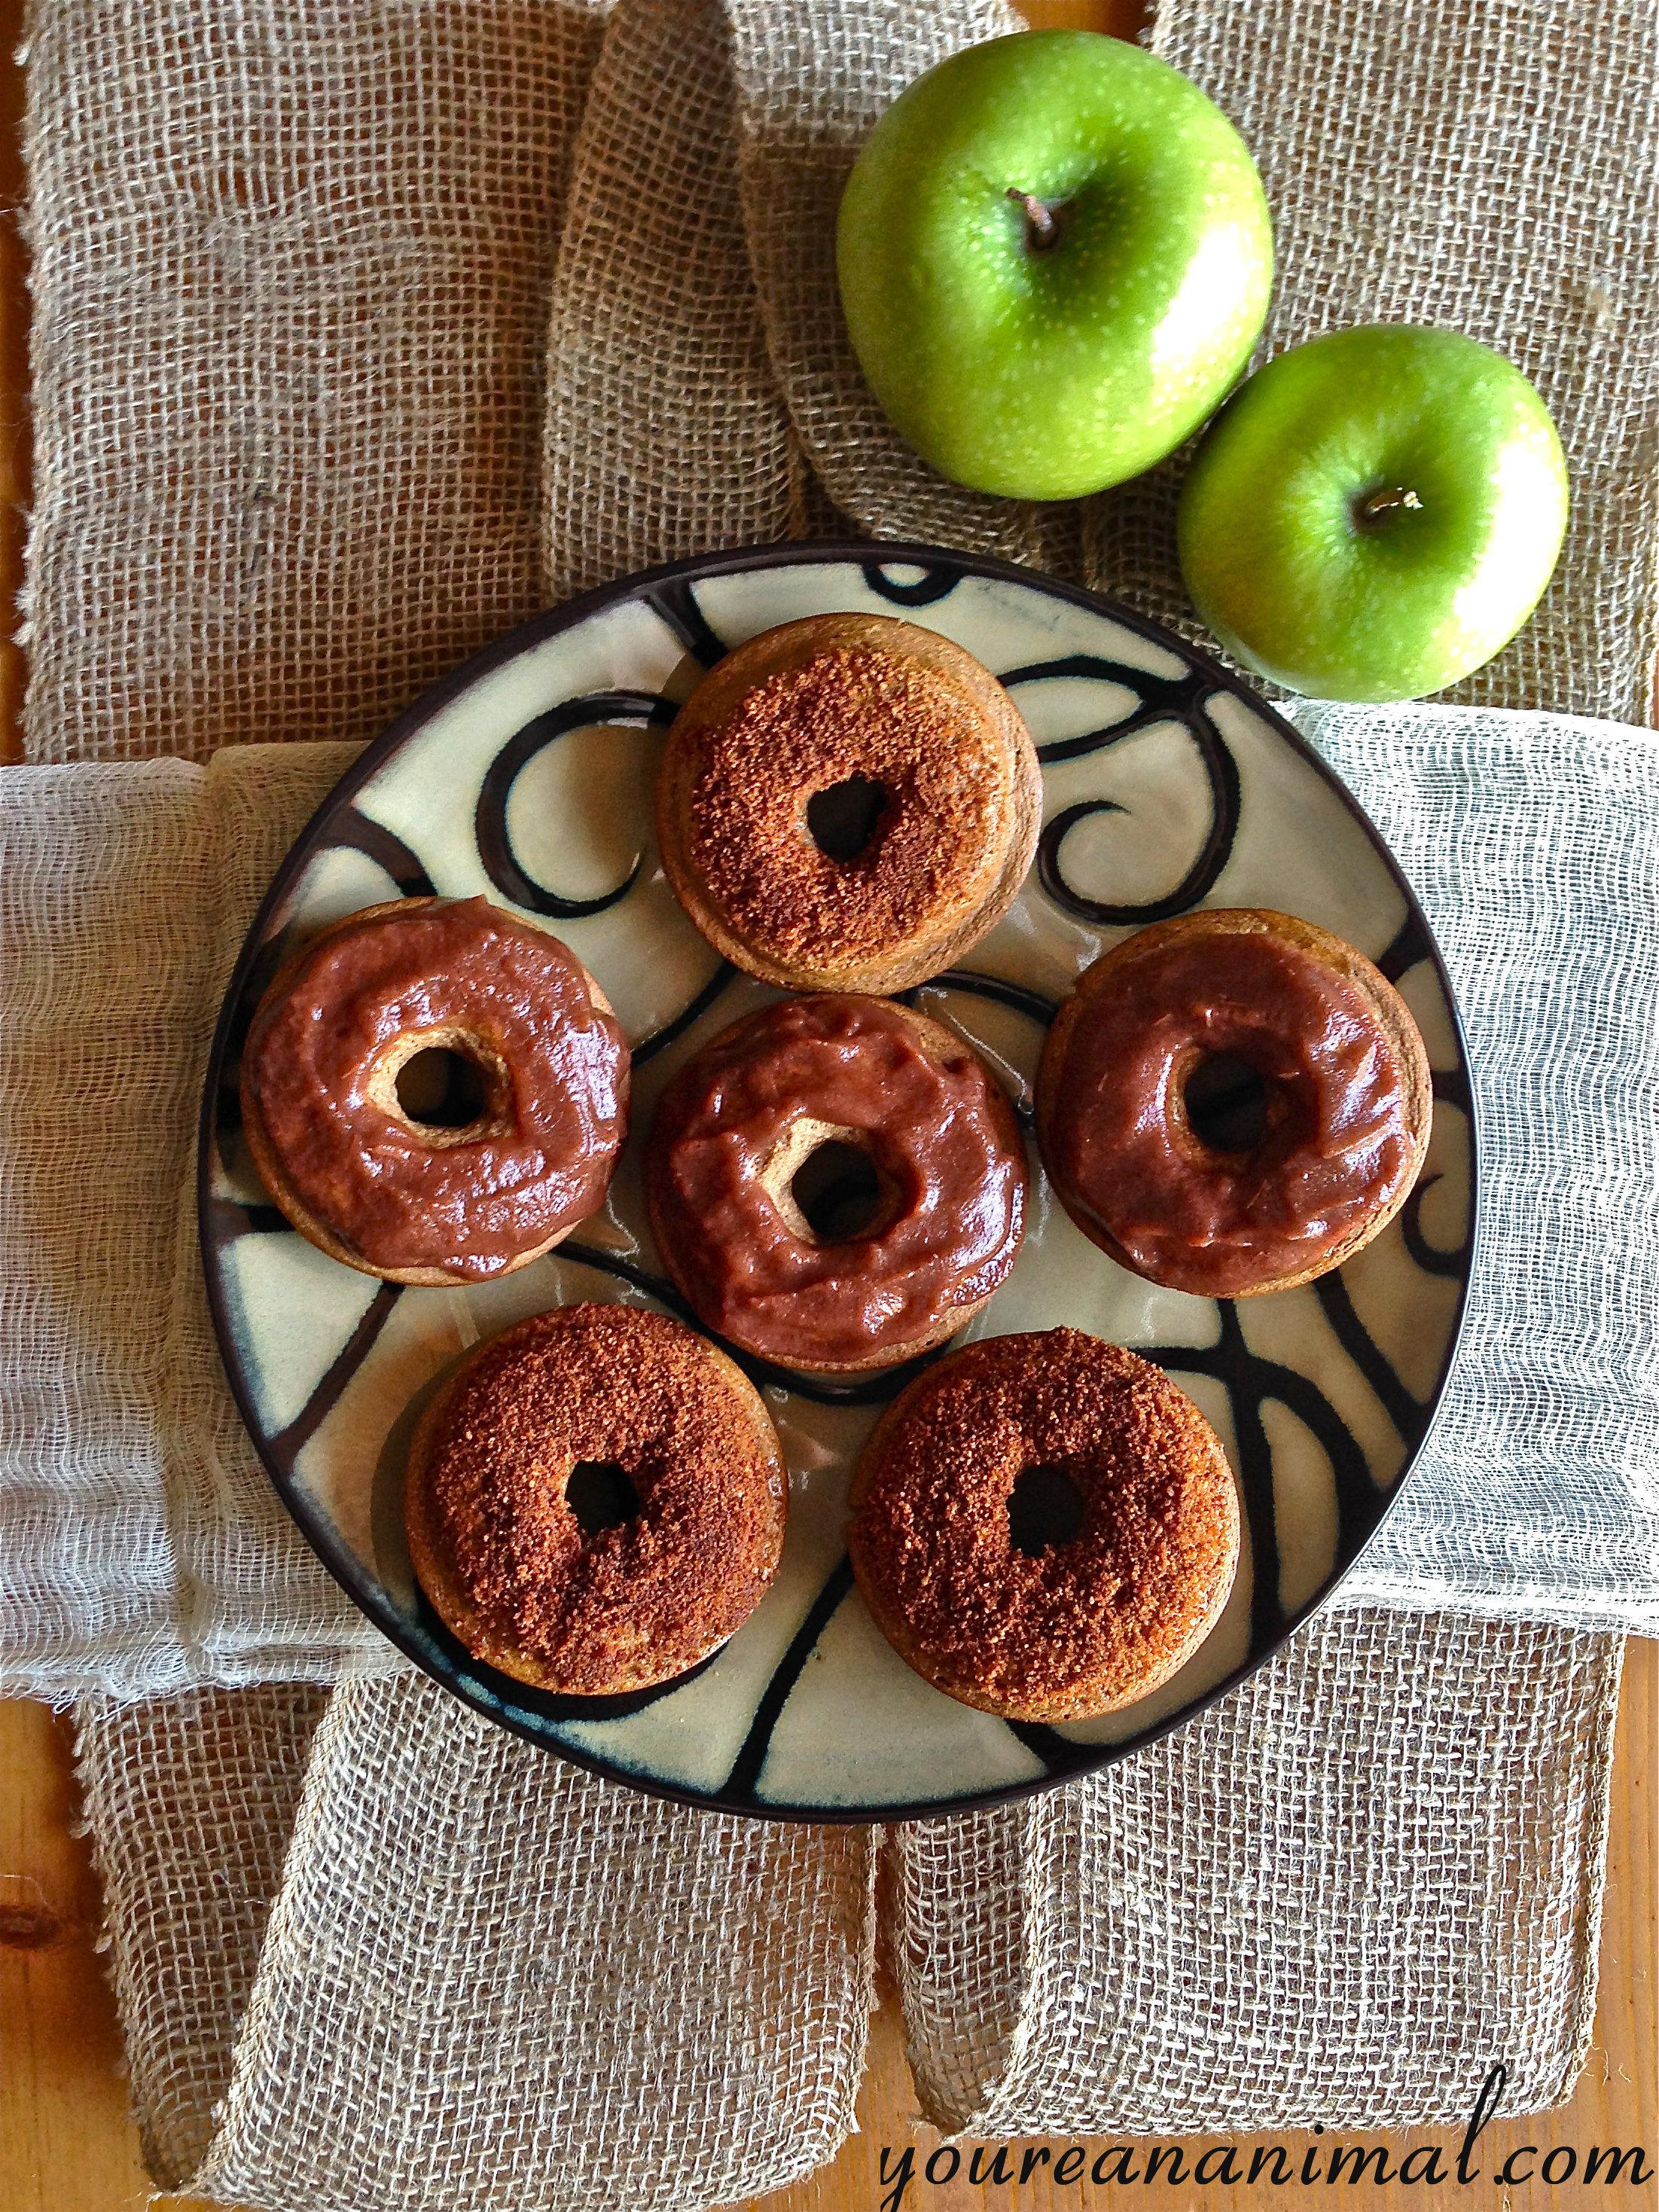
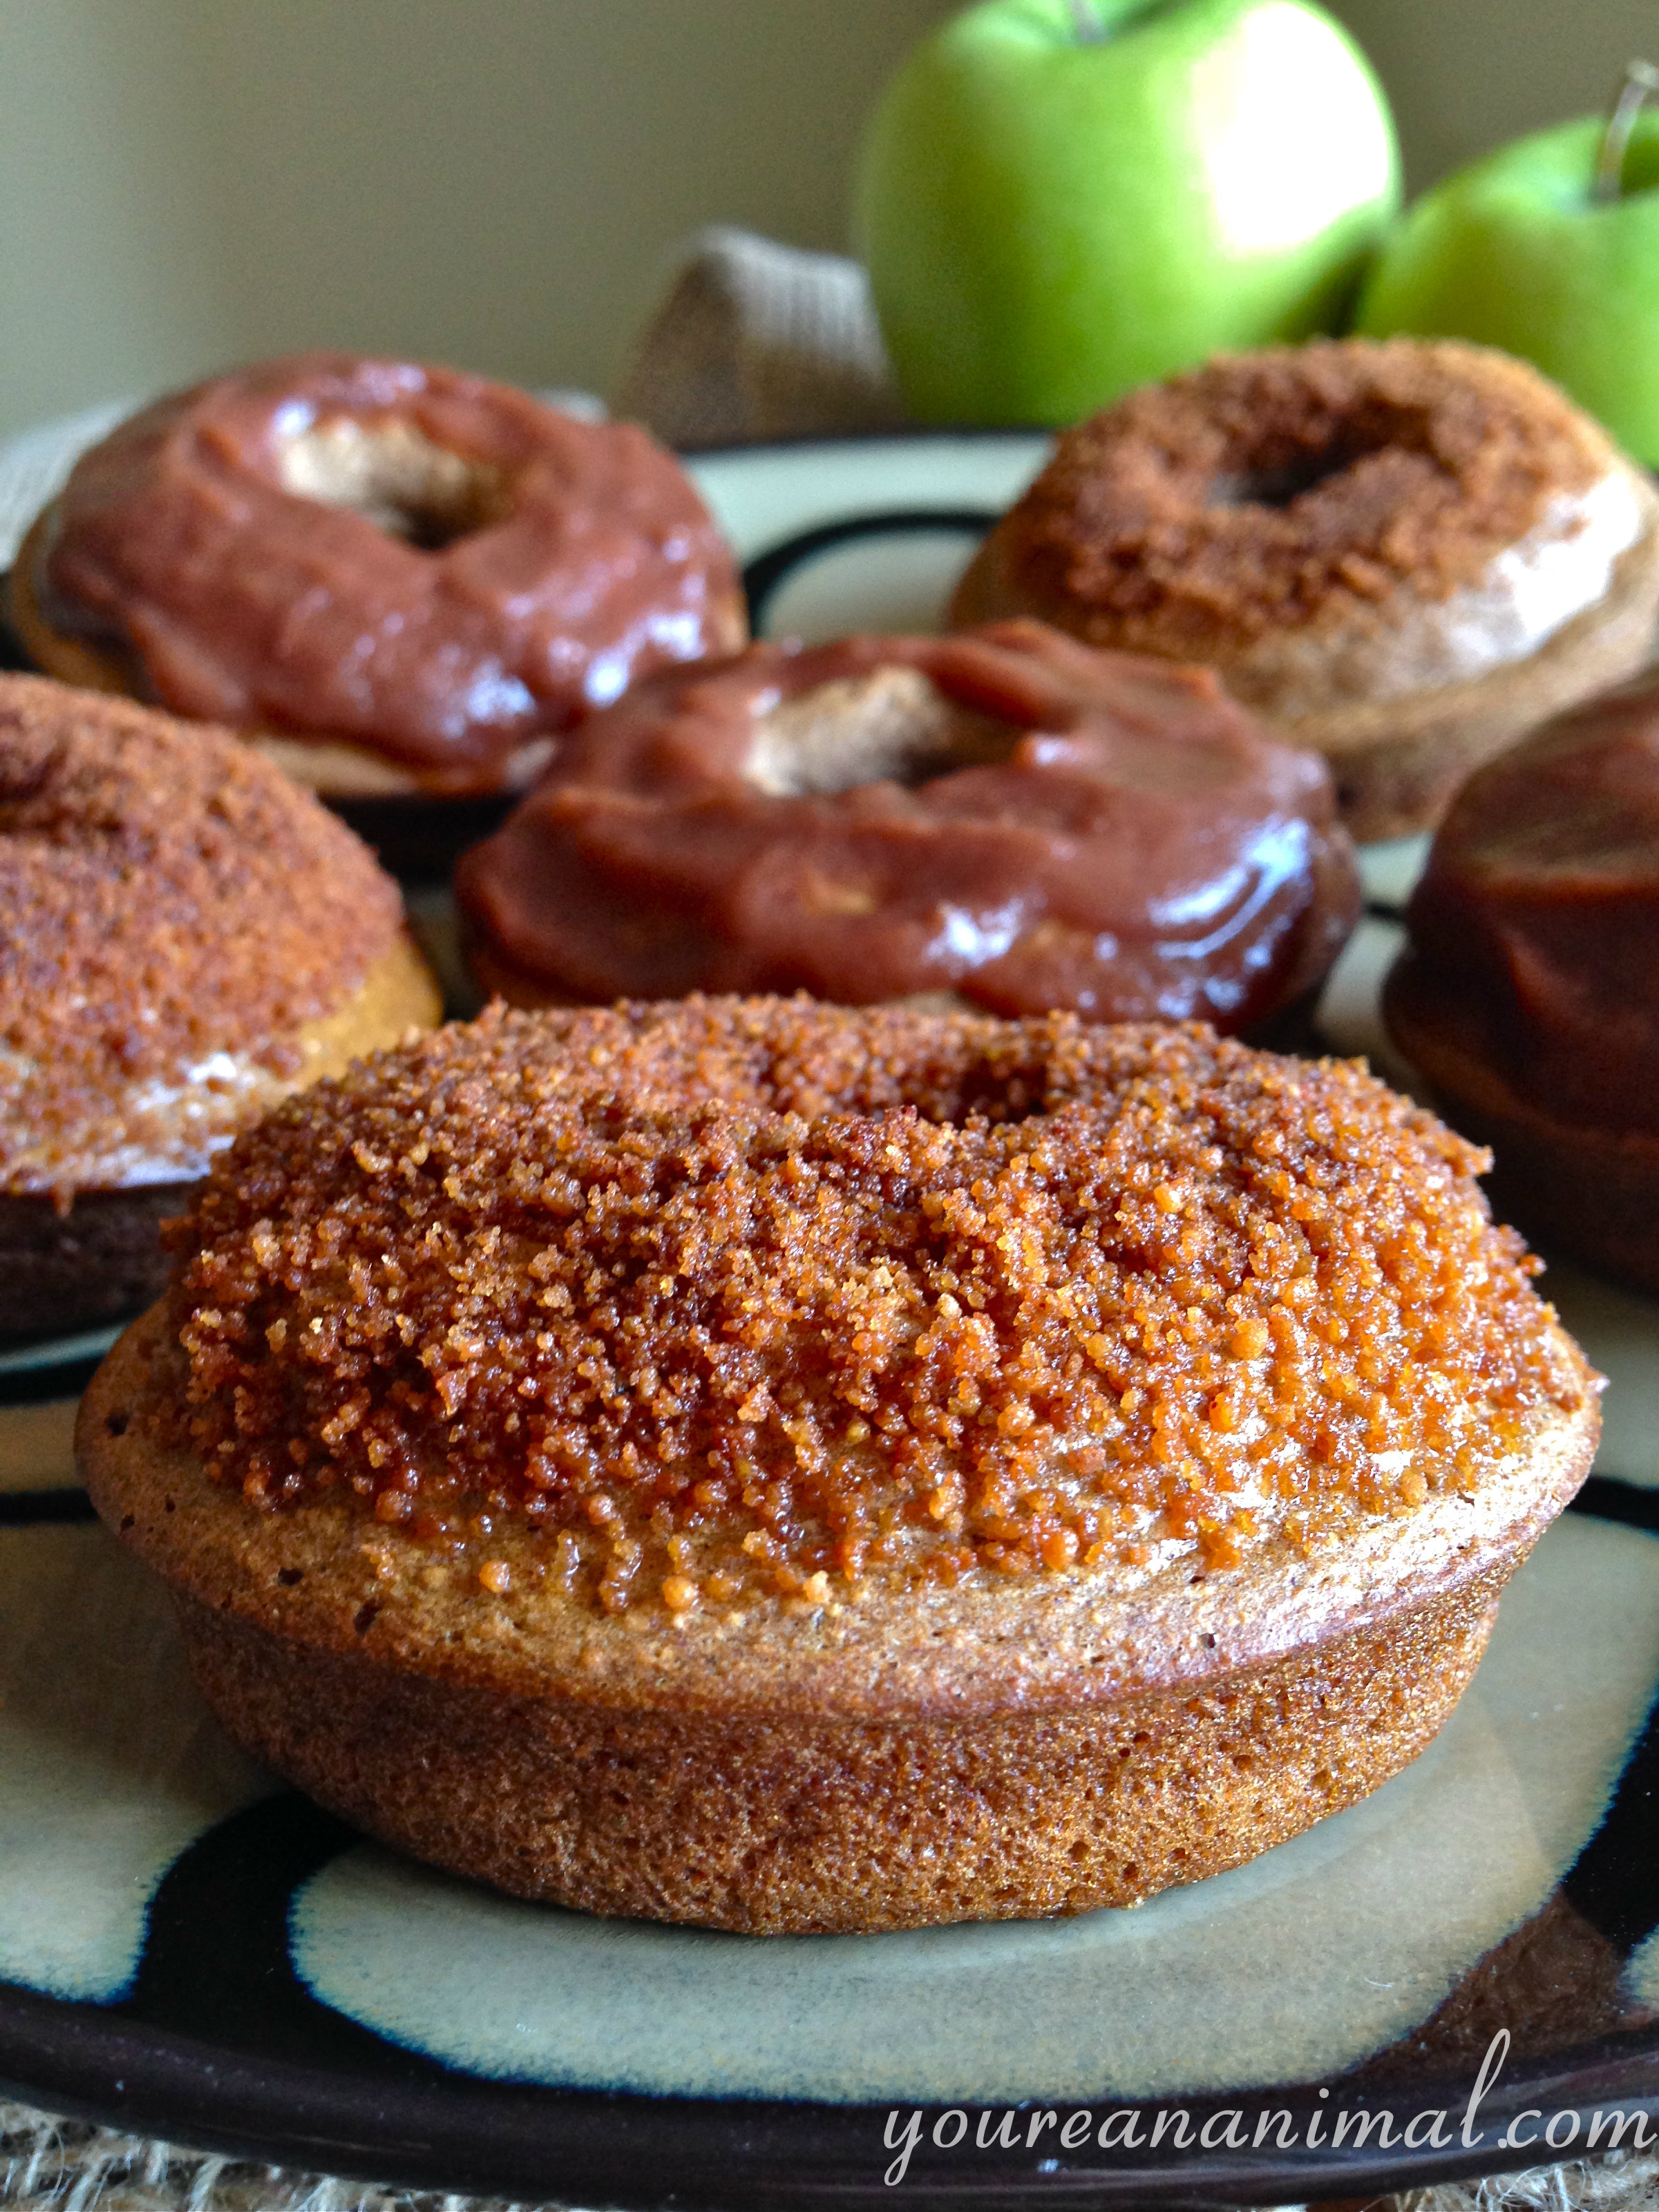
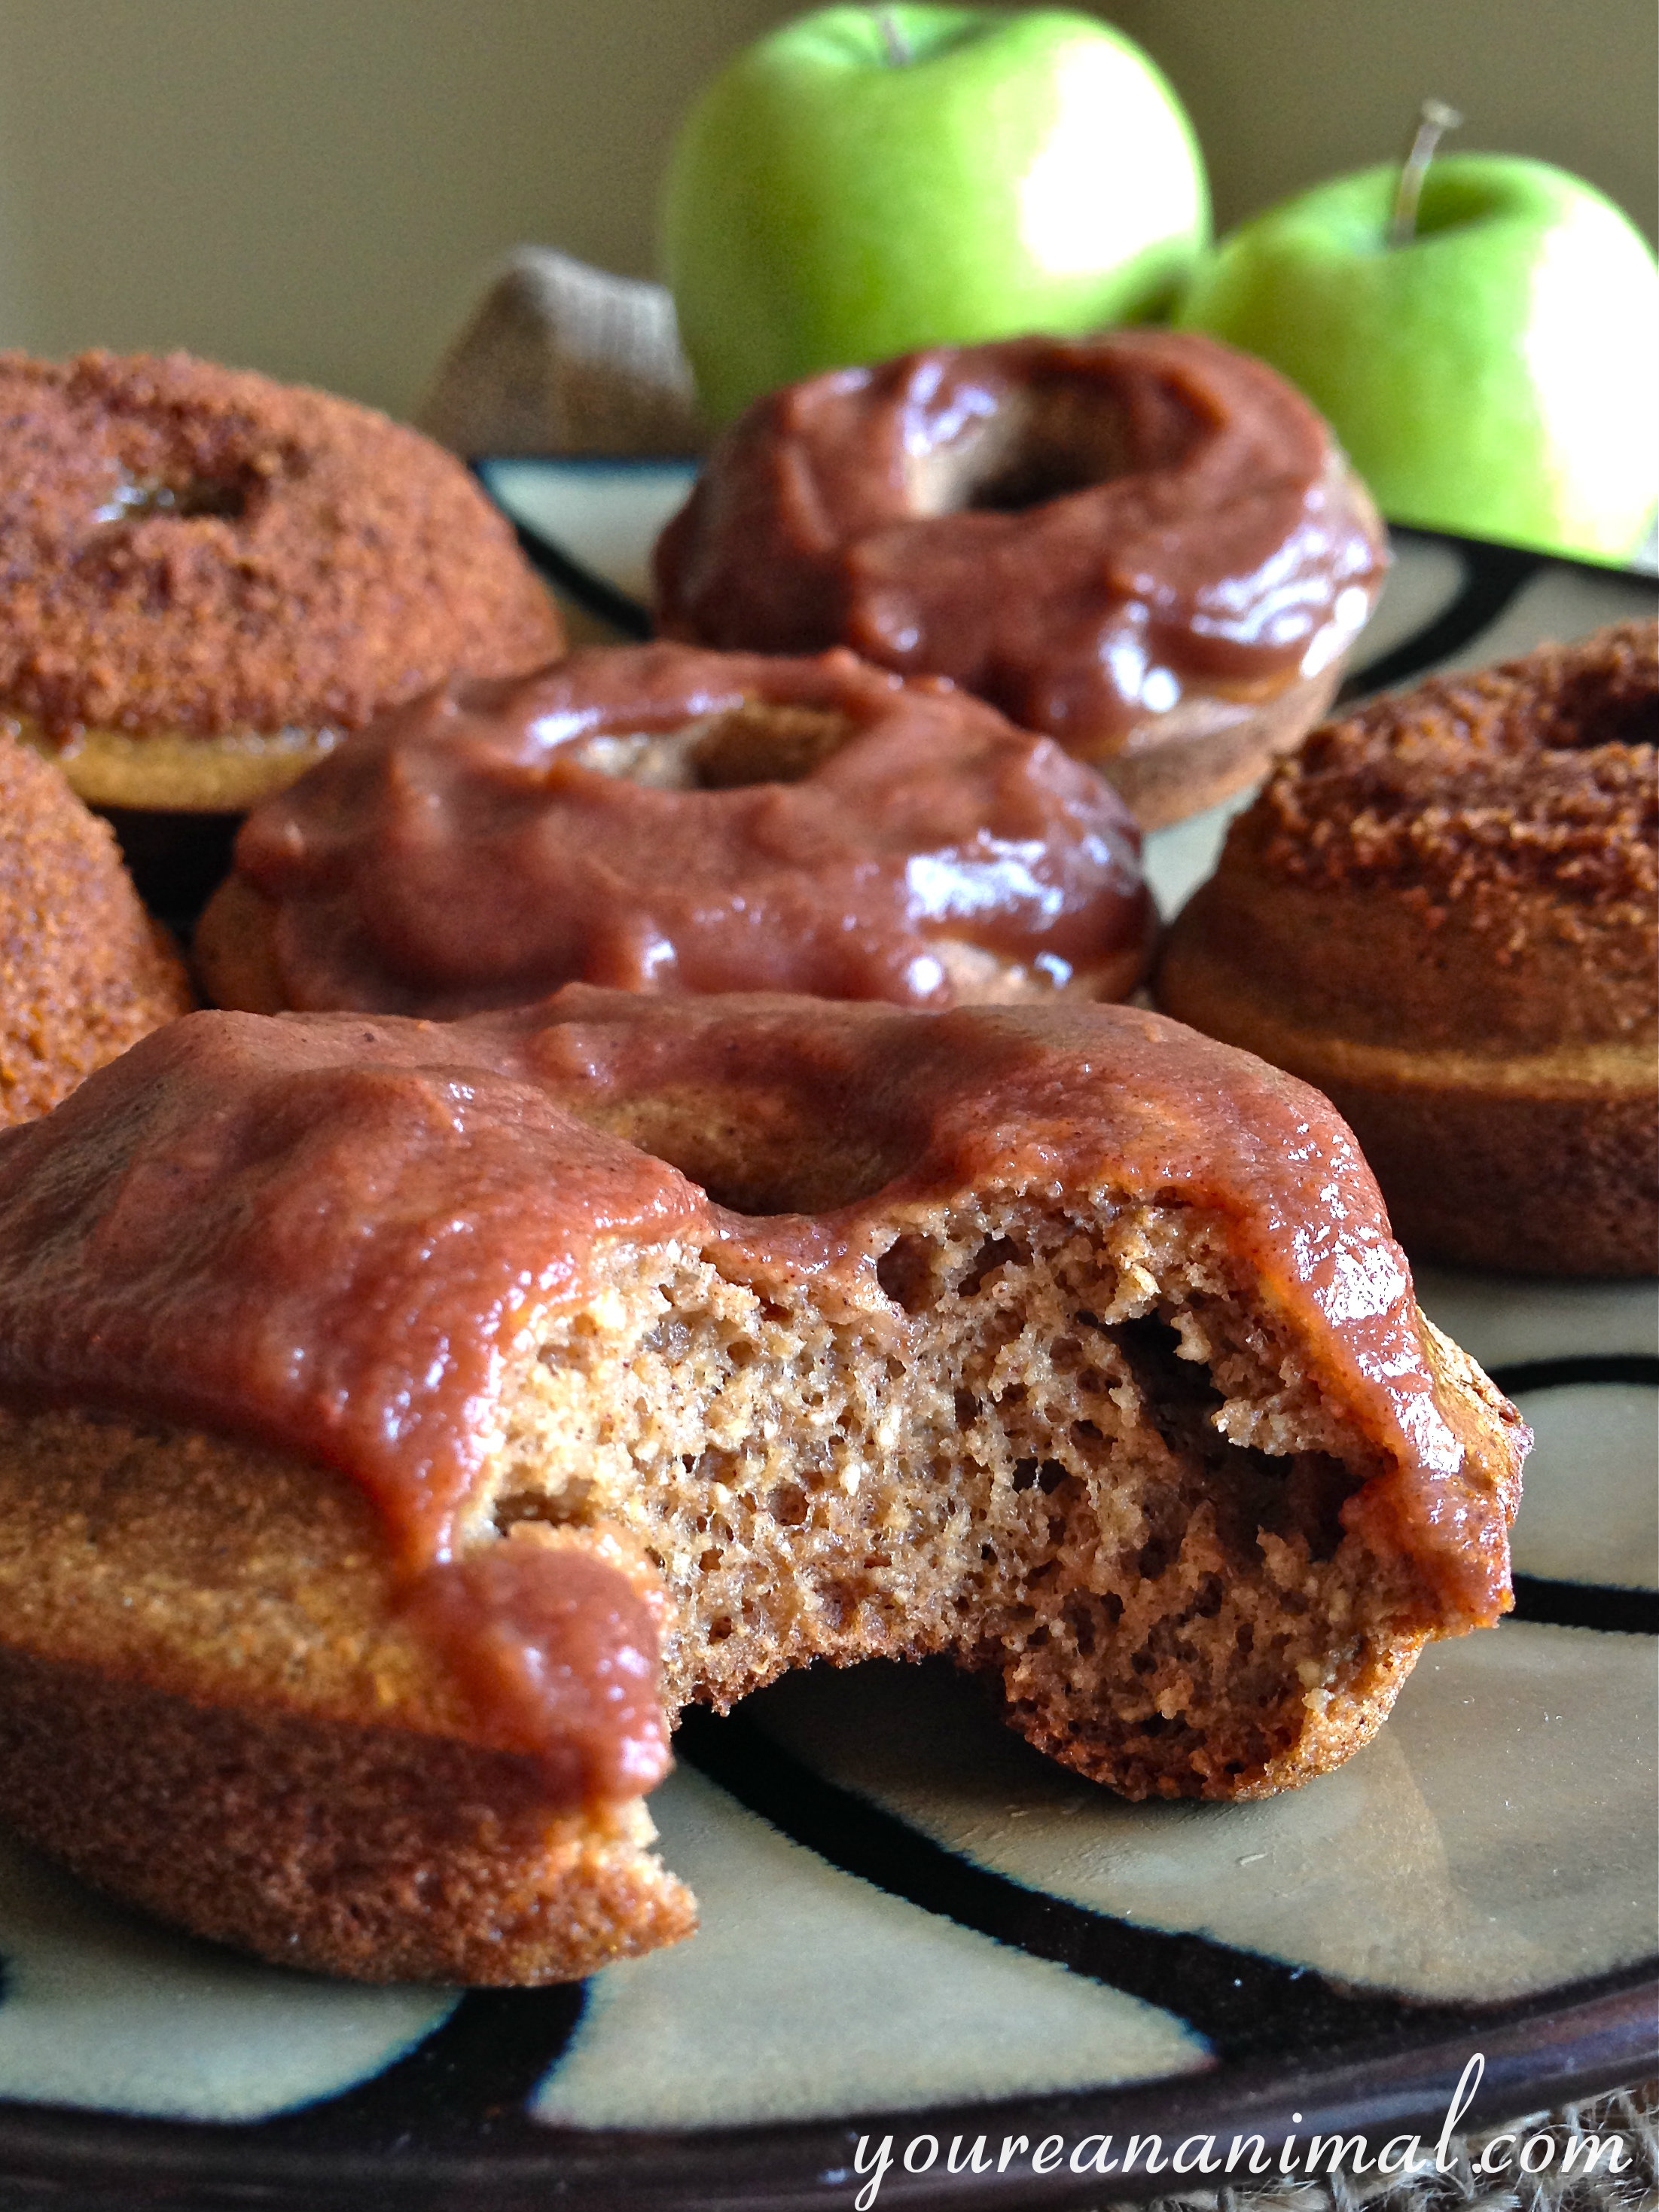
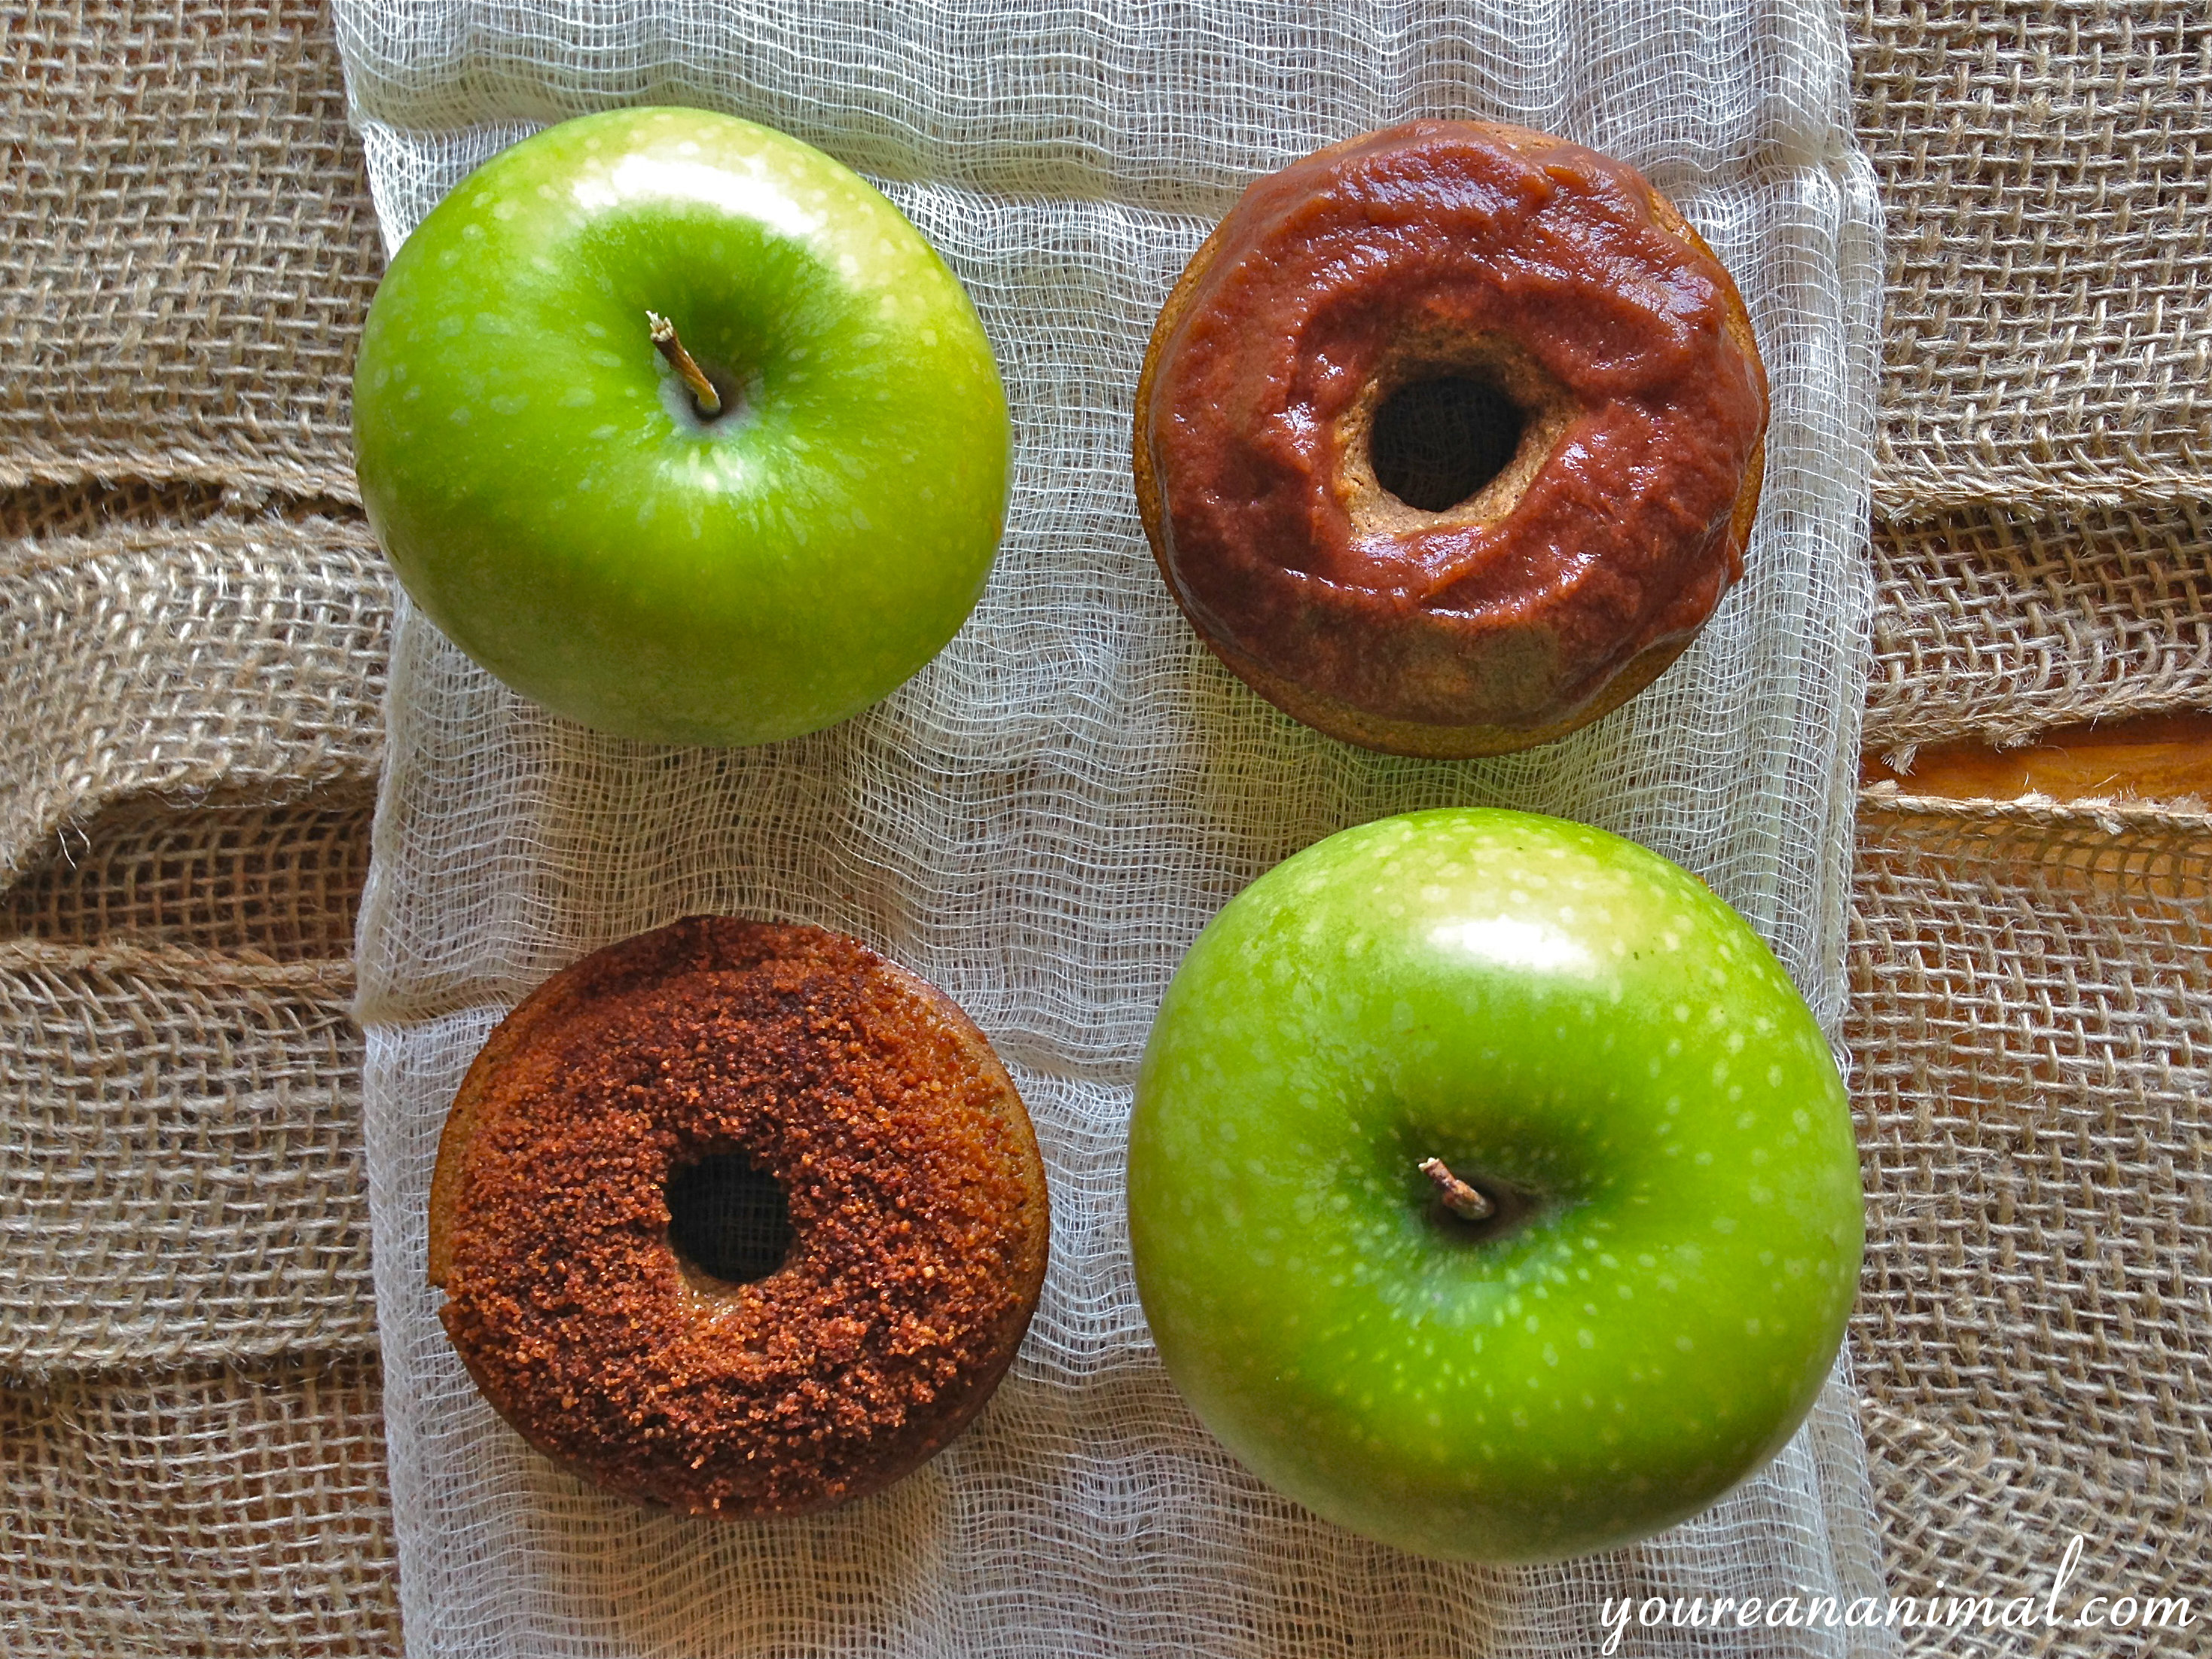
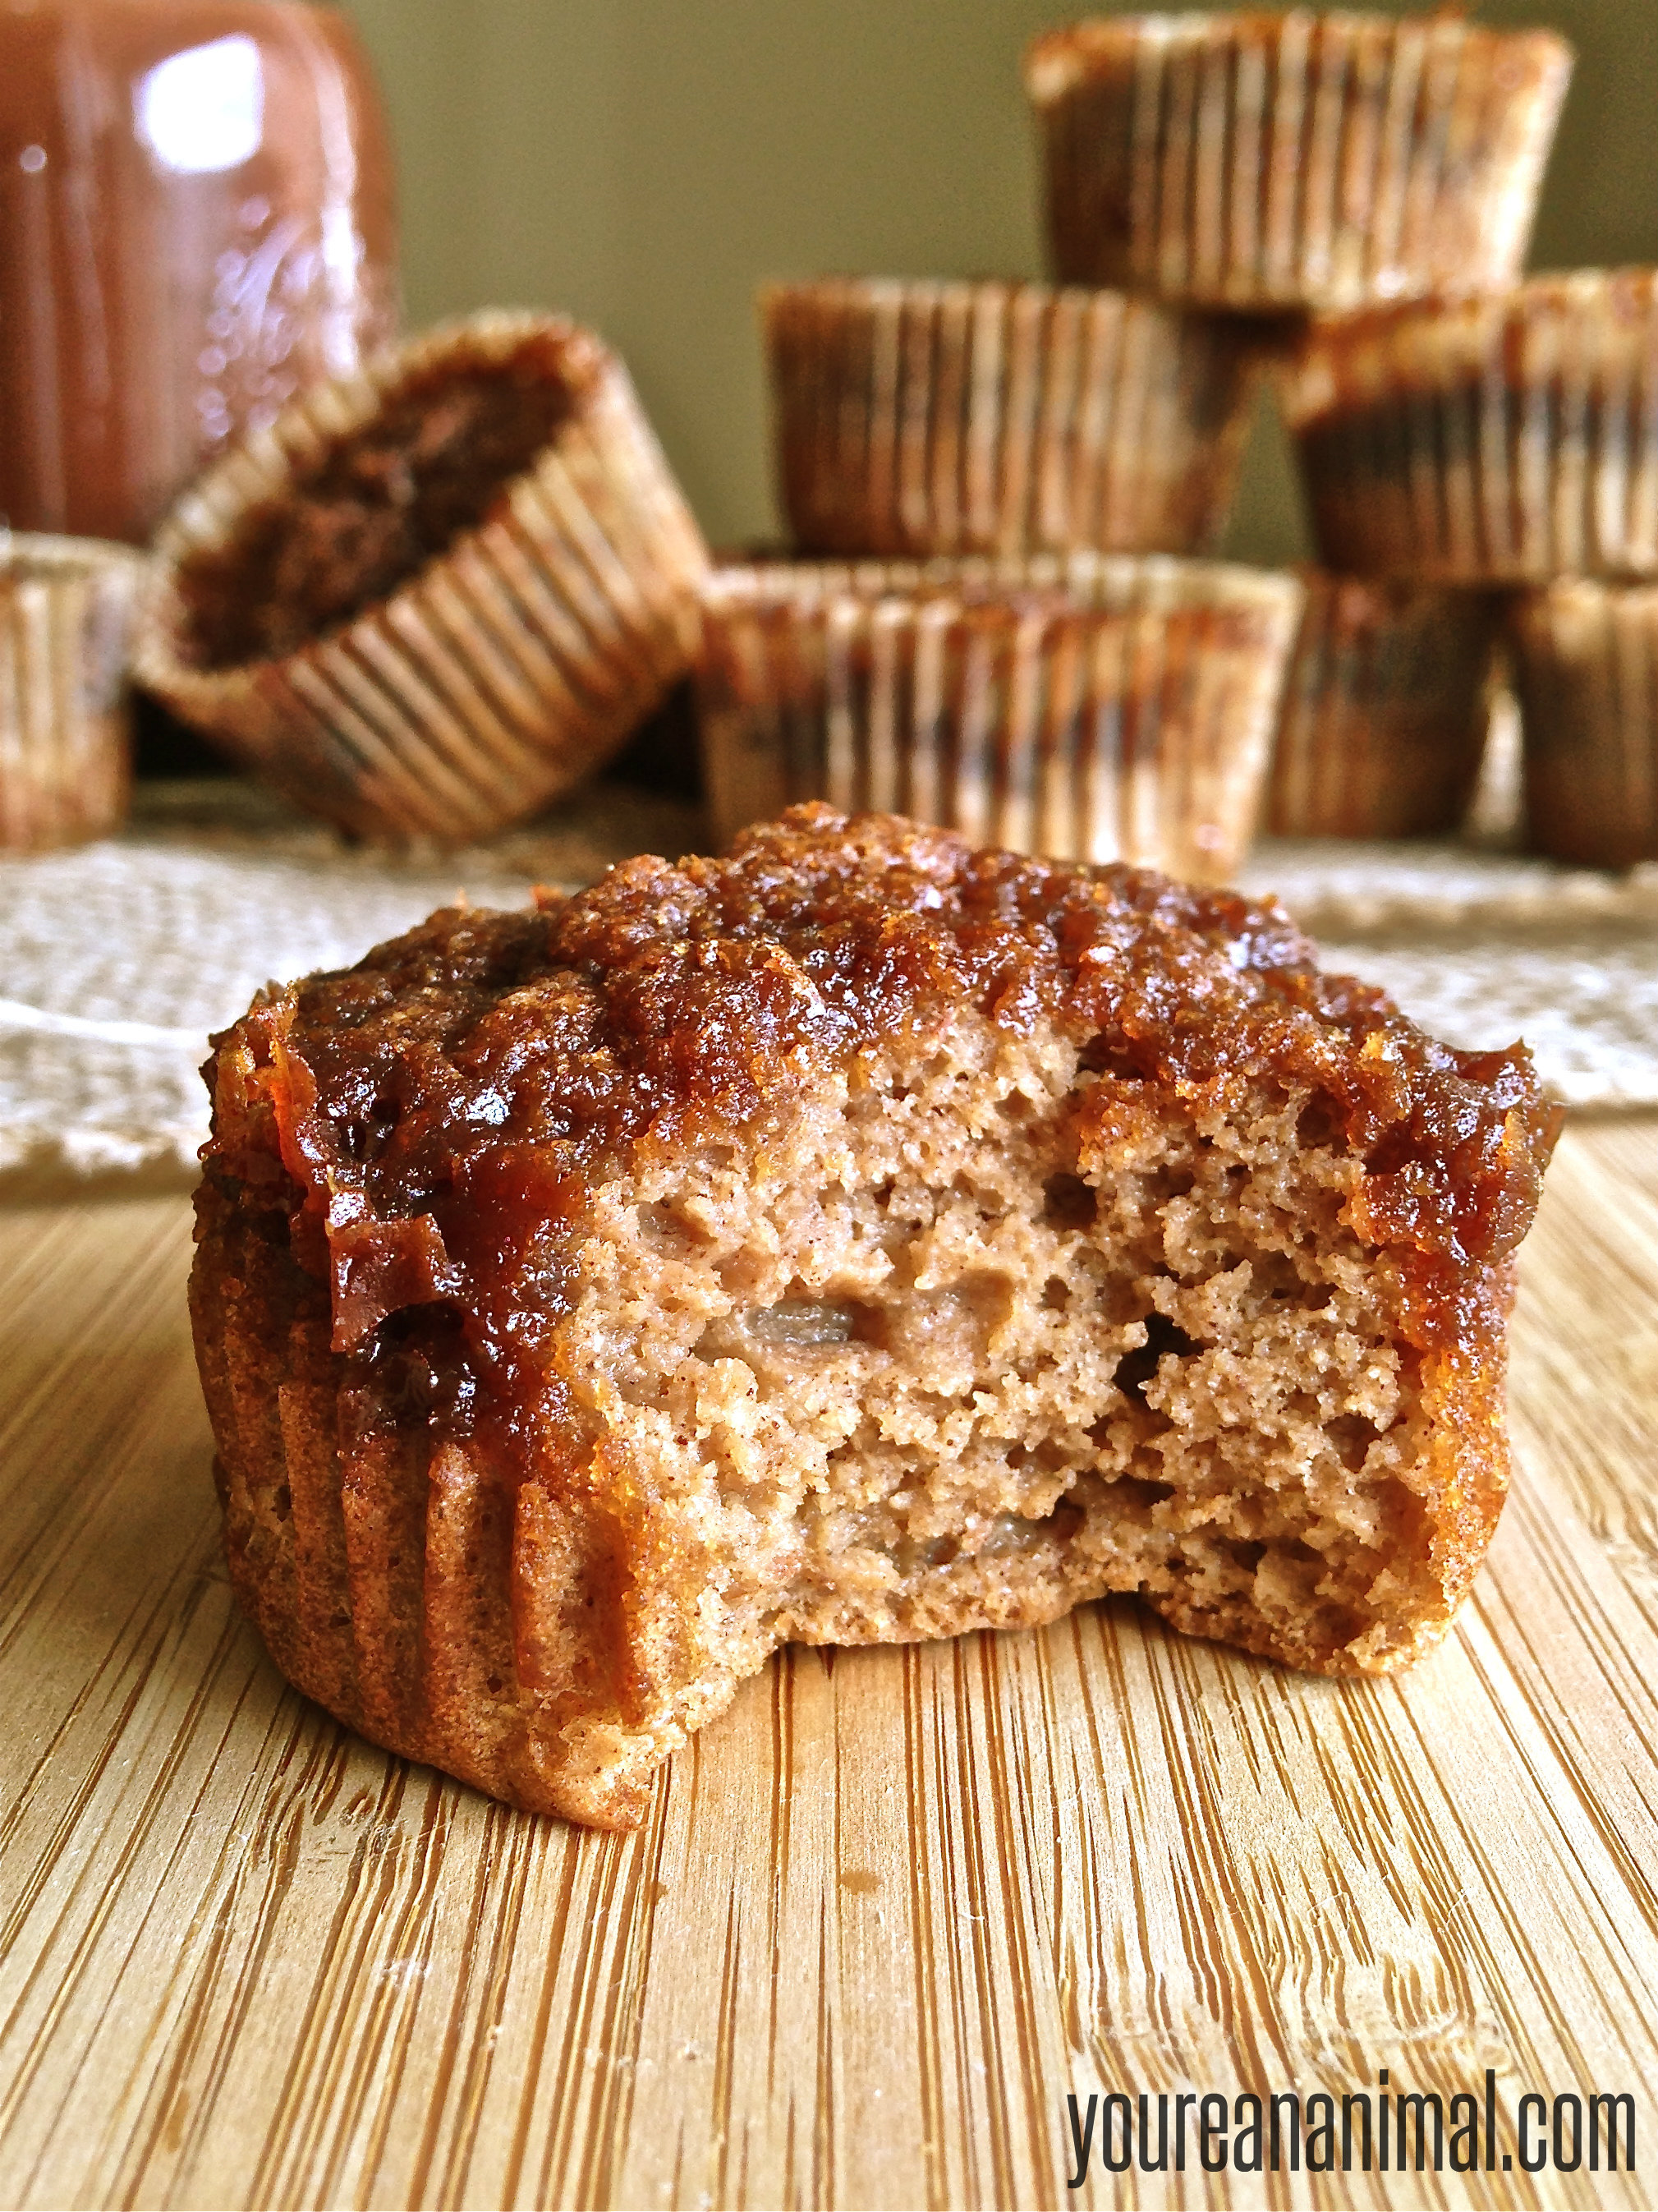
A couple weeks ago, I told you about my super-amazingly easy crockpot apple butter. The only thing about that apple butter recipe is that it makes a lot of apple butter. What’s a girl to do with alladat? Well, after making my apple butter muffins, and topping my protein pancakes with apple butter, and eating apple butter by the spoonful, I decided to go another direction… donuts. Because if apple butter donuts don’t say fall, I don’t know was does! Astute readers will notice that this recipe base is very similar to the apple butter muffins. However, there are some tweaks, which makes these a lot more donut-y than muffin-y. Mainly, they are chewier, like a donut should be! I’ve baked these in a handy dandy donut pan, but I believe you could probably shallow-fry these as well. The batter is a little runny though, so it might take some playing with. Or you could just bake them like I did… trust me, it’s divine. I didn’t add any sugar to these guys; I found the apple butter itself makes these sweet enough for my taste (since cutting back on sugar, my taste buds are a lot more sensitive to sweetness, which is amazing!) I topped off half of them with pure apple butter, and the other half with cinnamon sugar. The cinnamon sugar ones were my preference, and the apple butter ones were Andrew’s preference, so it’s up to you!
The texture is that of a chewy cake donut, and the flavor is spicy with the slightest hint of apples. Basically autumn on your taste buds.
For the cinnamon sugar topped ones, I melted a little Kerrygold grass-fed butter, dunked the tops of the donuts in the butter so the topping would stick, then swirled the donut in a combination of cinnamon and coconut palm sugar.
For the apple butter topped ones, I just spooned a little leftover apple butter on the tops. That’s it!
1/2 tsp each of baking soda, baking powder and apple cider vinegar
1/4 tsp each of cinnamon, nutmeg, and clove
splash of vanilla extract
Preheat your oven to 400 degrees F, and grease your donut pan (6 donuts) liberally with butter or coconut oil.
Combine your wet ingredients (apple butter, eggs, vanilla, and apple cider vinegar) in a large mixing bowl.
Add your dry ingredients (arrowroot, potato starch, coconut flour, baking soda, baking powder, and spices) to your wet ingredients mixture.
Use an electric mixer to fully combine your batter, until it is smooth.
Evenly distribute your batter in your donut pan, so each well is about 3/4 full.
Bake in preheated oven for 14-17 minutes, or until the donuts spring back when touched.
Allow to cool completely before adding any toppings (see above post for suggestions)
Makes 6 donuts
Please note that some of the links in the above post are affiliate links that will take you to an Amazon.com page. If you choose to purchase a product featured in this post using an affiliate link, you will be directly supporting You’re An Animal. Thanks!
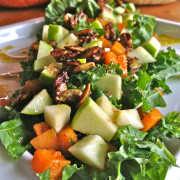
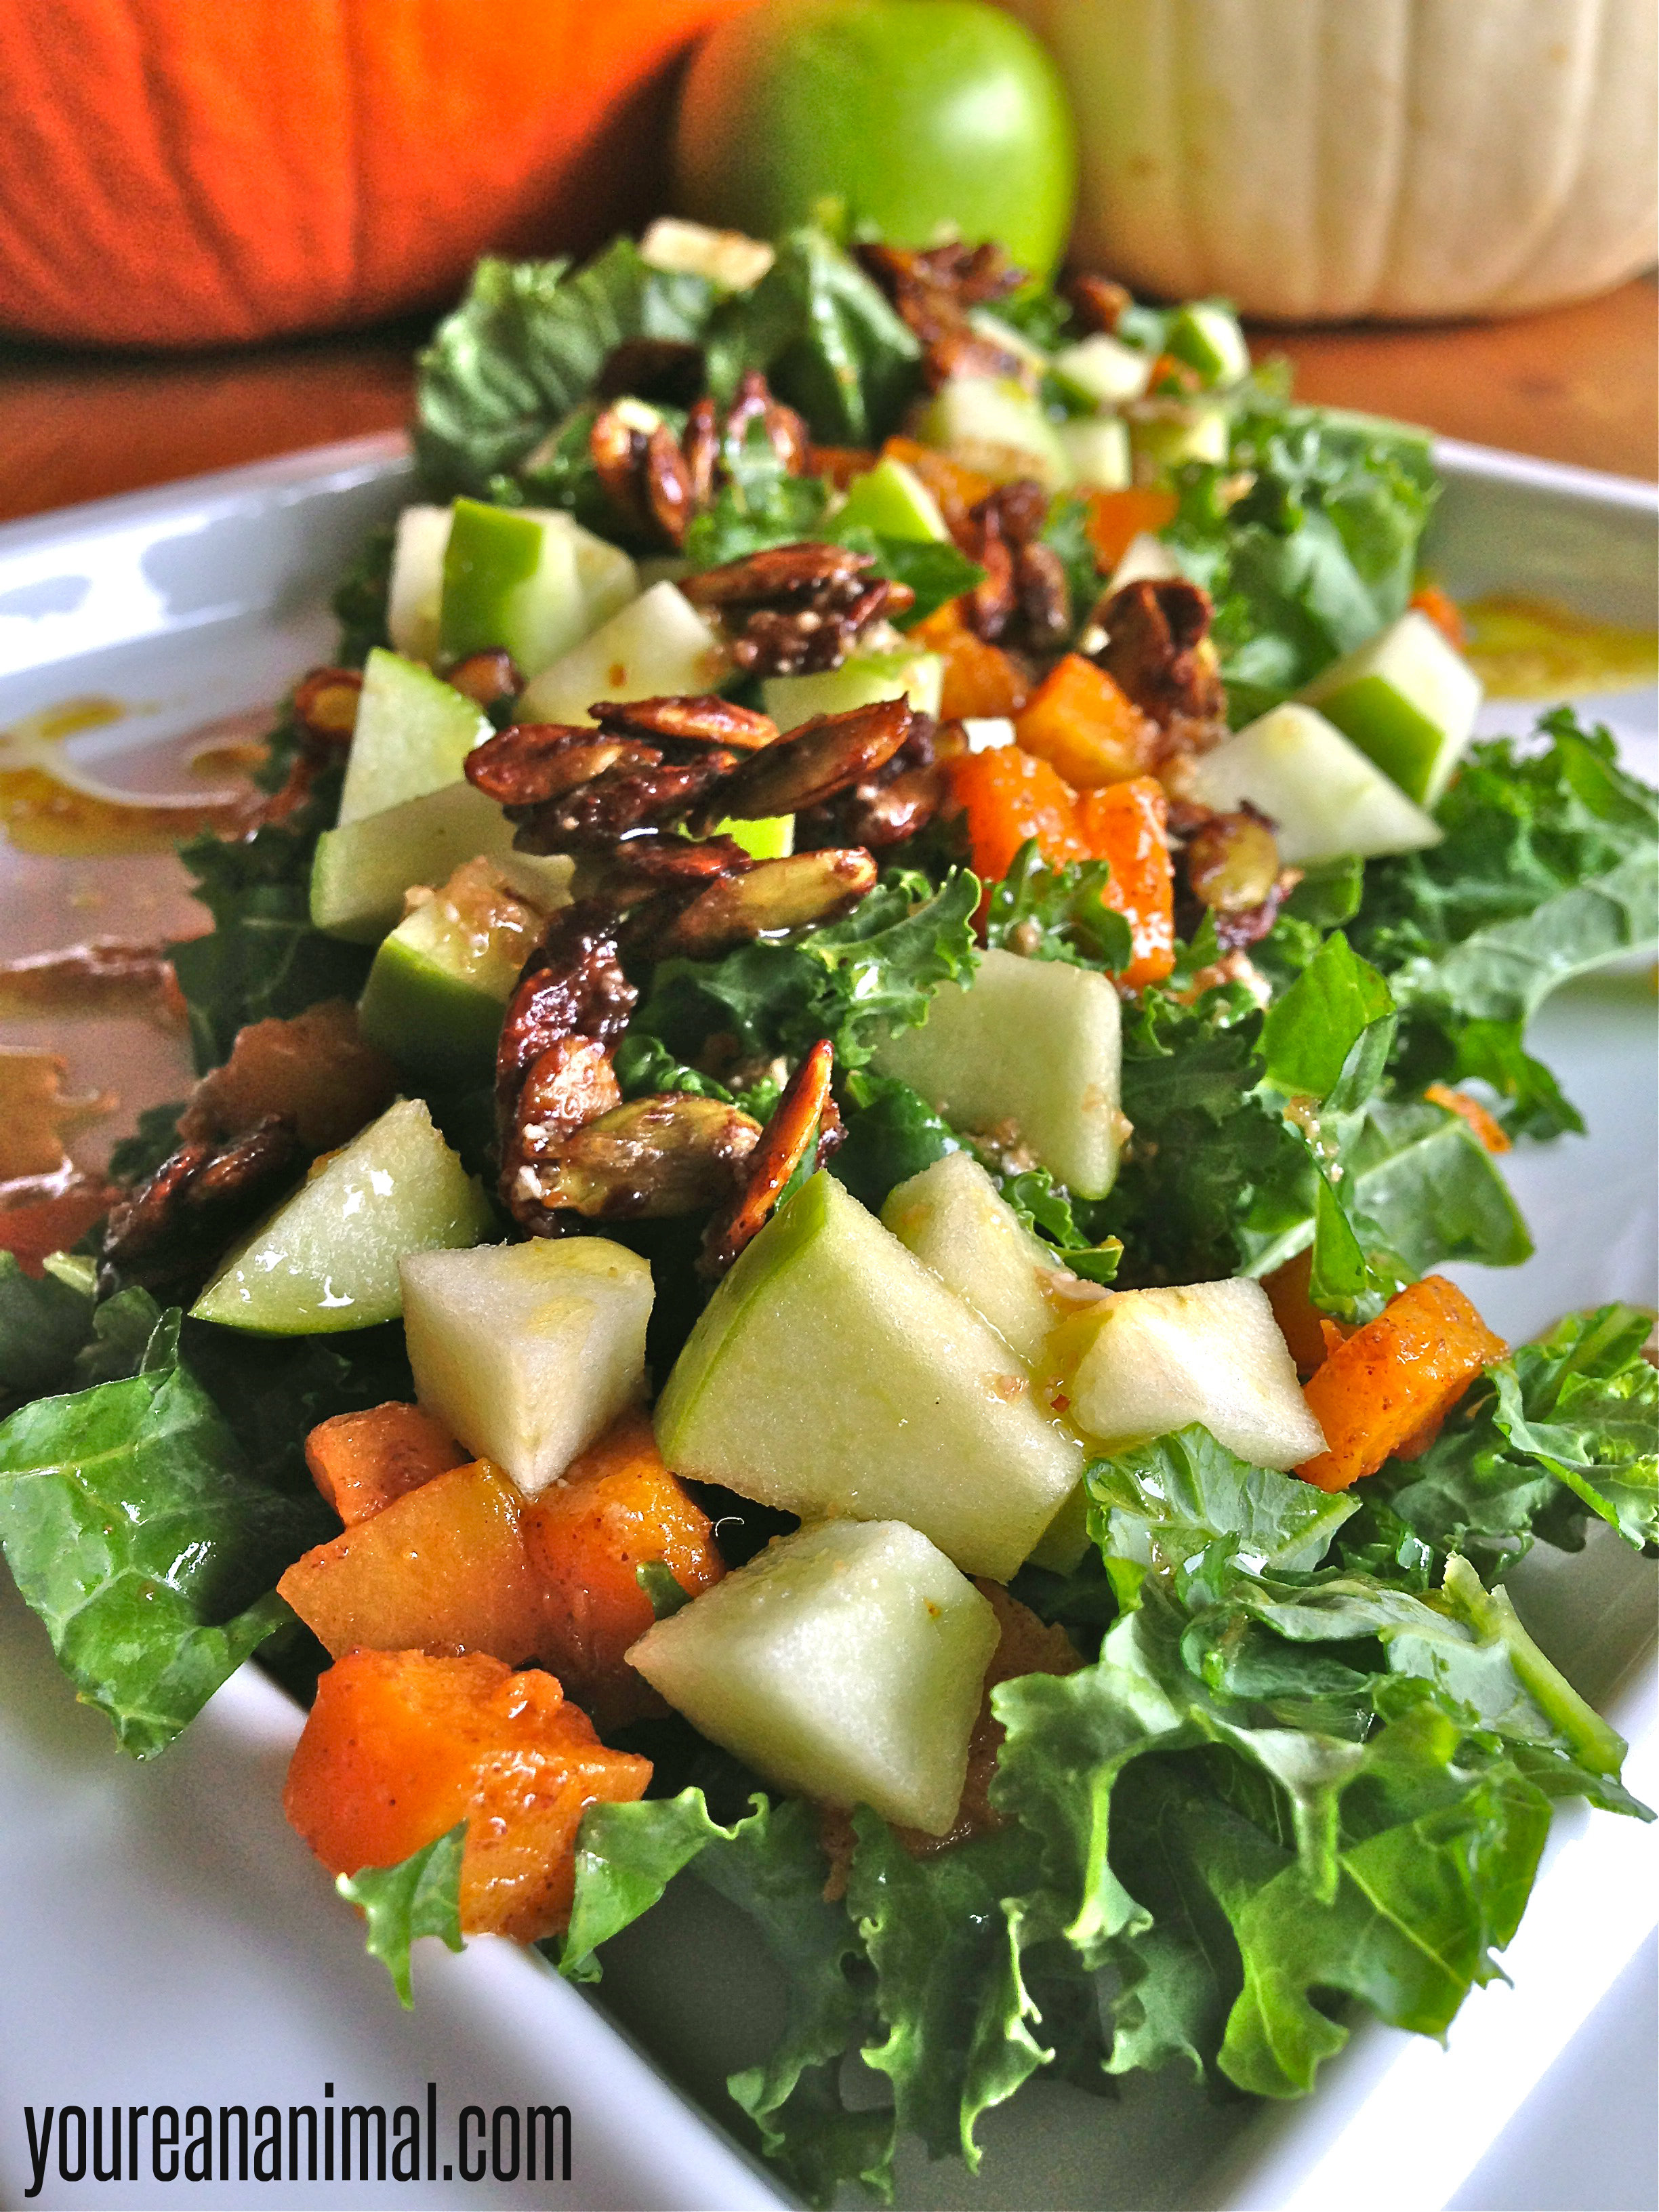
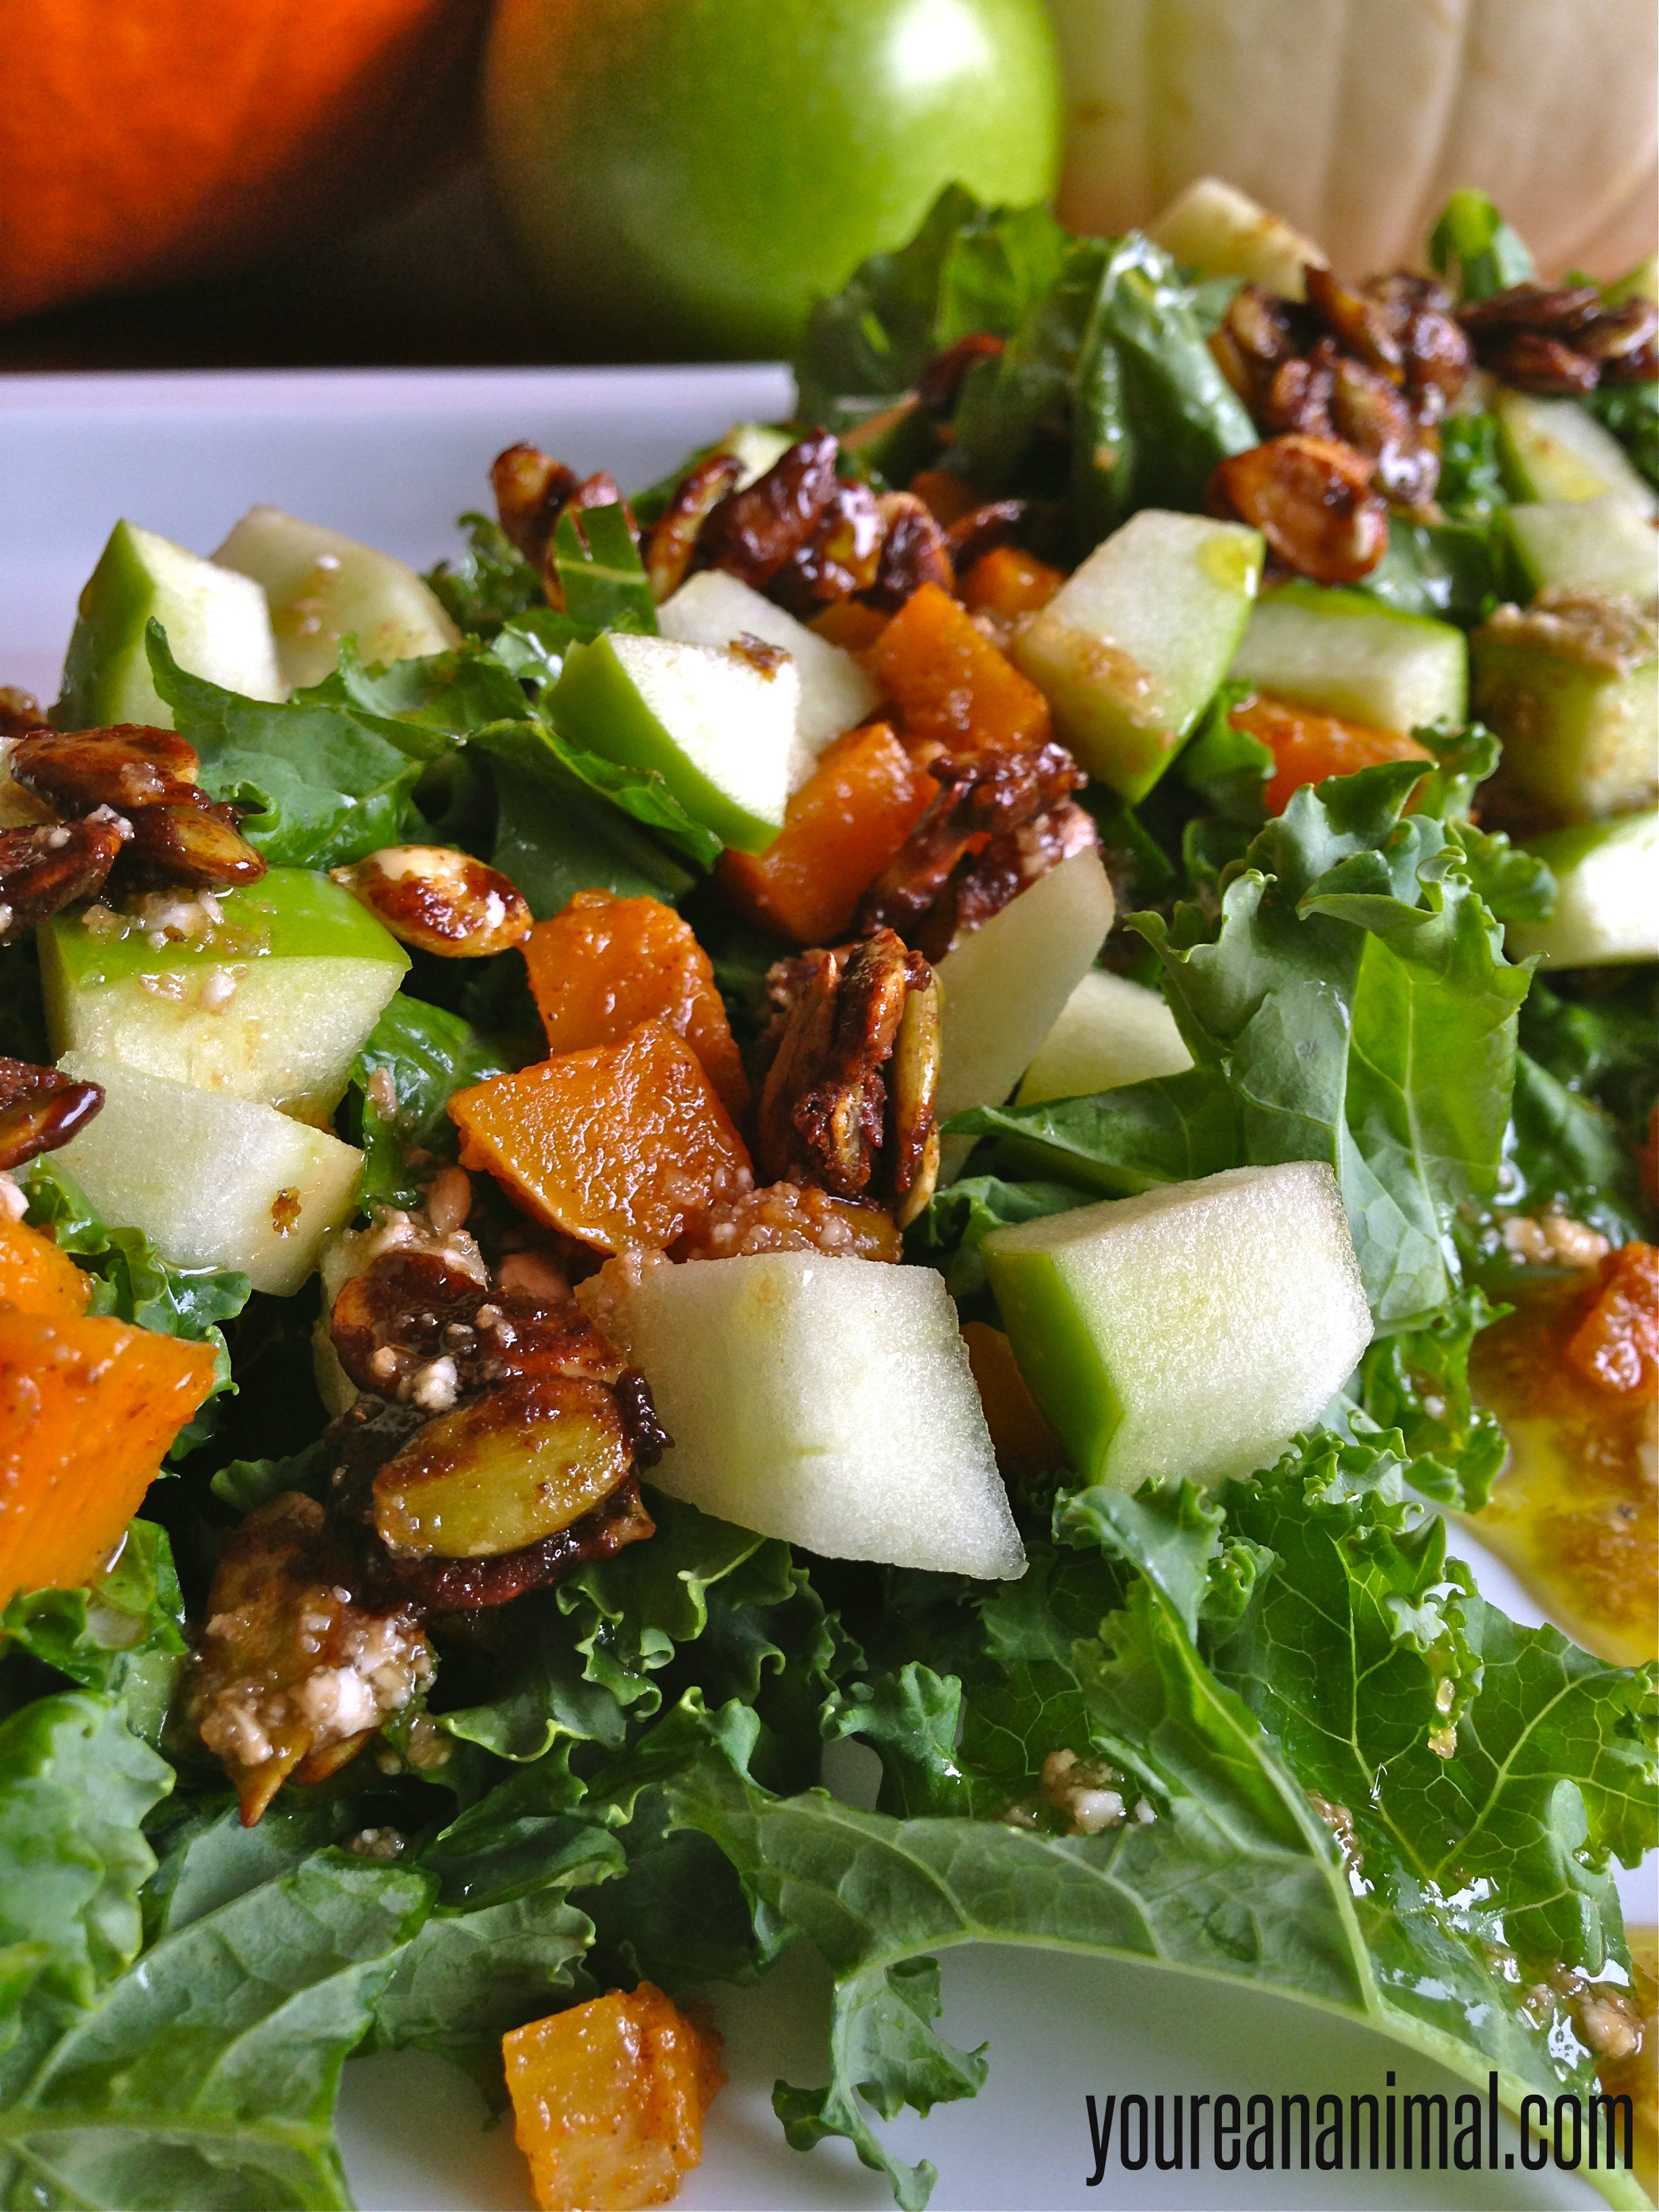
Autumn really is a great foodie season. Getting creative with the seasonal fruits, veggies, squashes, and spices has been really fun so far, and I love having a definite theme. Also, this is an amazing benefit of trying to consciously eat seasonal and local! A couple weekends ago, Andrew and I had dinner at one of our favorite restaurants here in RVA, Stella’s. Stella’s is a Greek restaurant owned by our friend Katrina, and we are frequent visitors. And by frequent, I mean pretty much all of the wait staff not only recognize us, but also know which appetizer is our favorite must-have. But one thing I love about Stella’s is that while I do have my favorite appetizer that I always order, I almost always get a different entree. I know I’m not alone in saying that at most restaurants I find my go-to dish and never venture outside of that comfort zone. But at Stella’s, I never know what I’m getting until I hear the specials. They have new specials all the time, and they’re always amazing. So I often wait for the server to rattle off those little delicacy options before choosing my dinner. The last time Andrew and I ate at Stella’s we tried the salad special… and I loved it so much I made my own version. Stella’s version had a kale base, with butternut squash, radishes, and spiced pumpkin seeds. For my version, I swapped the radishes for apples, added my favorite Goat Cheese Balsamic Vinaigrette, and let the autumn lovin’ begin.
This salad perfectly embodies everything Fall. It’s got fresh, crisp apples, creamy butternut squash (oh hellllooooo Vitamin A… win-win-win situation we’ve got going on here), and spiced pumpkin seeds that are a treat in themselves. Add the perfect blend of tangy and savory with the goat cheese balsamic dressing, and you’ve got a winner. Hearty kale just pulls that whole thing together for a healthy, mouth watering salad. You can make this a side dish at Thanksgiving (or you know… any other meal of the season), or add some protein (chicken or turkey perhaps?) and it’s a meal in itself!
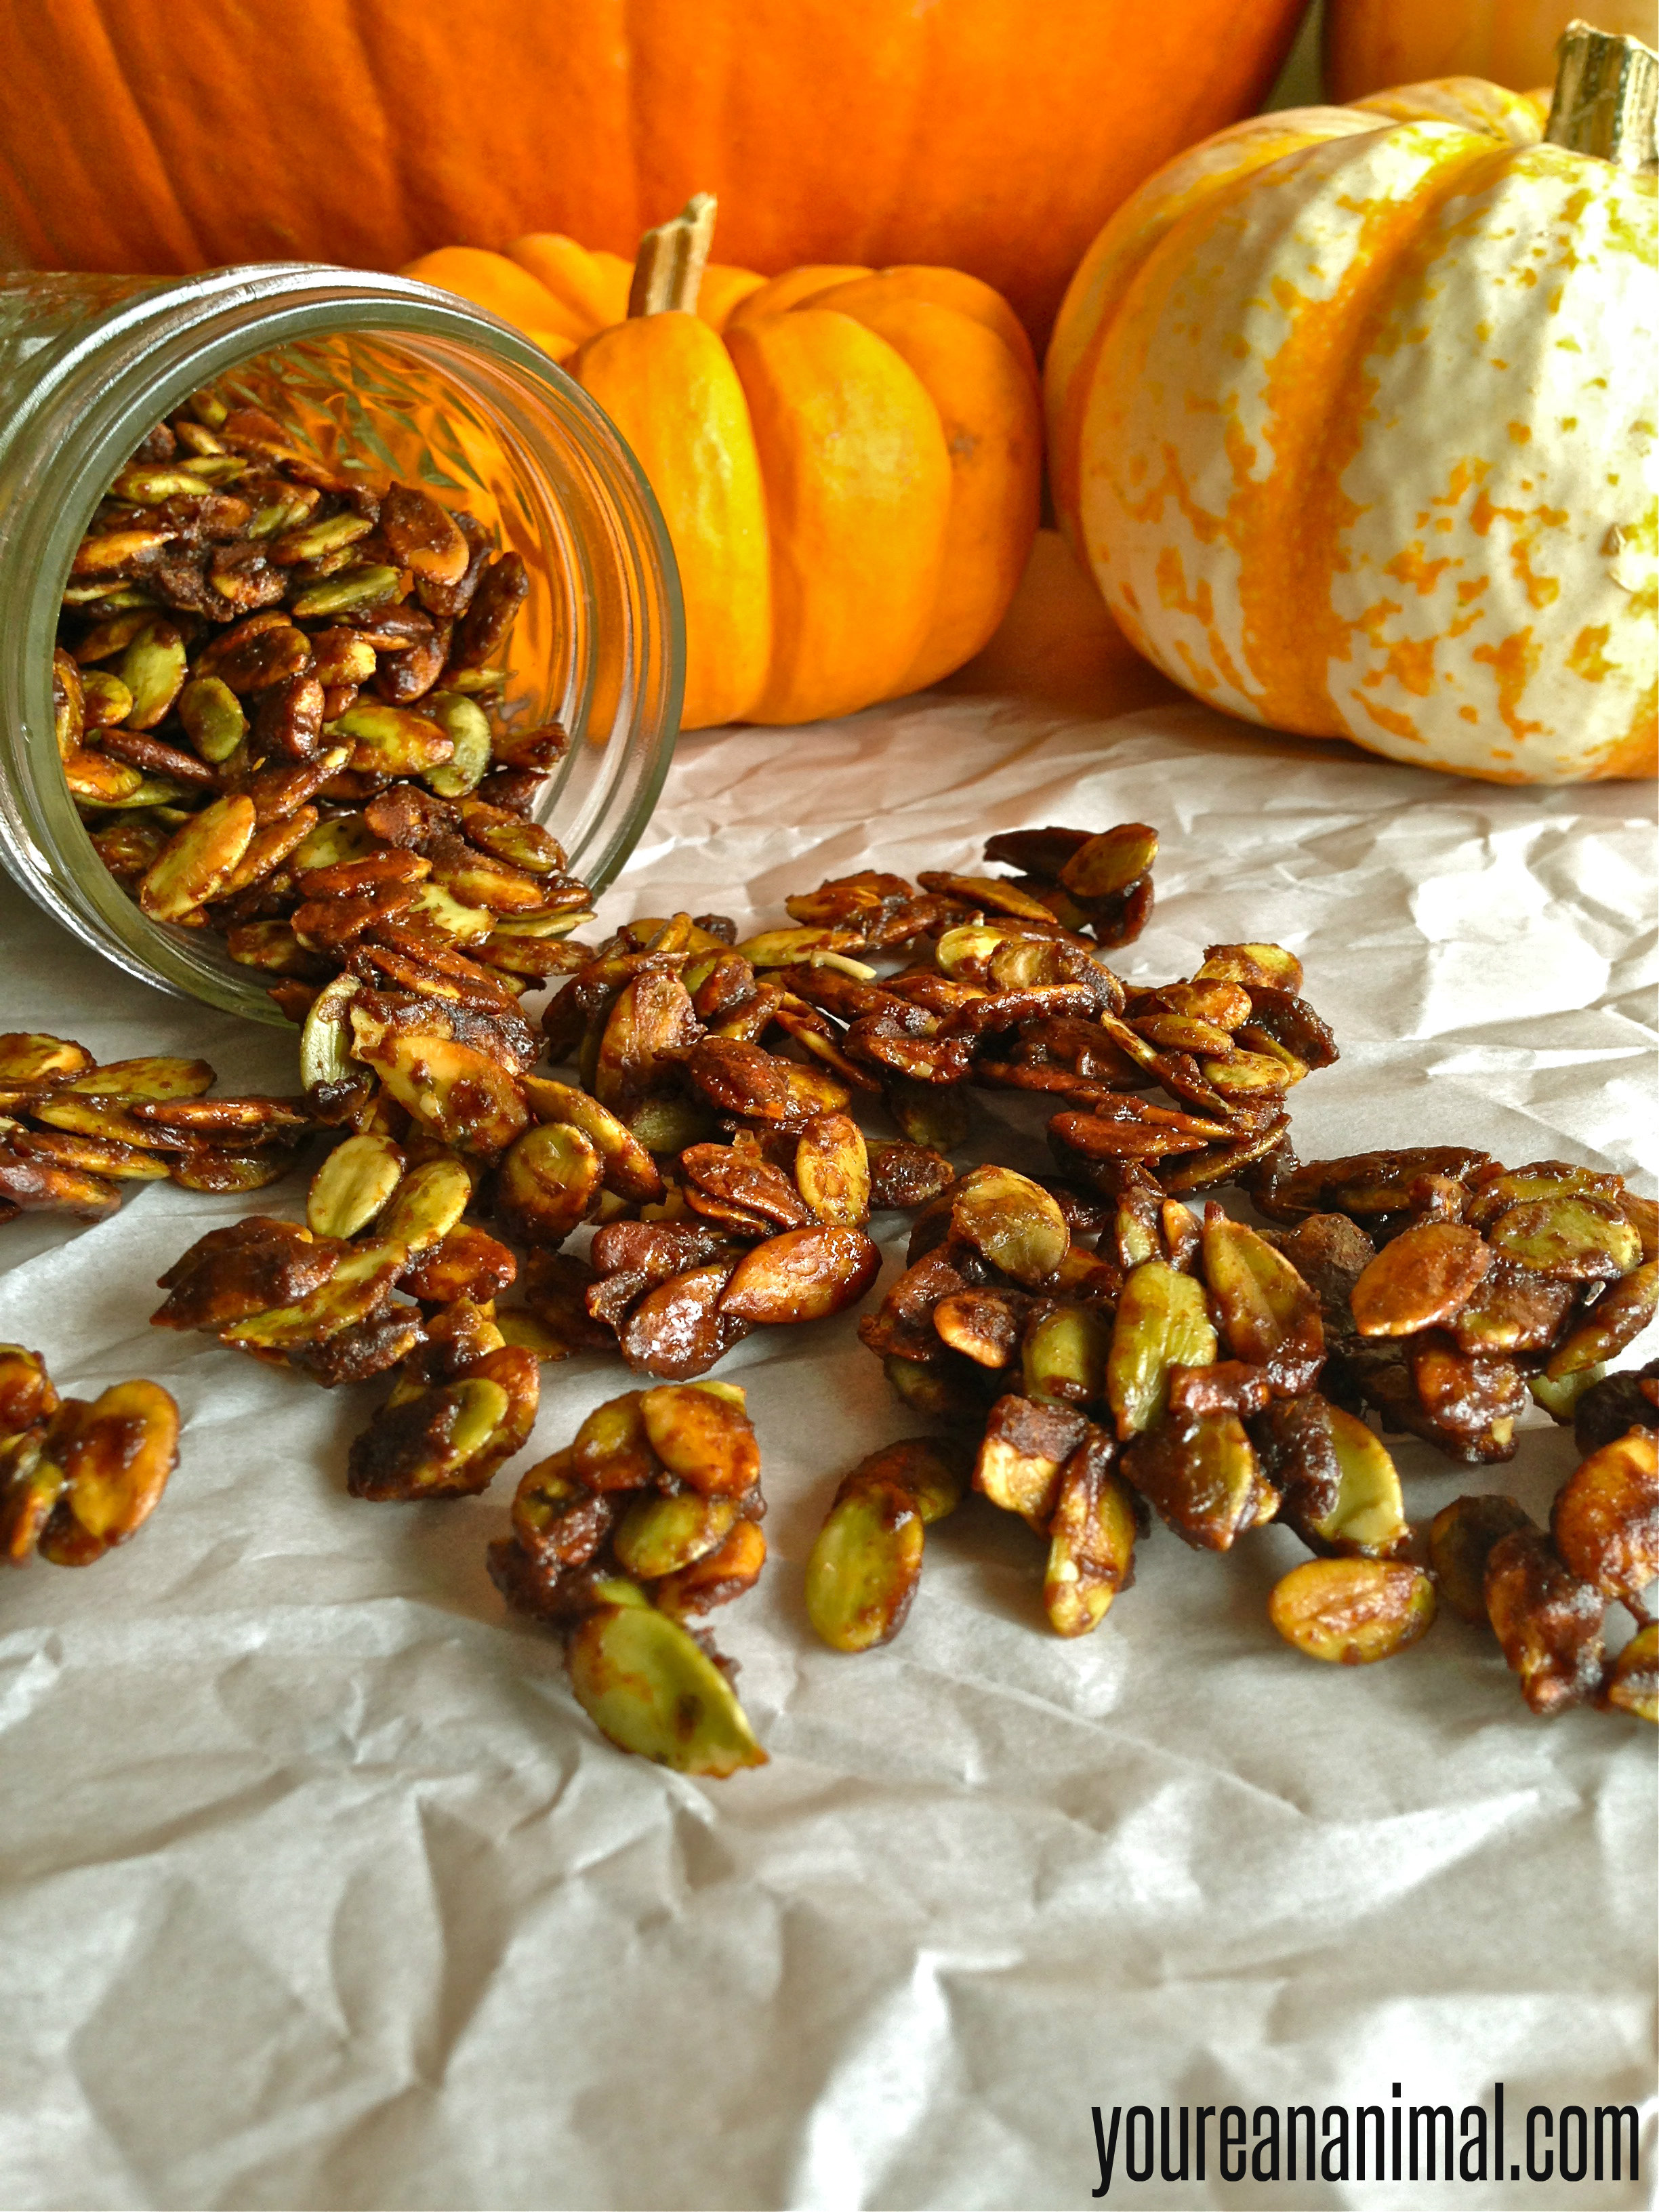
Remember how I said the spiced pumpkin seeds are a treat? Well, they are such a treat that they even get their own side recipe. Lucky little pepitas.
Lay out a sheet of aluminum foil or parchment paper to transfer the seeds to once done.
Combine the coconut sugar, molasses, cinnamon, salt, paprika, cumin and cayenne in a small bowl. You may need to use your fingers to fully incorporate the molasses.
Place the seeds in a nonstick skillet, and toast them just slightly until they smell nutty and are lightly browned.
Pour the sugar spice mixture over the seeds, and stir to combine.
Add the butter.
Stir the mixture until the sugar and butter are melted, and the seeds are coated.
Quickly transfer the seeds to the foil/parchment and spread them out as much as you can.
Allow them to completely cool, then break up any chunks. Store in cool dry place, or fridge.
These pumpkin seeds are sweet and spicy, and are really what ties together this Autumn salad. They would also be perfect for a topping on pumpkin bread or muffins, or on a pie, or just eaten by themselves! Anywhere you would use spiced pecans, you can use these spiced pumpkin seeds.
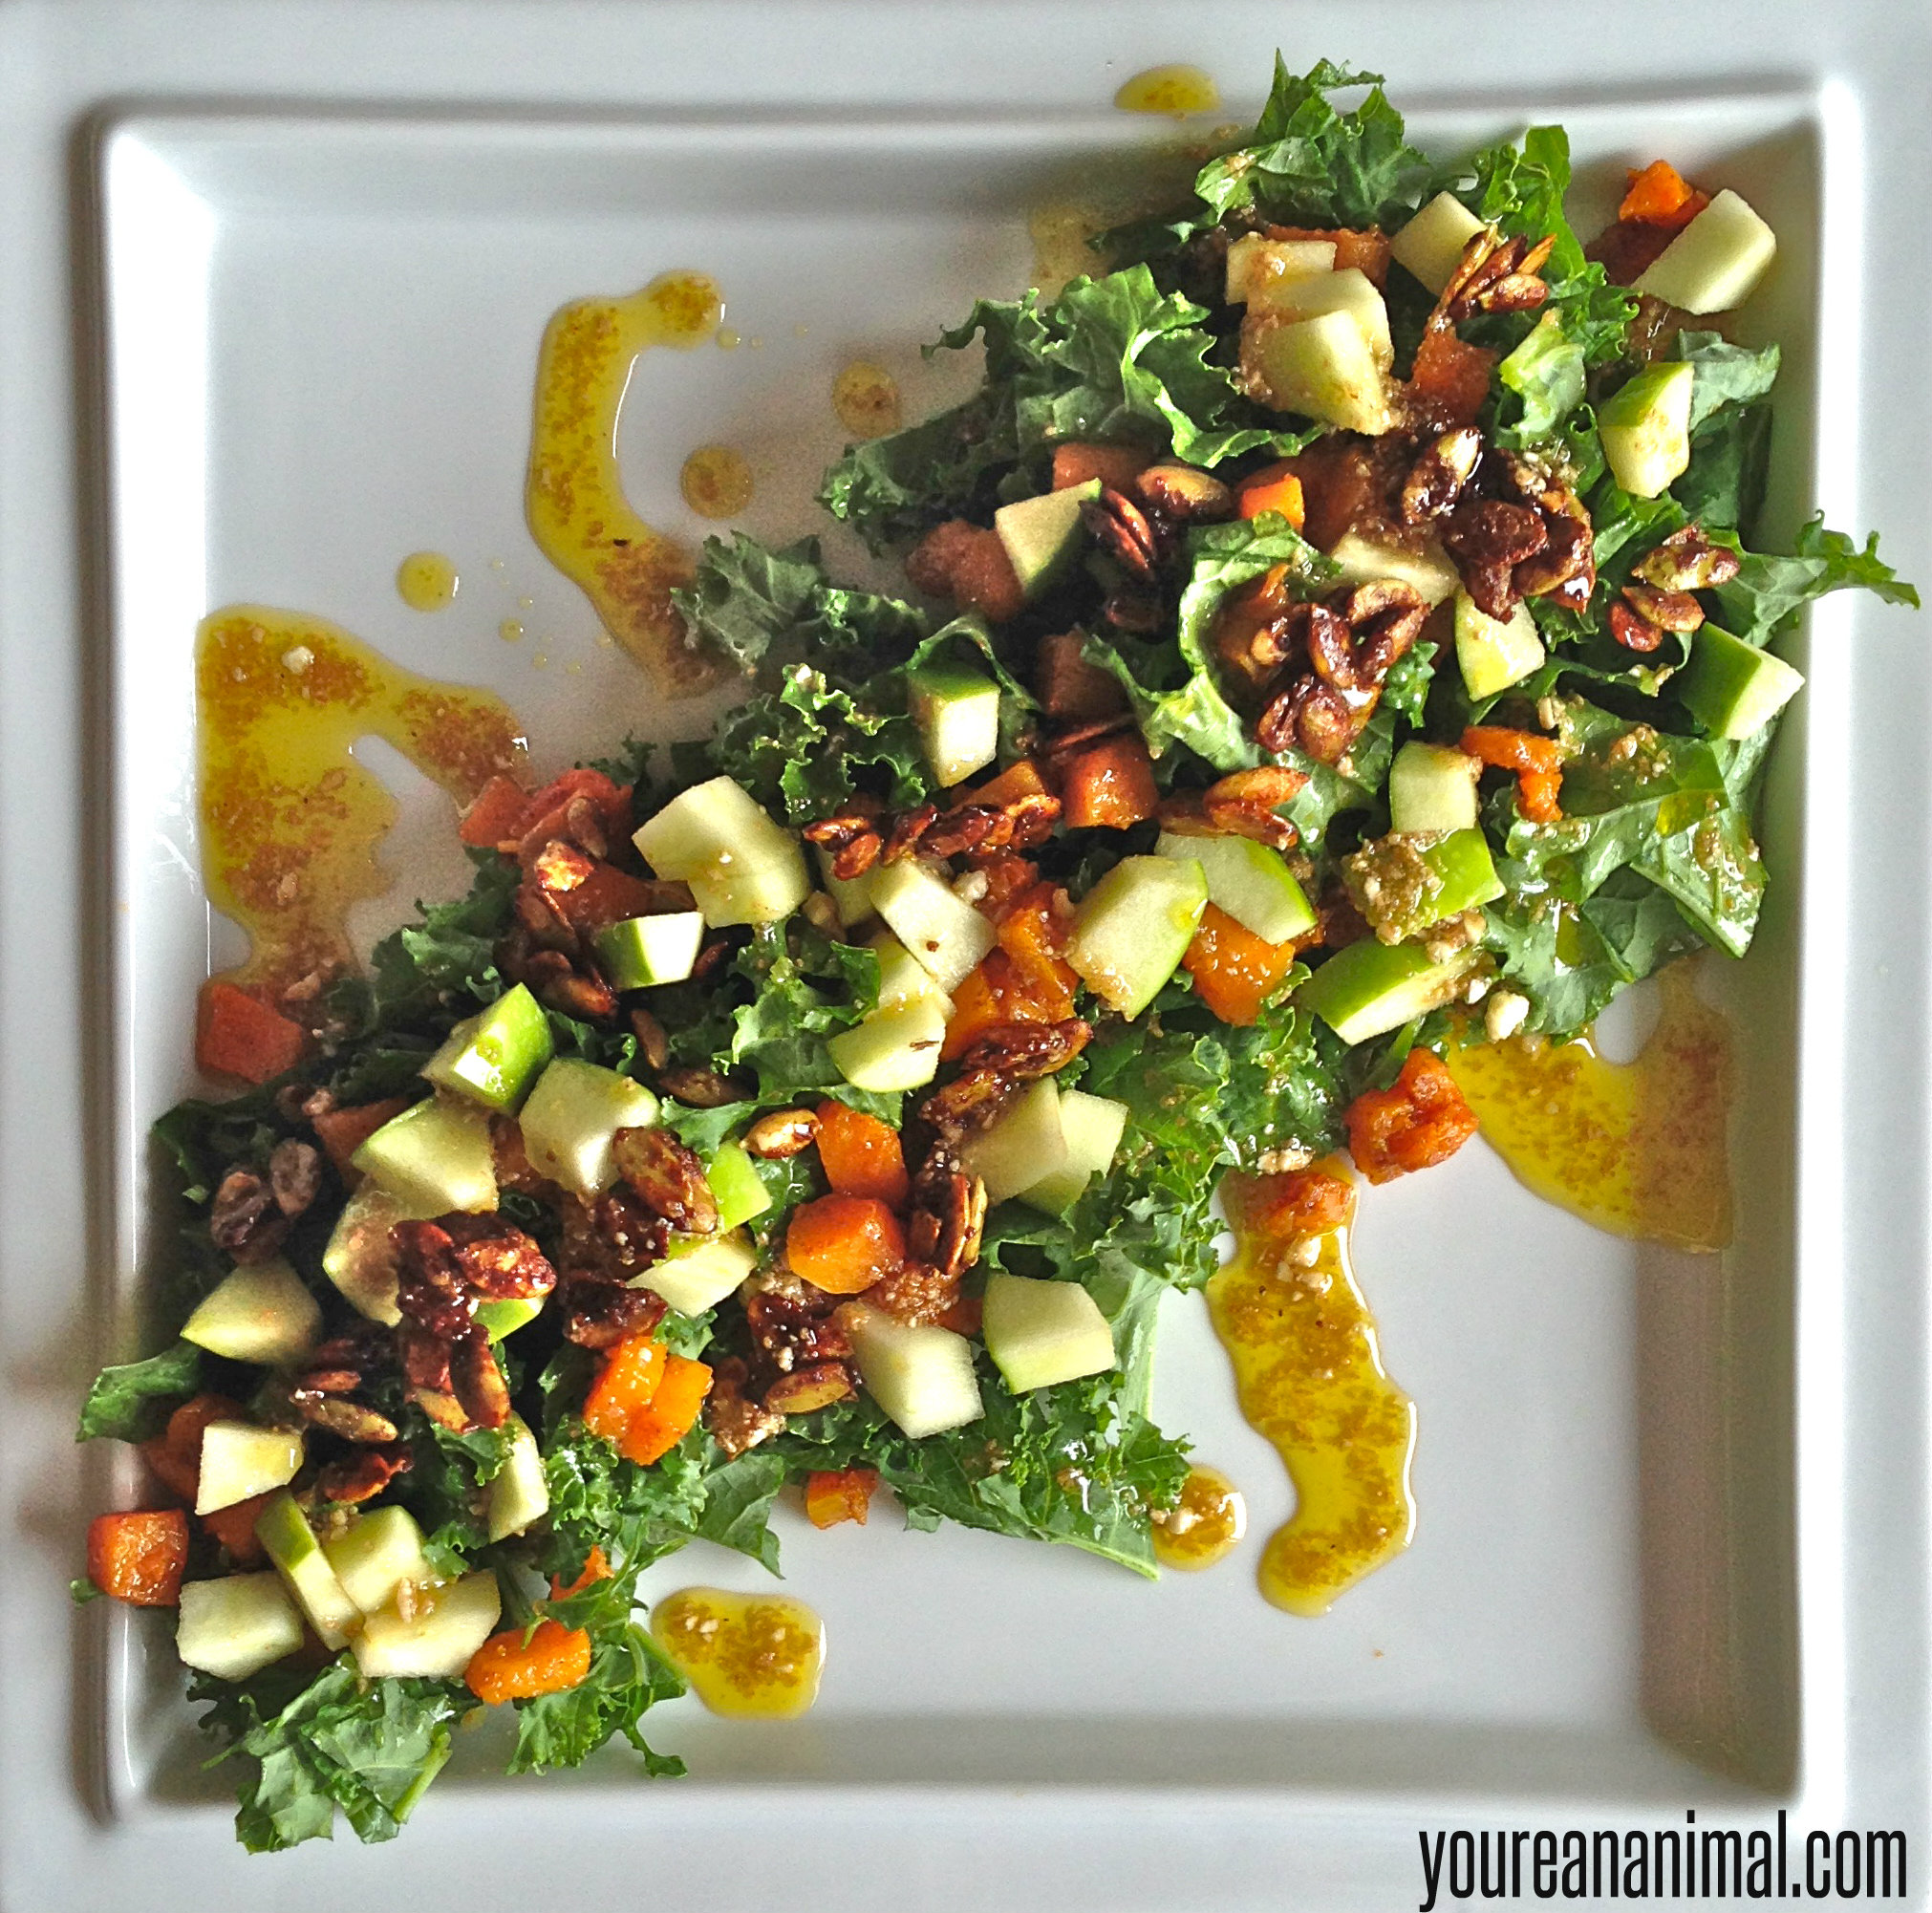
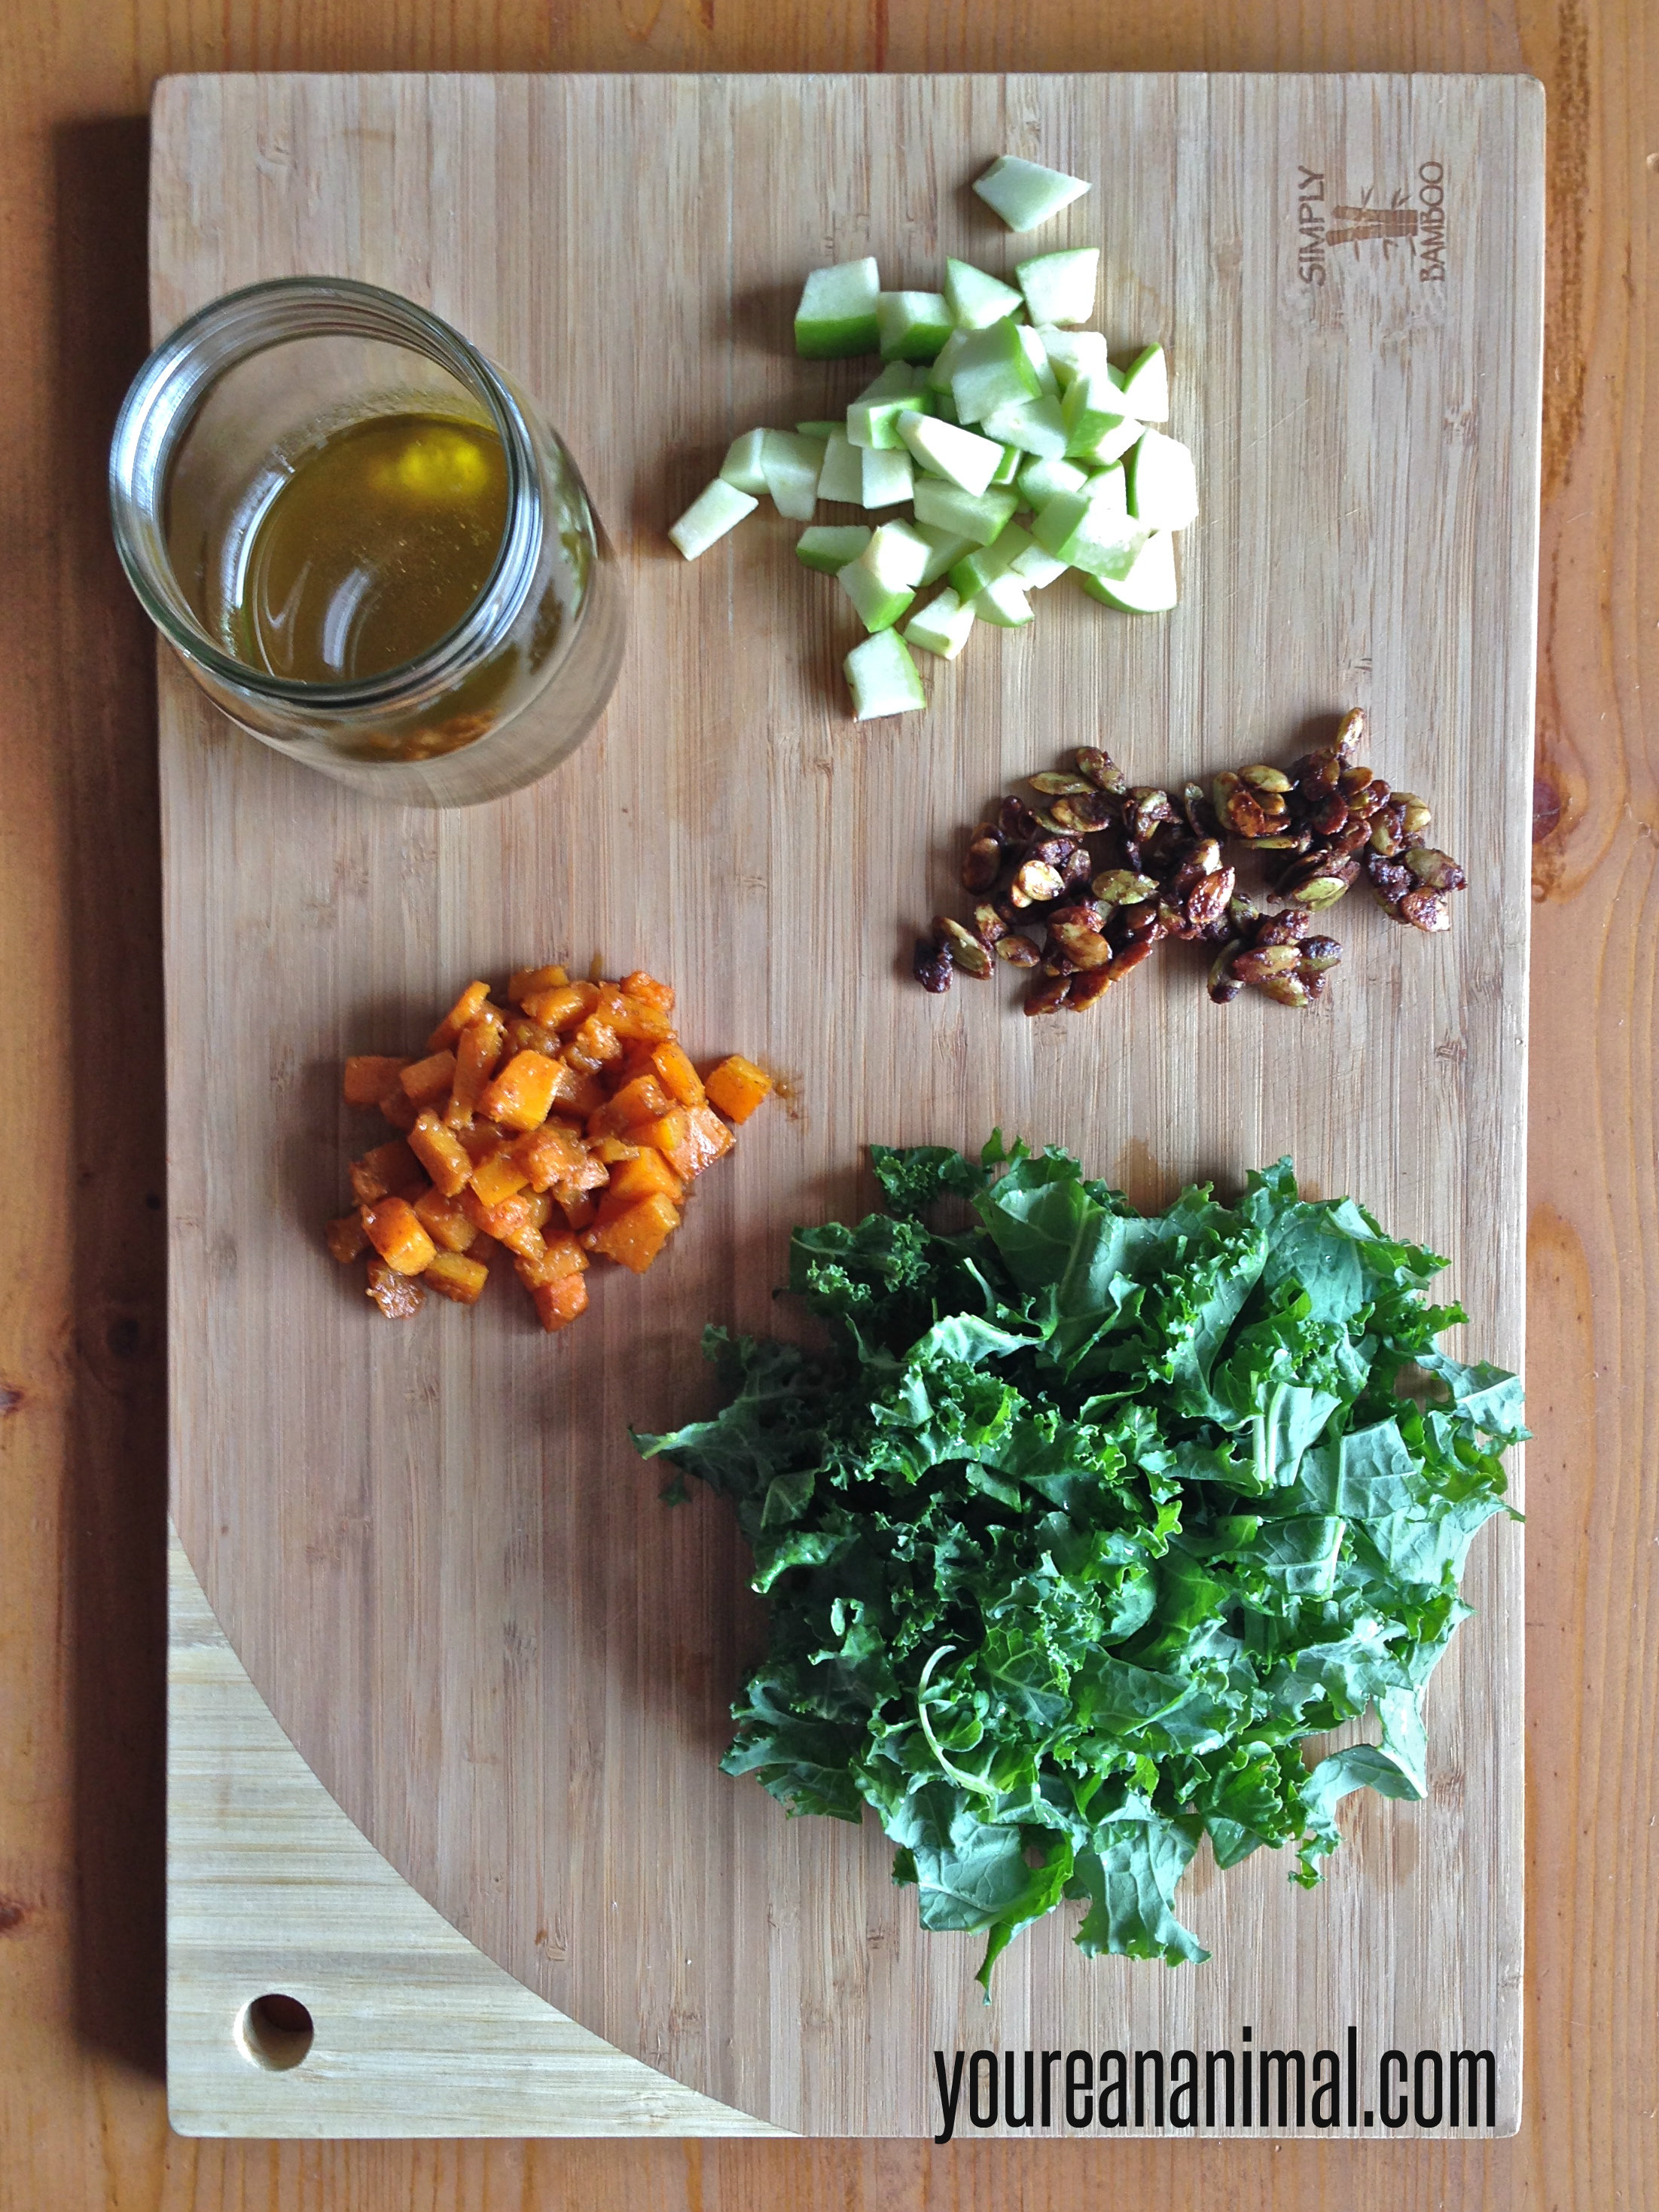
The other elements of this recipe are also fantastic alone, which is why this salad is such a winner. The whole is greater than the sum of its parts, and the sum of its parts is already pretty bangin’. The spices from the pumpkin seeds are carried over to the butternut squash, which brings those two elements together. The tart crunch of the apples provides perfect contrast to the creamy sweetness of the squash, and that tartness of the apple is also in perfect harmony with the sour balsamic in the dressing. Seriously… have I sold you yet?
Autumn Salad
3-4 large leaves of kale, de-ribbed and chopped (about 4-5 cups)
1 cup of butternut squash, diced into 1/4 inch pieces
1 Granny Smith apple, diced into 1/4 inch pieces
Spiced pumpkin seeds (see recipe above)
1/4 tsp each cinnamon, salt, cumin, paprika
cayenne to taste
avocado oil or olive oil to saute squash
Goat Cheese Balsamic Vinaigrette (mix all ingredients together in a mixing bowl, or shake in a mason jar)
3 tbsp avocado or olive oil
1 tbsp balsamic vinegar
1/2 tbsp of soft goat cheese
1/2 tsp each of salt, pepper, onion powder, garlic powder, and dried yellow mustard powder
Heat avocado oil/olive oil in a medium skillet over medium heat.
Add diced butternut squash to the heated oil.
Add spices (cinnamon, salt, cumin, paprika and cayenne) to the squash. Stir to coat the squash in the spices.
Saute the squash, stirring occasionally, until the squash is fork tender.
Once the squash is cooked, assemble your salads, evenly distributing the kale, apples, squash and topping the salad with your desired about of spiced pumpkin seeds and balsamic vinaigrette.
This makes either 2 entree-sized salads, or 4 side salads. Enjoy!
Please note that some of the links in the above post are affiliate links that will take you to an Amazon.com page. If you choose to purchase a product featured in this post using an affiliate link, you will be directly supporting You’re An Animal. Thanks!
https://nourishwild.com/cms/wp-content/uploads/2014/10/fallsalad15.jpg32642448Morgan Carrhttps://nourishwild.com/cms/wp-content/uploads/2016/02/Logo-Only-Large-300x212.pngMorgan Carr2014-10-12 18:55:502016-02-27 21:03:06Autumn Salad with Spiced Pumpkin Seeds
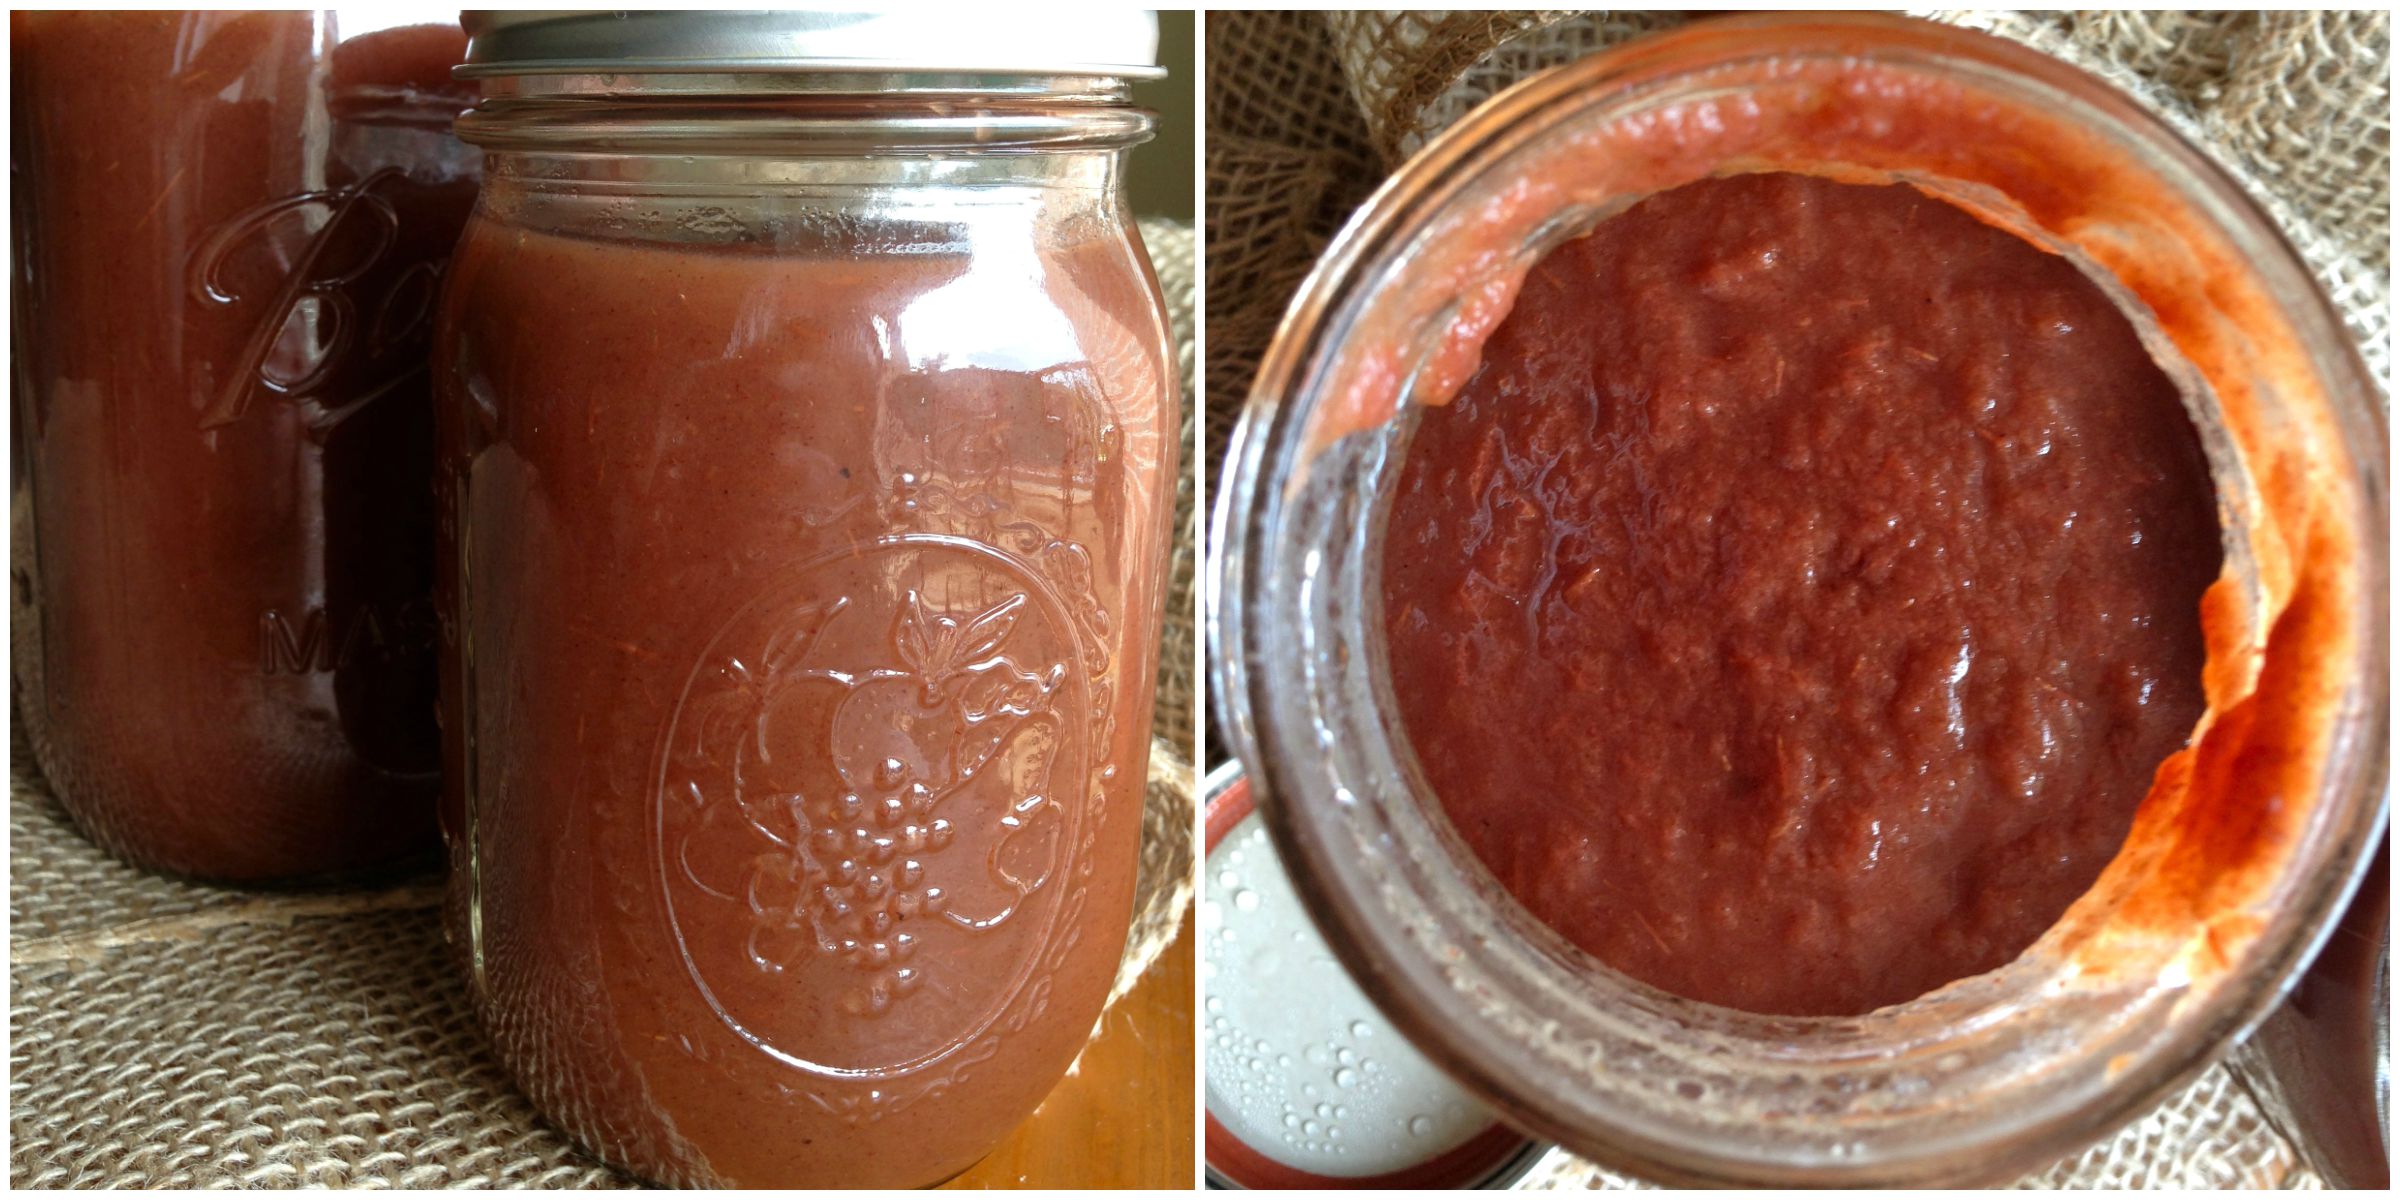
First, let me apologize for being MIA for a while. I’m in the midst of a 20-day work week… aka I haven’t had a day off which means no time for recipe fun! But this morning I was determined to get something done before work. And oh, it was a gooood choice. Apple butter (for me) is something that has become as much a staple of fall as pumpkin errythang. I first discovered apple butter while living in Harrisonburg. Every fall, my friend and I would head to a Mennonite auction/market and it was there that my love affair with apple butter began. And until now, I didn’t trust any other kind aside from that Mennonite-made goodness. I was most certainly not going to buy it from the store, and I don’t have the opportunity to get to the farmers markets around here (one of the downfalls of working the Saturday morning shift). However, since we got a crockpot, I figured I’d try my hand at making me own. Whoa baby, is this stuff easy and delicious! So today, you all are getting a double whammy: Apple Butter recipe AND Apple Butter Muffins recipe! I’m going to start with the Apple Butter.
If you have never had apple butter before, it’s essentially a spiced applesauce. But it also tastes like the manifestation of autumn itself. It has almost the exact same spices as a pumpkin spice combo, so just imagine those spices with an apple background rather than a pumpkin background and YUM. You can use apple butter in a lot of ways. I used to just eat it on an english muffin, or mix it in with oatmeal. Now, I’ll probably drizzle it over ice cream (maybe even make an apple butter ice cream… hmmm), use it in these delectable muffins, or eat it by the spoonful 🙂 The possibilities are as wide as your imagination! Oh and by the way… it’s ridiculously easy to make. I don’t even peel the apples, mostly because I think it’s a waste of time. And all of the nutrients are in the peels! You end up blending it anyway, so keep those peels people!
Crockpot Apple Butter
12 (organic) apples (I use Gala, because they’re my favorite)
Core the apples, and chop into 2-3 inch chunks. No need to peel!
Place in the crockpot.
Add the spices and honey, and stir to combine with the apples. Doesn’t need to be perfect, just incorporate it so the spices don’t dry out/burn sitting on the top.
Cook the mixture on low for 10 hours.
At the end of the 10 hours, use the back of a ladle/spoon to mash the apples.
Makes about 48 oz, depending on the size of your apples.
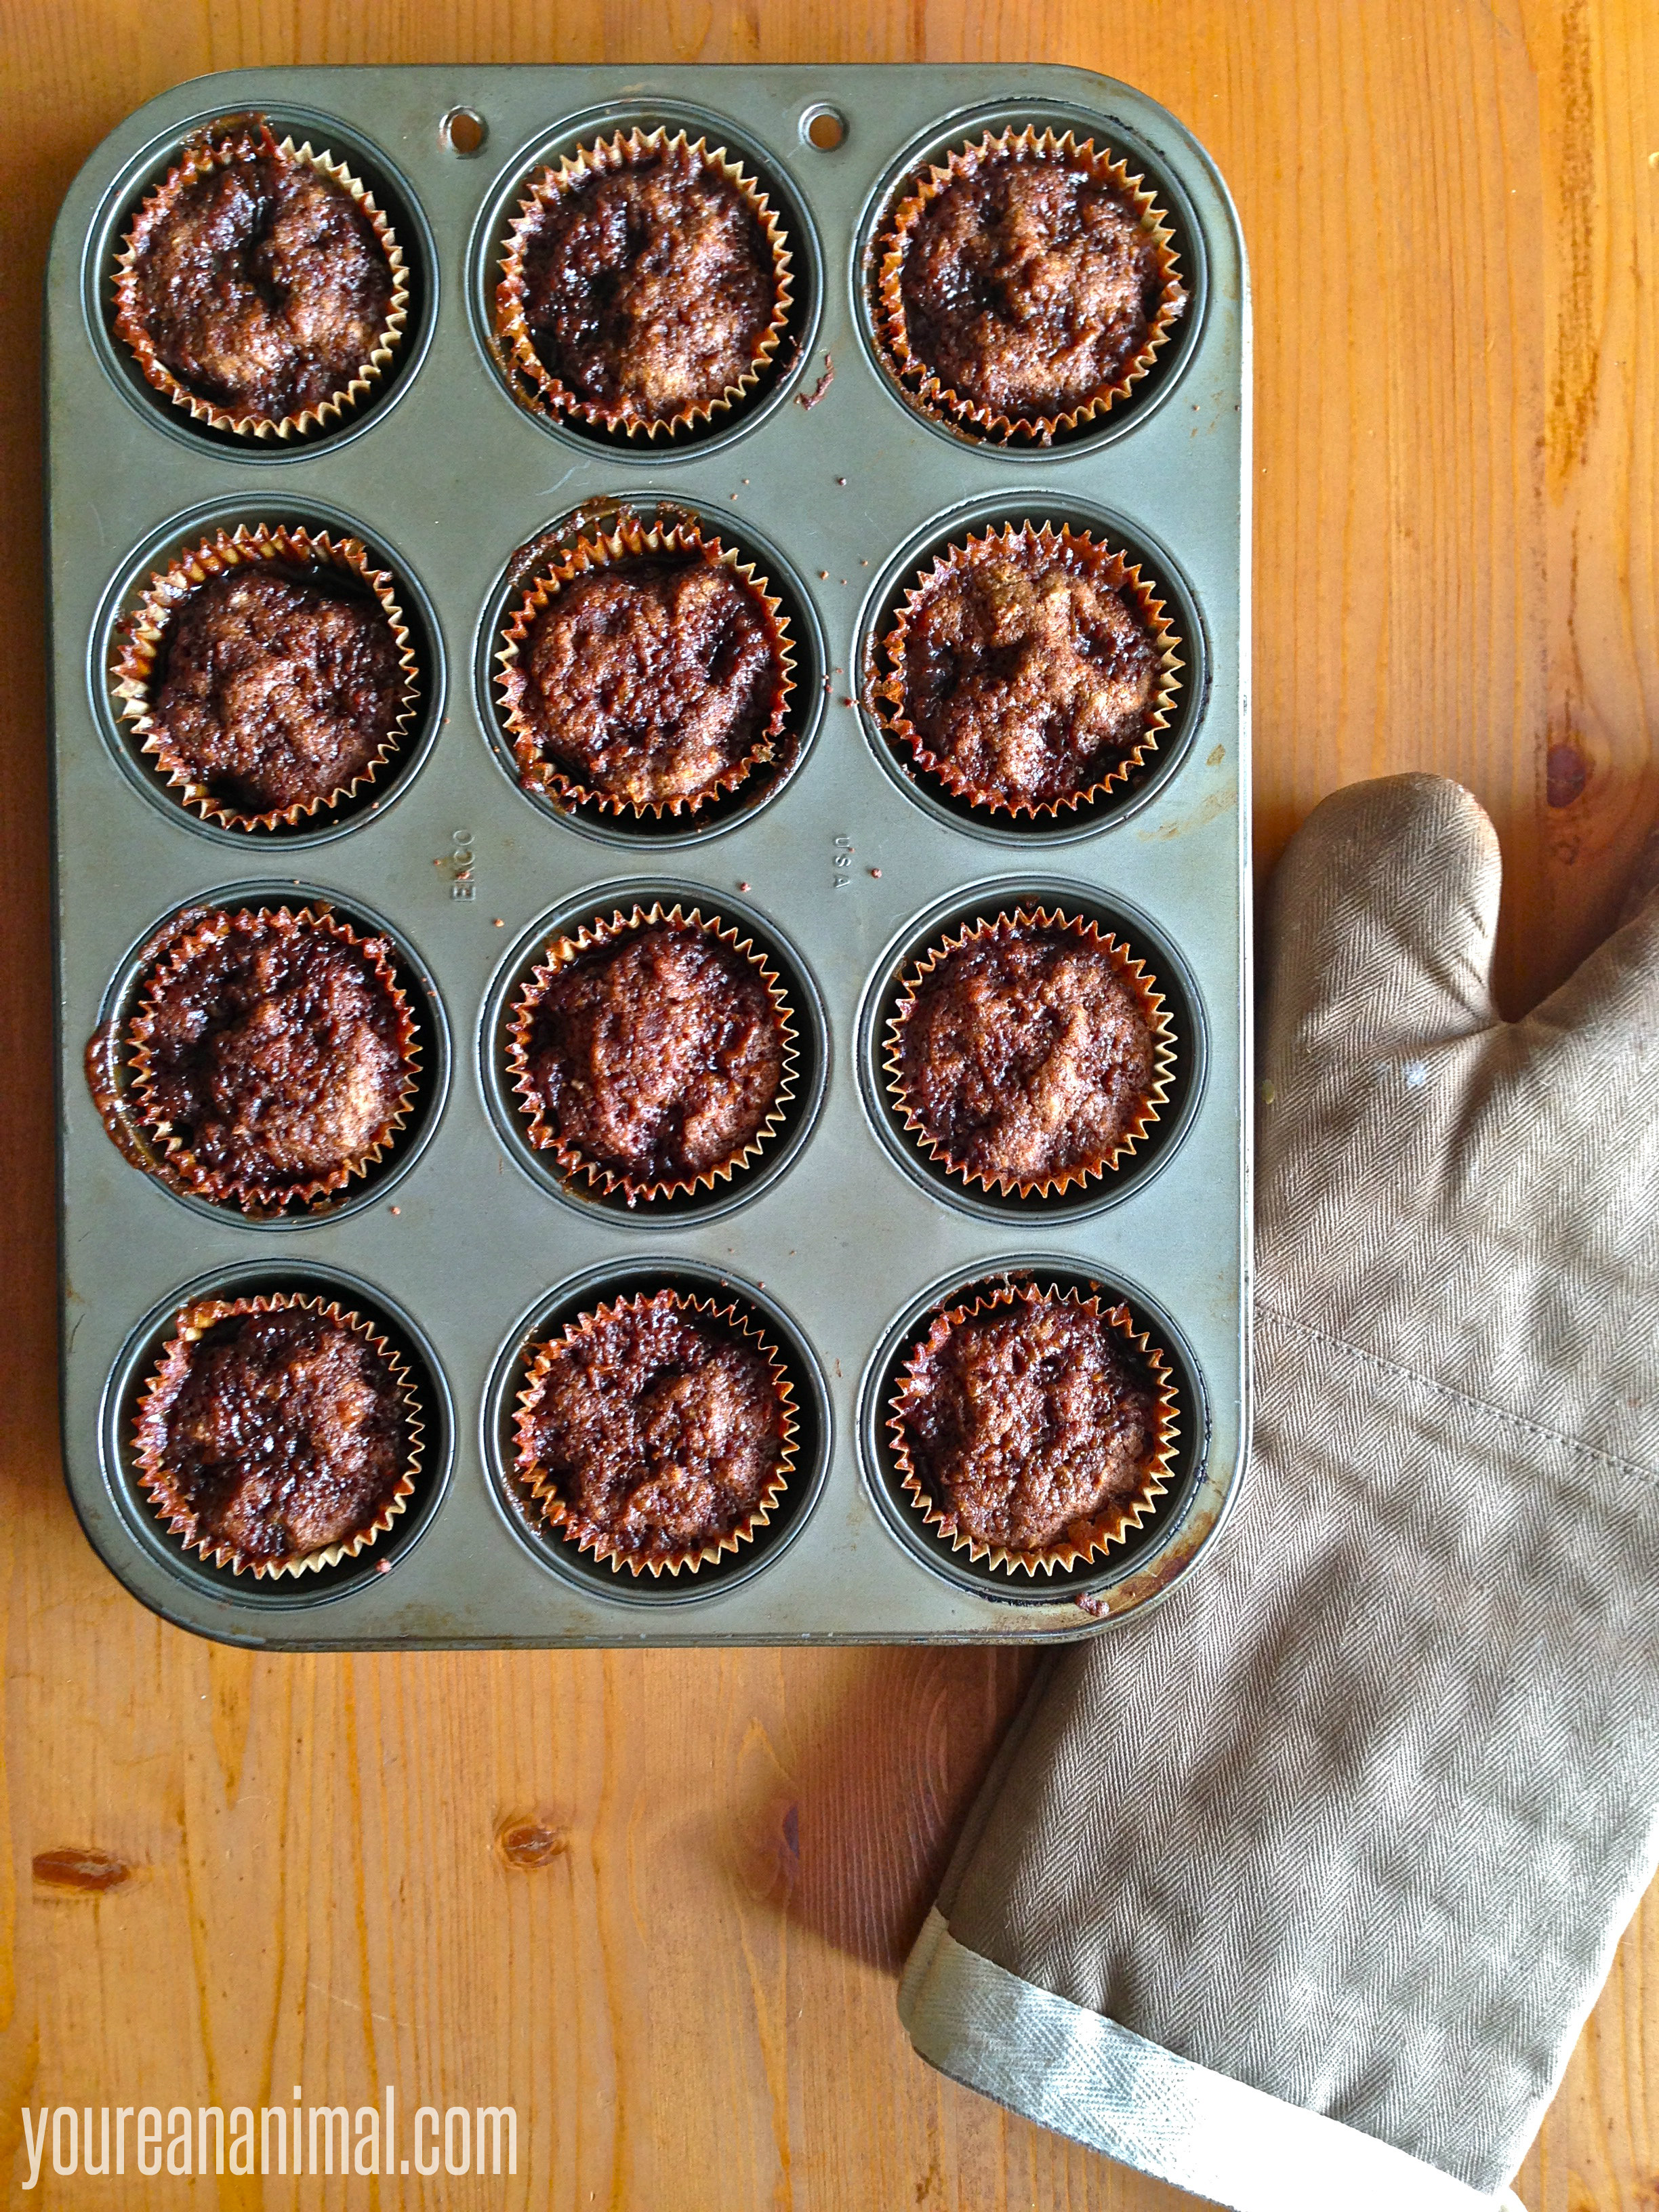
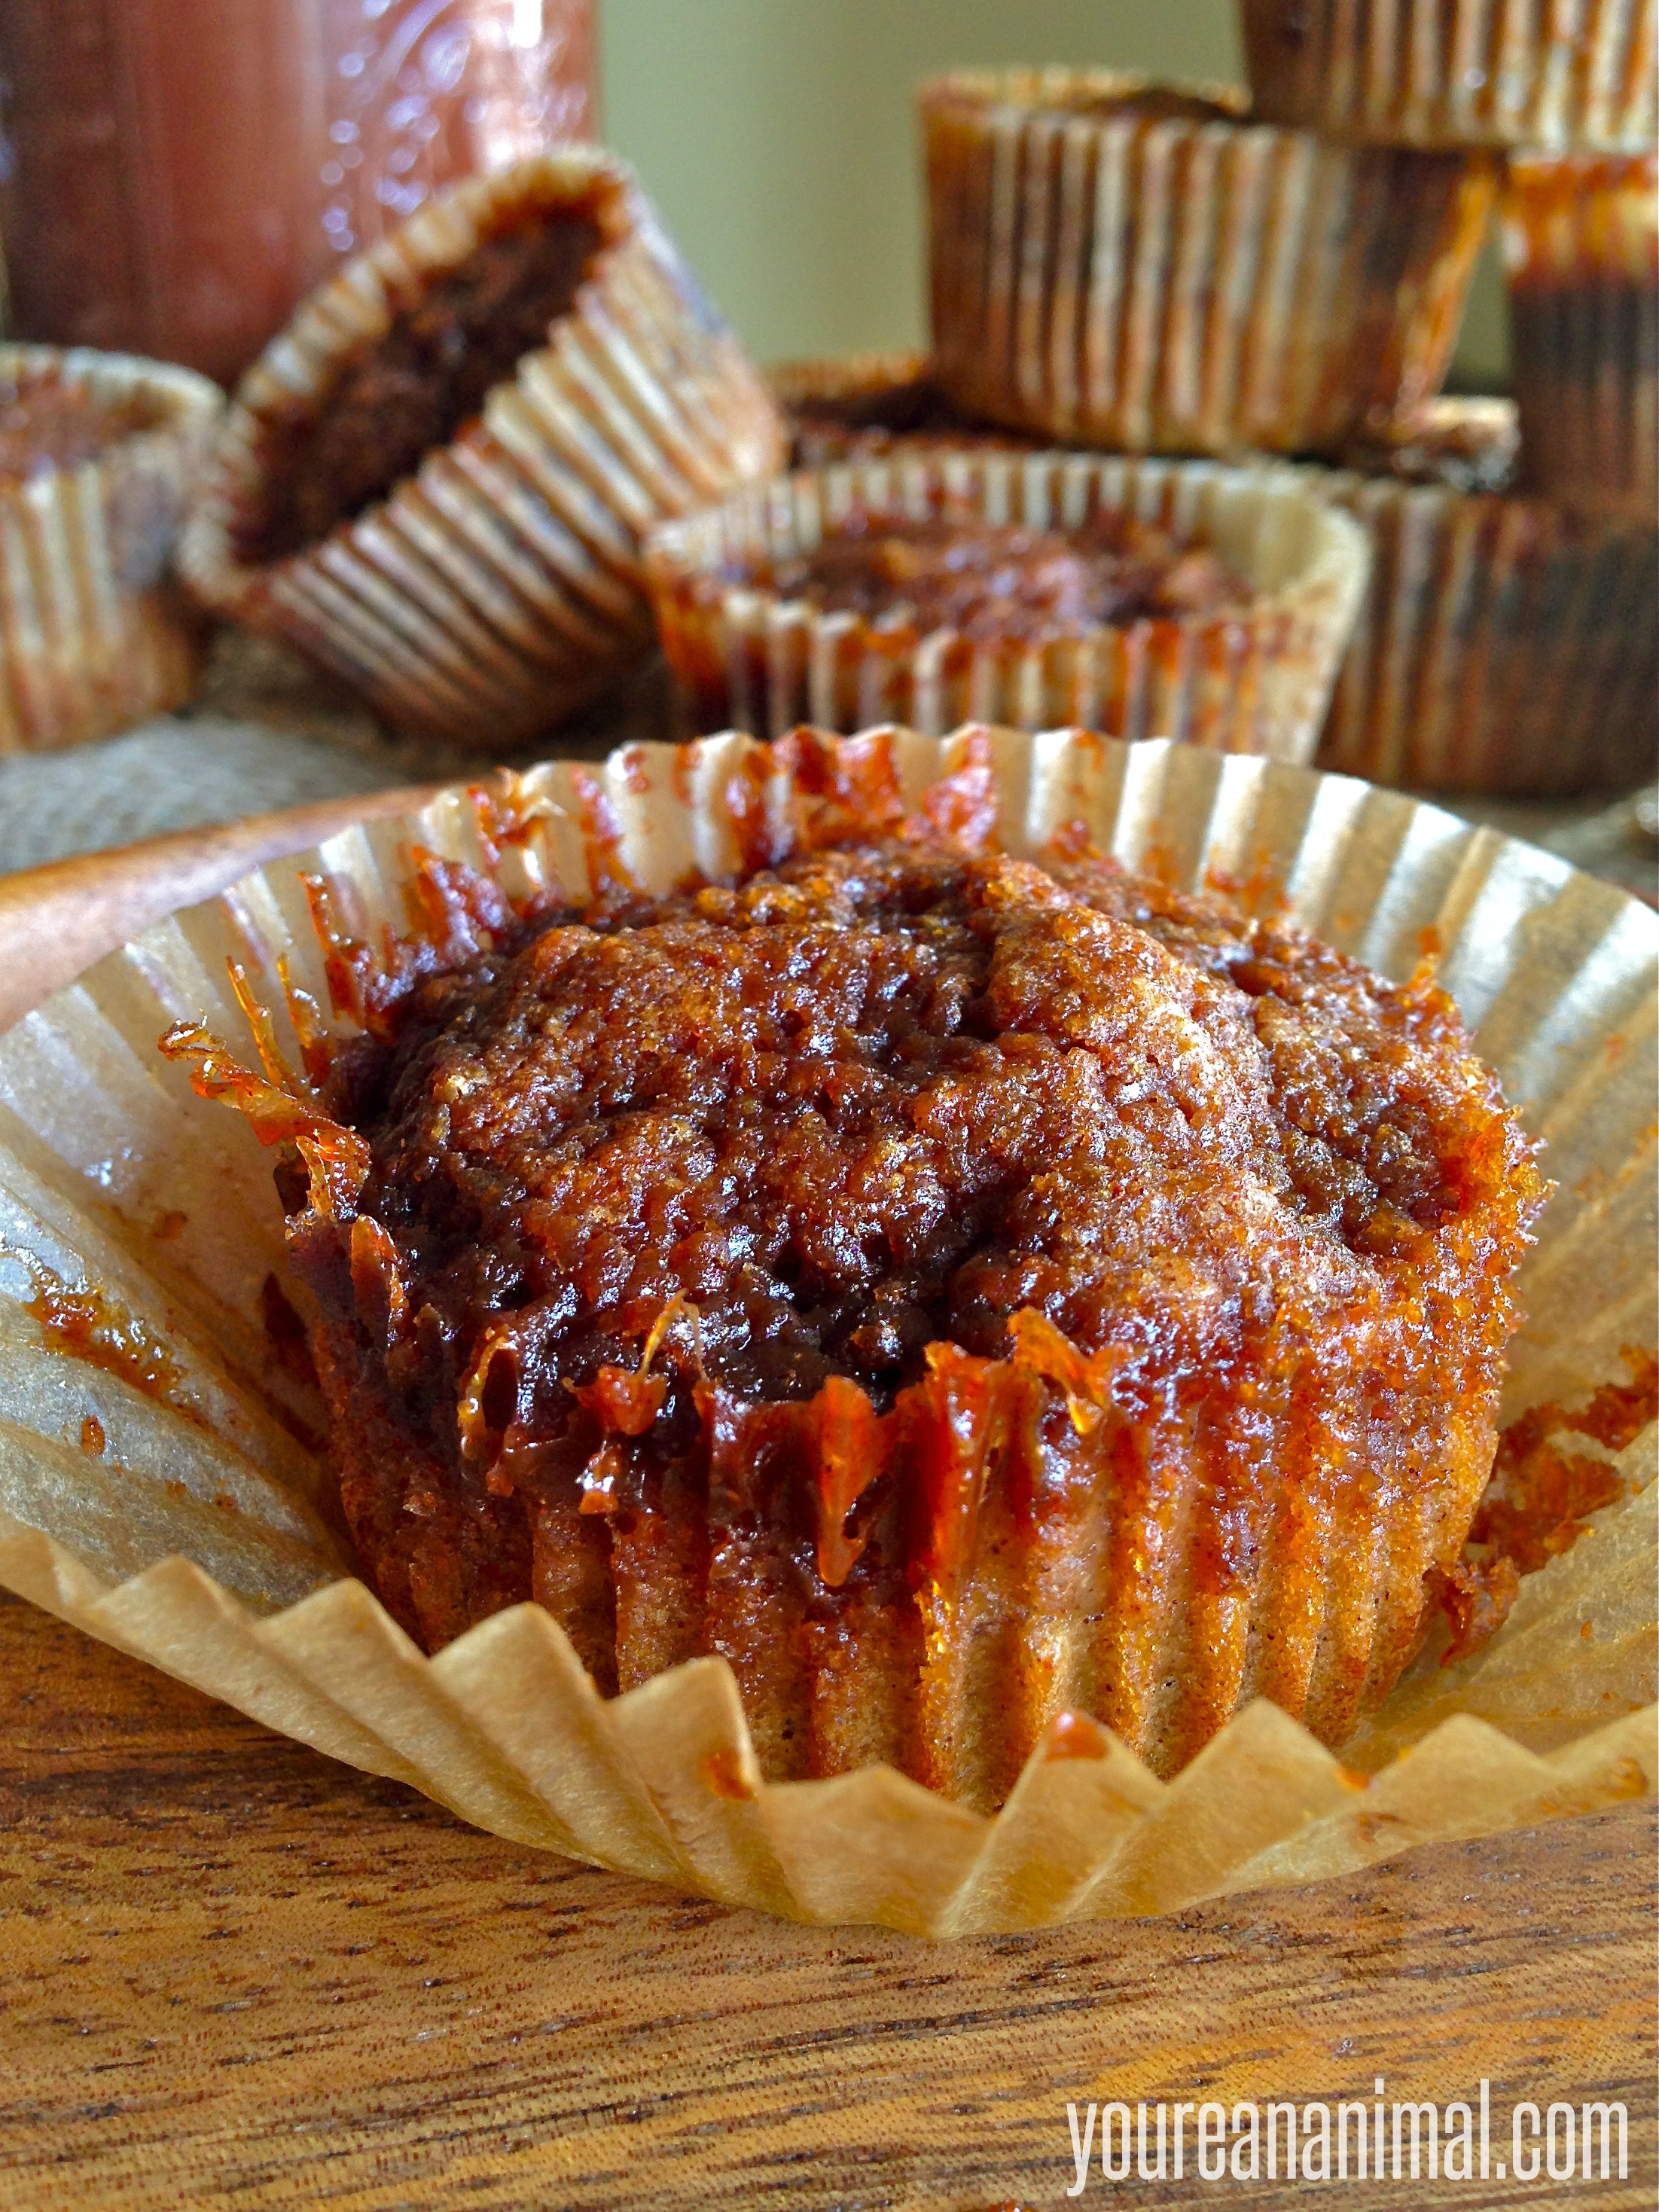
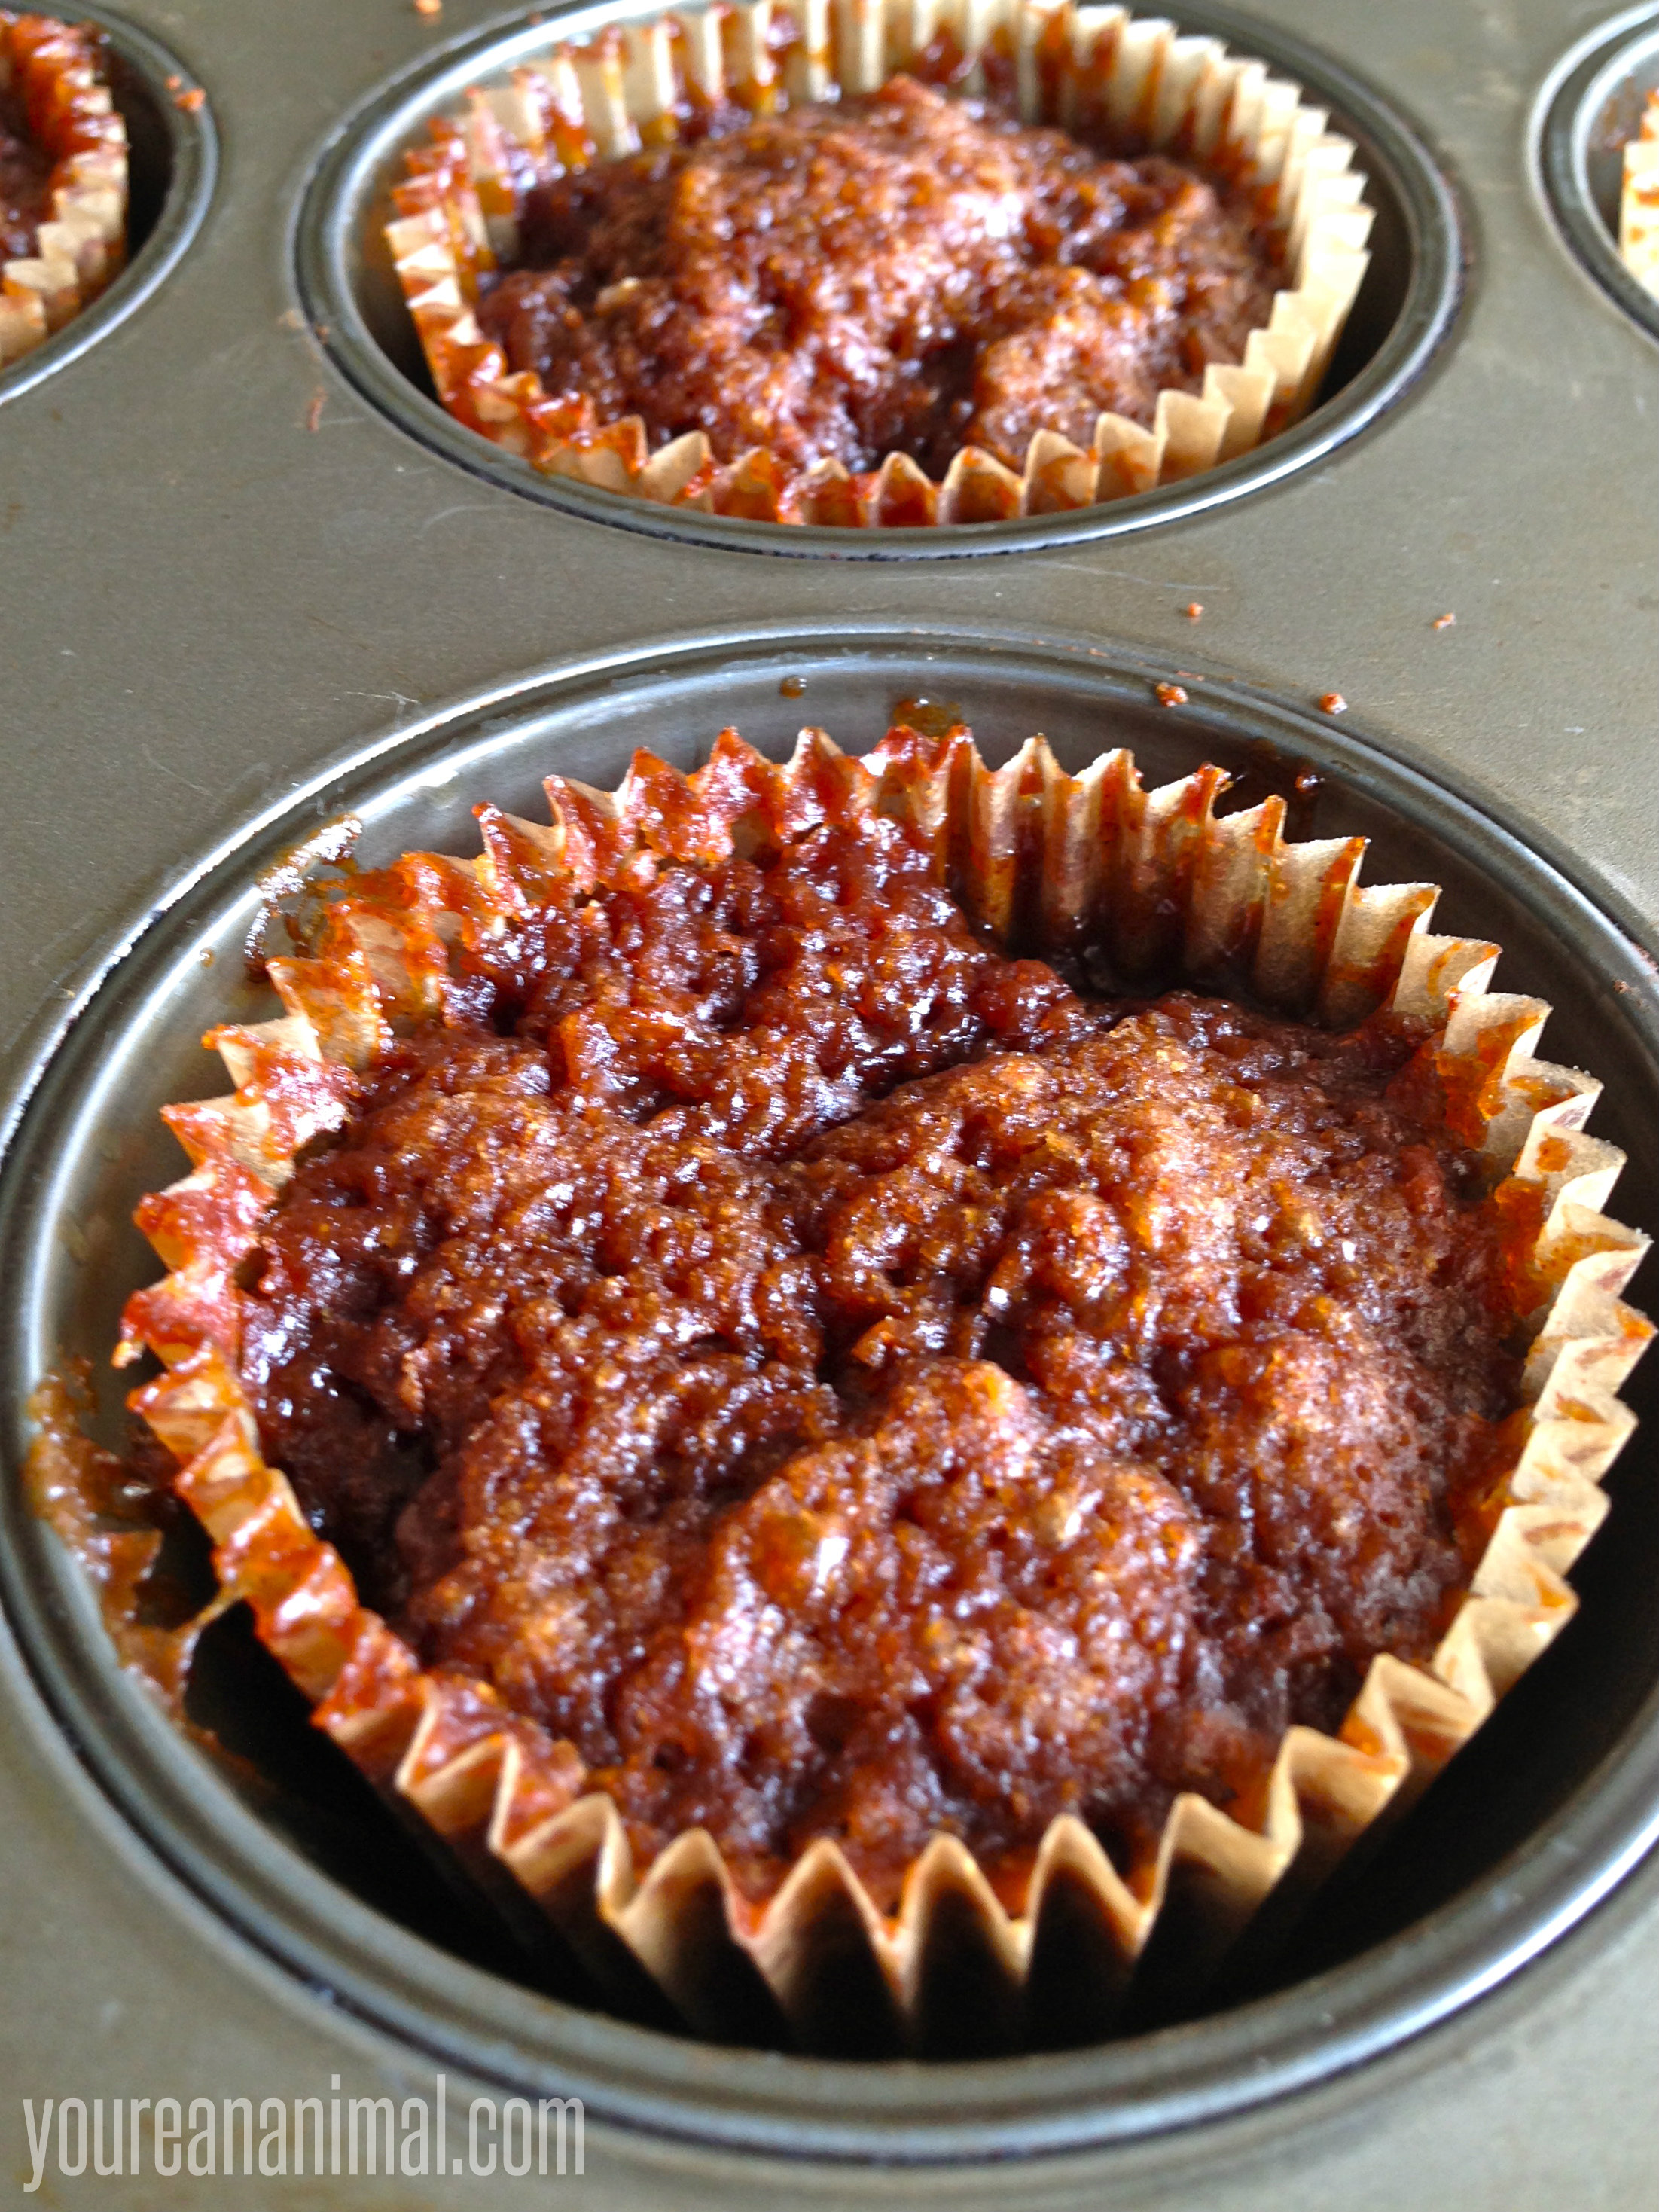
Okay, now onto the muffins. I love me a good muffin. After switching to a mostly grain-free lifestyle, breakfast pastries and baked goods were definitely the things I missed the most. To me, breakfast wasn’t breakfast without some kind of sweet carb. I’ve learned to move past that, and now usually have one of my Superfood Green Smoothies for breakfast, but every once in a while I like to get that sweet treat. And since it’s fall time, I really wanted to do something with my apple butter obsession. And with that, Apple Butter Muffins were born! These muffins are fluffy, moist, and sweet. The apple butter taste is very mild, so if you want a spicier muffin*, you can add about 1 tsp cinnamon, 1/4 tsp clove and 1/4 tsp nutmeg to your muffin batter. Or for lighter flavor, leave out the extra spices. It’s up to you! I also added the sweet topping, because I did not add any sugar to the muffin batter. I love a crisp, sweet topping, and it worked perfectly. However, if you don’t want the extra sugar, you can certainly leave it out. Or simply drizzle apple butter over the top. Any and all options would be delicious!
Line a muffin tin with muffin papers, or grease the pan liberally.
In a large mixing bowl, combine the 1 cup of apple butter, eggs, and apple cider vinegar.
Sift in the dry ingredients (coconut flour, potato starch, arrowroot, baking soda, baking powder, and optional spices).
Mix the ingredients by hand until smooth. Do not over mix, the batter should be light and loose.
Spoon the batter into your muffin tin, filling each cup about 2/3 full.
In a smaller mixing bowl, use a fork to combine all of your sugar topping ingredients. The mixture should be in the consistency of wet sand.
Evenly distribute the sugar topping over the muffins, pressing the topping into the batter slightly.
Place the muffins in the oven, and bake for 17-19 minutes, or until the muffins have risen and spring back in the center when touched.
Makes 12 regular sized muffins.
Please note that some of the links in the above post are affiliate links that will take you to an Amazon.com page. If you choose to purchase a product featured in this post using an affiliate link, you will be directly supporting You’re An Animal. Thanks!
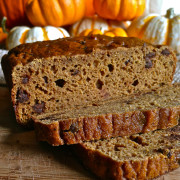
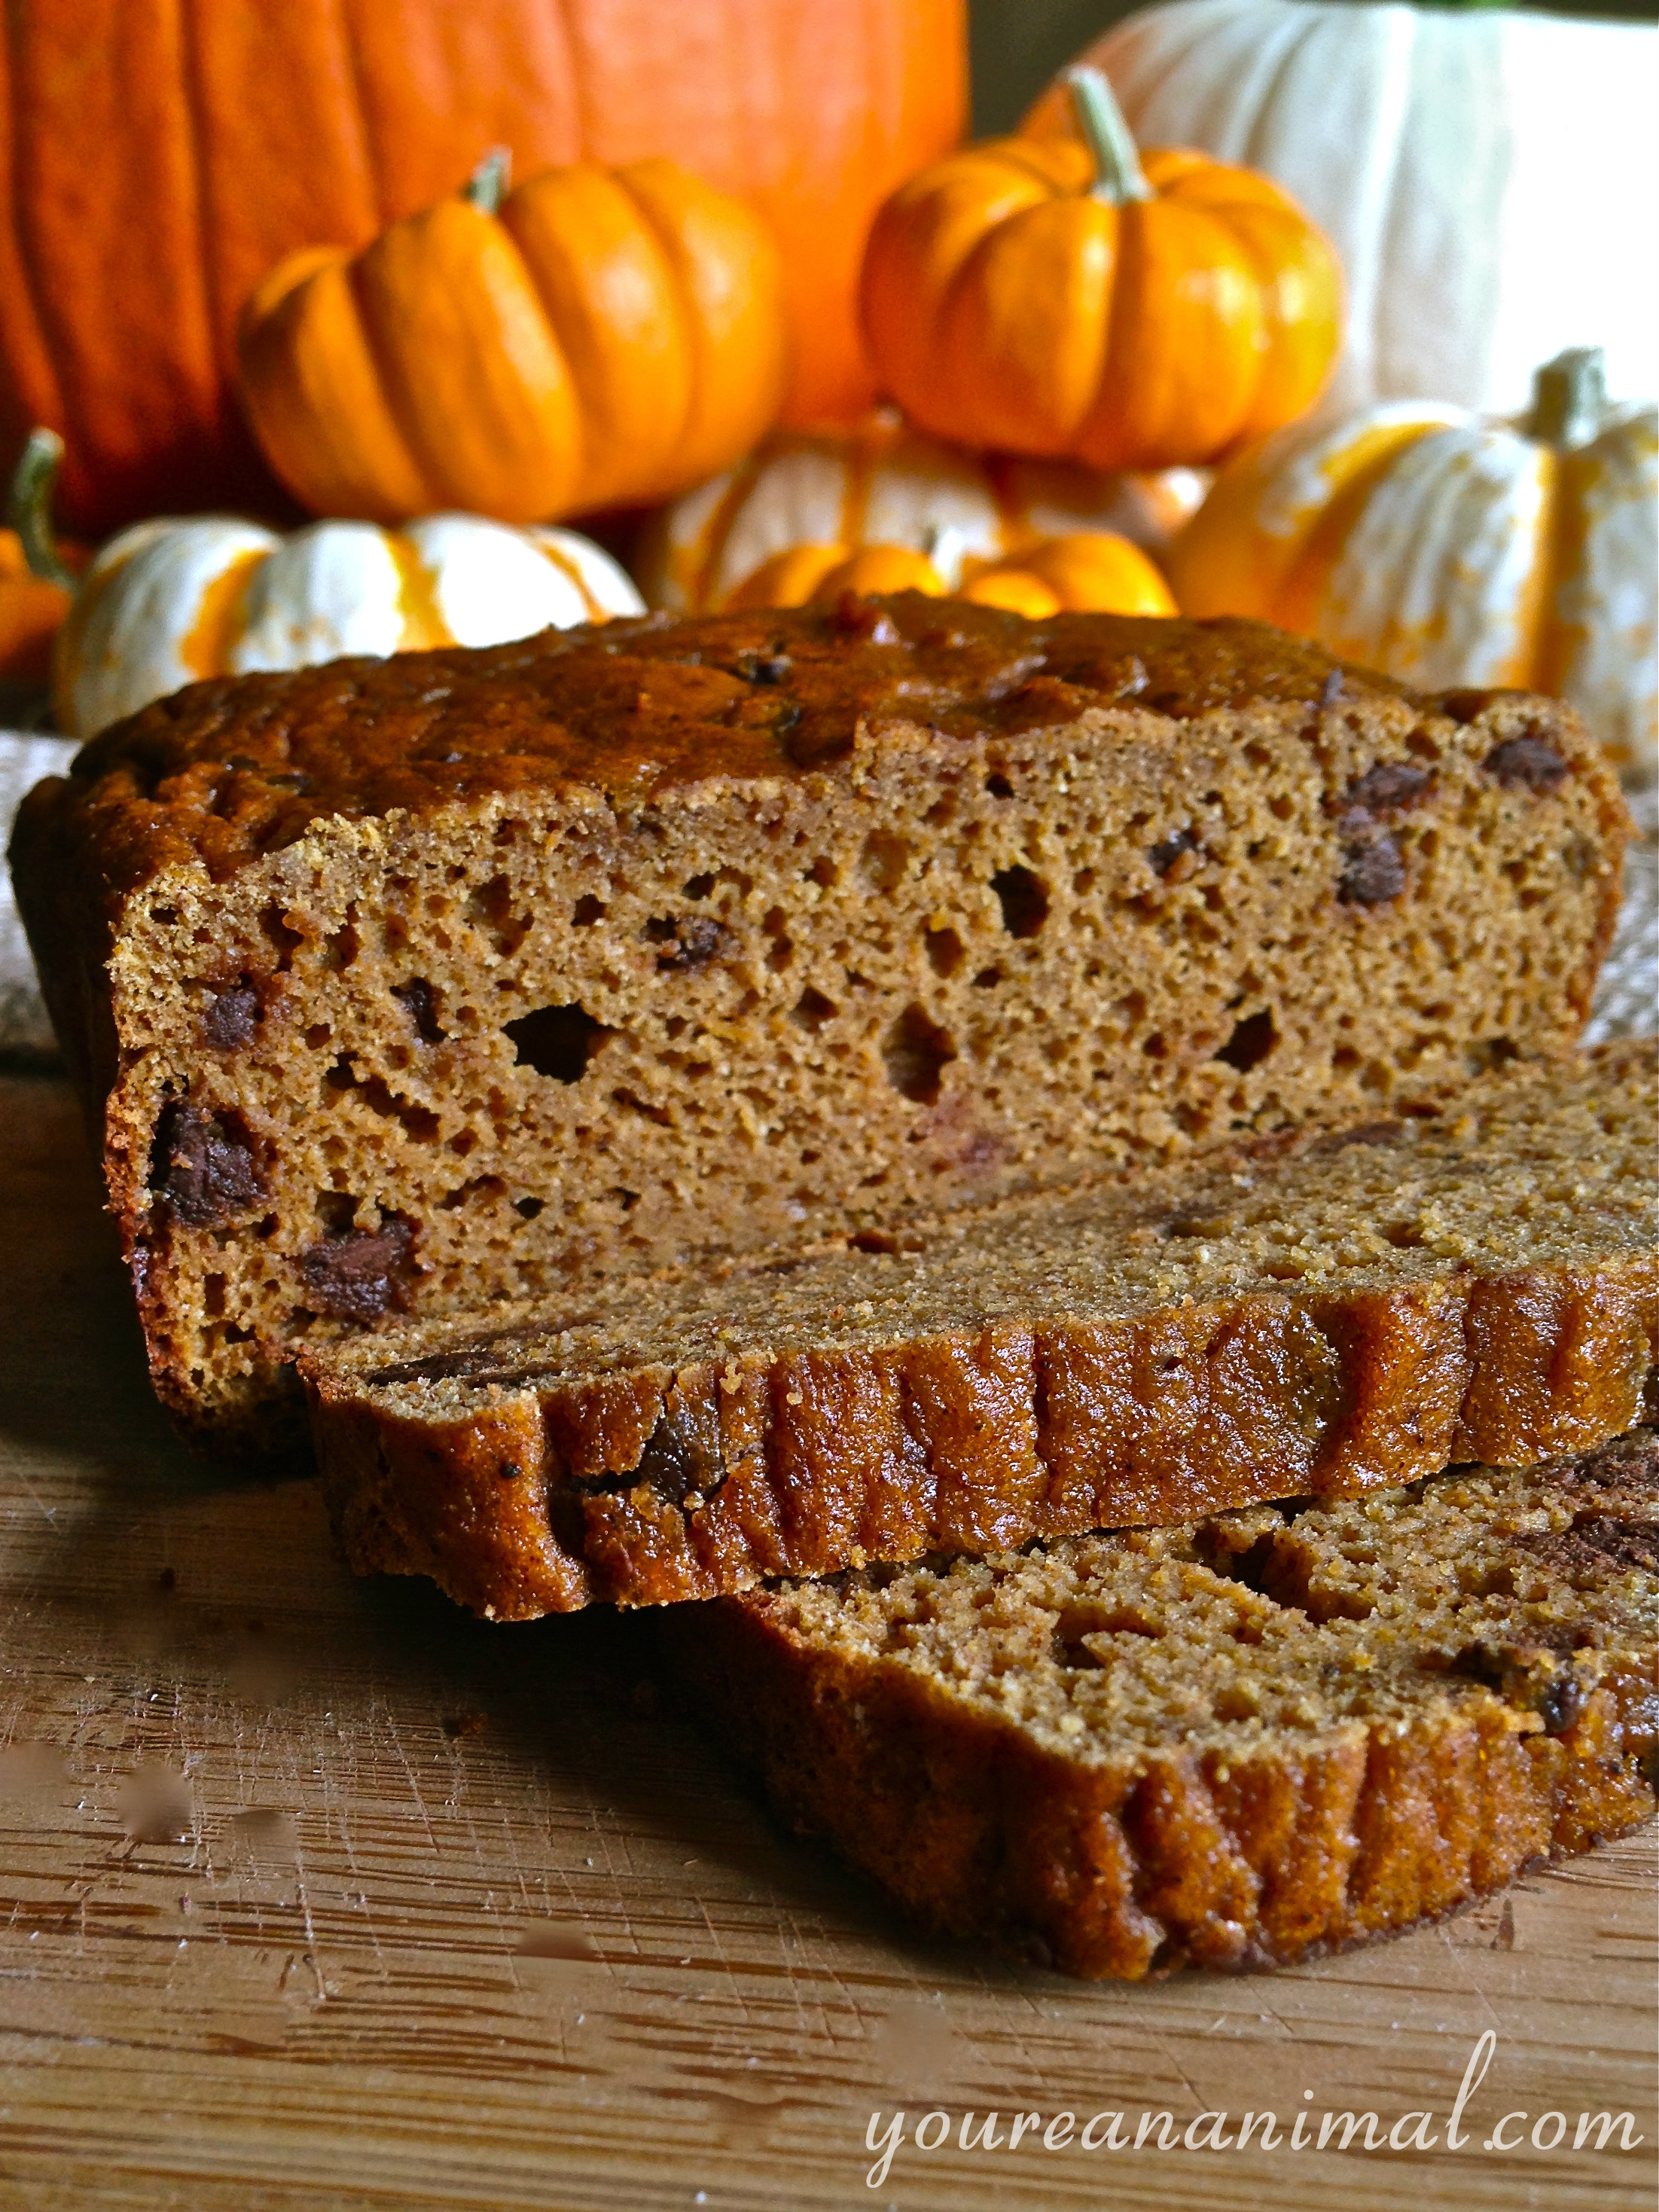
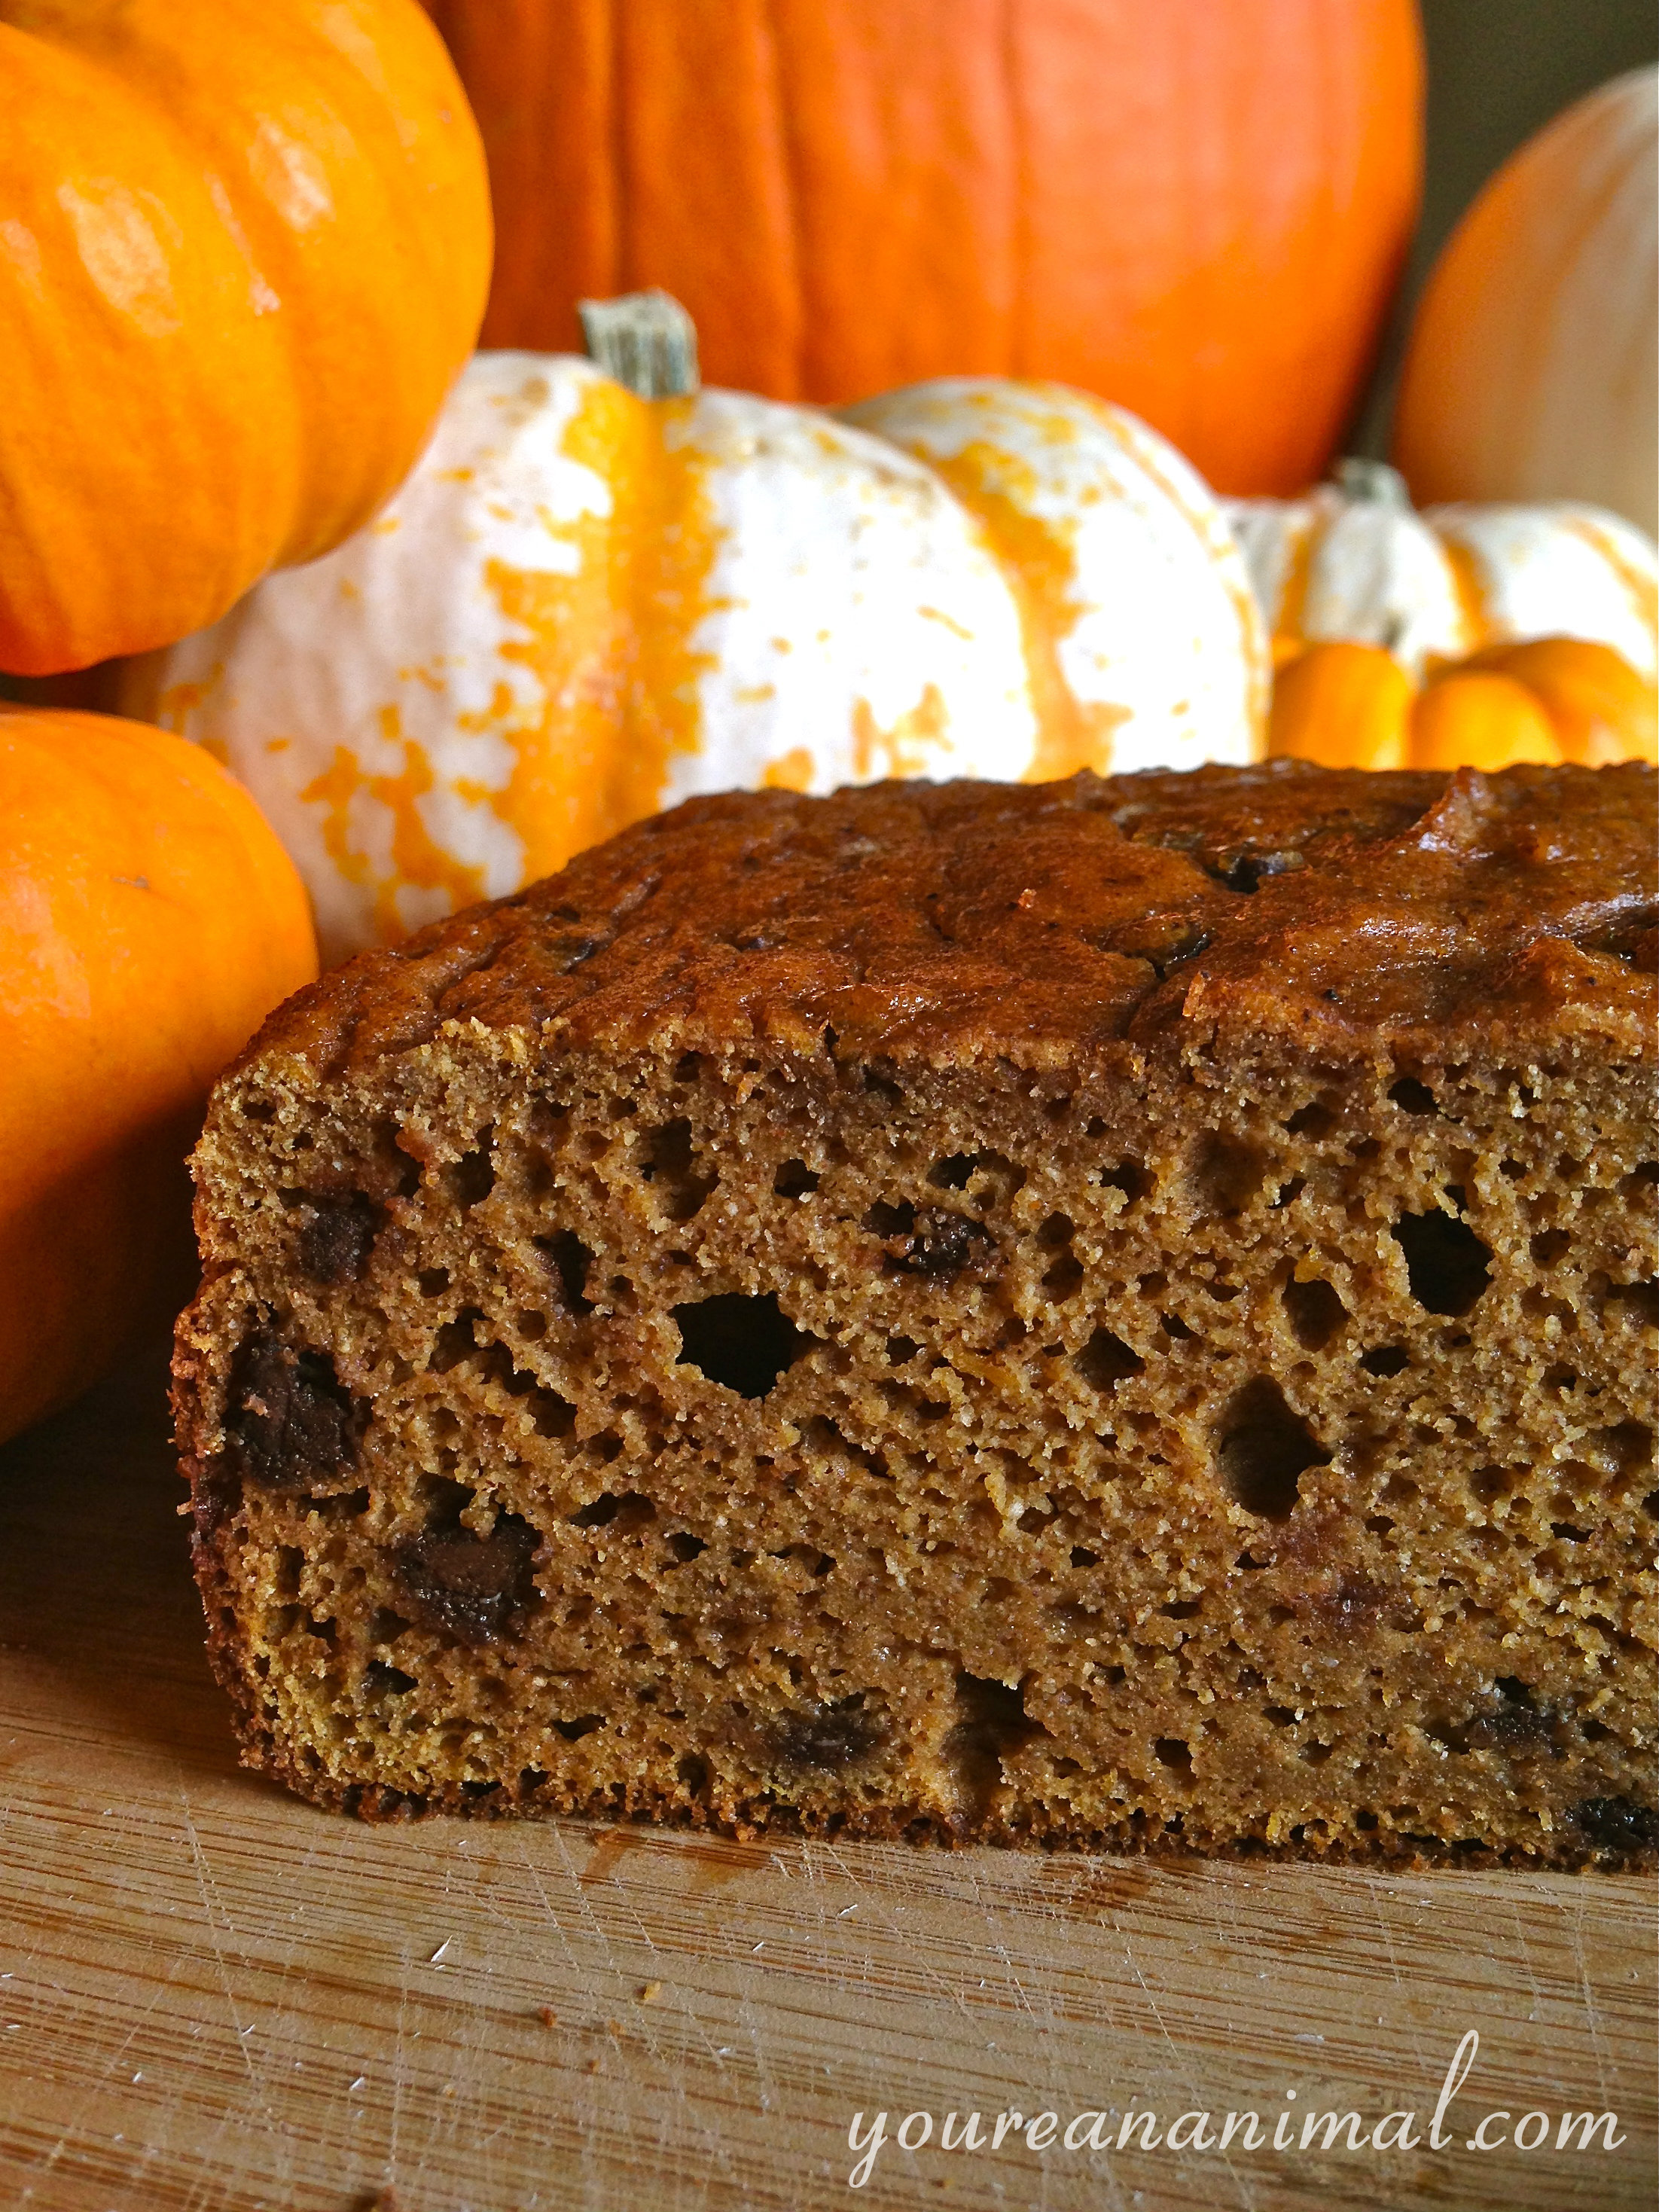
Welcome to Part 2 of my Pumpkin Everything obsession! I expressed my love for pumpkin season (aka I’m addicted to cinnamon) in my Dairy-Free Pumpkin Ice Cream post here, and am continuing the trend with a glorious grain-free, gluten-free, nut-free, white sugar-free, paleo (ish) pumpkin bread. Well what the heck is even in it? Coconut flour and starch, my dears! Andrew and I have decided to go without nuts and seeds, at least for a little while, after realizing how much phytic acid we were eating with our nut and seed intake. I had already cut out nuts last fall after getting rashes on my legs and face, but Andrew was having a weird reaction on his tongue (almost like a Geographic Tongue), and after a lot of research we decided that it might be worth a try to cut out the nuts and seeds. And guess what… so far so good! We both feel better without the nuts and seeds, so we’re sticking with it for now. However, that makes grain-free baking increasingly more difficult, since most grain-free baking uses almond meal or sunflower seed meal as a replacement. So I began experimenting with something different: starch. Specifically potato starch and arrowroot starch. I have come to prefer potato starch for baking, as I think arrowroot starch is a little too chewy and has a stronger taste when used in larger quantities. Now, I know there are mixed feelings about potatoes (helllllo carbs… and this is also why I dubbed this “paleo-ish” since for many paleo people white potatoes are a no-no) and therefore potato starch may throw up a red flag for a lot of people, but when we went to Portland we were introduced to an interesting concept. That concept is called Resistant Starch. I’m not going to go into the details here because it is still very new to me and I am no expert, but basically resistant starch can be found in cooled starches such as white potatoes and white rice, and is very beneficial for gut flora and essentially acts as a pro-biotic. You can read more about resistant starch in this article, and this article, but I also recommend you doing your own research. It’s been very fascinating to learn about.
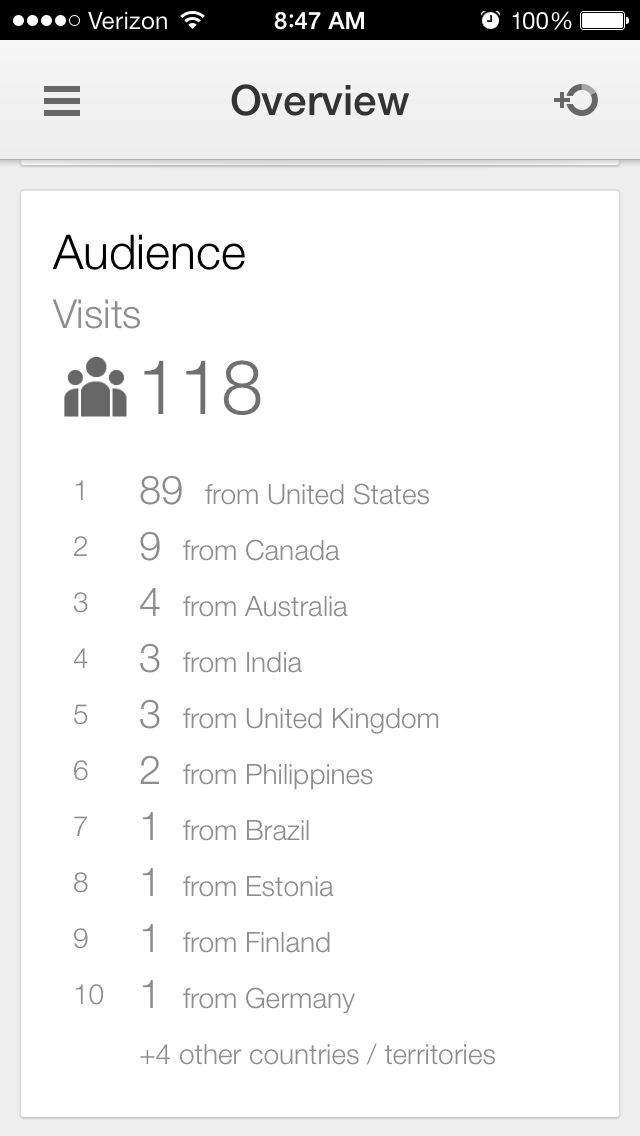
On another note, our little blog here hit over 100 unique visitors for the first time yesterday! Thanks to foodgawker.com for sending people our way. I’m excited to hopefully continue to see this website grow and start reaching more people! I’m really enjoying this new hobby and creative outlet, plus I love working on it with my guy 🙂
Okay, let’s go back to this pumpkin bread. It’s everything you expect from this classic seasonal treat: moist, springy, dense, and spicy. But luckily it’s got none of the bad, guilt-driving stuff that the usual recipe contains. I added chocolate chips because chocolate makes everything better and I adore the combination of chocolate and cinnamon/spice, but that’s up to you! Last night we ate this pumpkin bread topped with my Pumpkin Ice Cream and, oh yes, it was the perfect way to welcome in Autumn. So here you go friends, pumpkin everything is in full swing!
1/2 tsp baking powder (note that baking powder often uses corn starch, so eliminate if this is an issue for you)
1/2 tsp baking soda
1/2 tsp apple cider vinegar
2 tsp cinnamon
1/2 tsp each of powdered ginger, clove and nutmeg
1 tsp vanilla extract
optional: about 1/2 cup of chocolate chips (I use Enjoy Life)
Preheat the oven to 350 degrees F.
Whisk together the wet ingredients (pumpkin, eggs, maple syrup, vanilla, and apple cider vinegar) in a large mixing bowl.
Sift the dry ingredients (coconut flour, potato starch, arrowroot starch, baking powder, baking soda, spices) into the wet ingredients. Sifting removes any lumps in the dry ingredients, and helps lighten up the batter.
Use an electric mixer to thoroughly combine the mixture, until all ingredients are incorporated and the batter is completely smooth.
Fold in the chocolate chips if desired.
Pour the batter into a lined loaf pan (I line mine with parchment paper to ensure easy removal).
Place in preheated oven, and bake for 45-50 minutes, or until the top is cracked and an inserted toothpick comes out clean.
Please note that some of the links in the above post are affiliate links that will take you to an Amazon.com page. If you choose to purchase a product featured in this post using an affiliate link, you will be directly supporting You’re An Animal. Thanks!
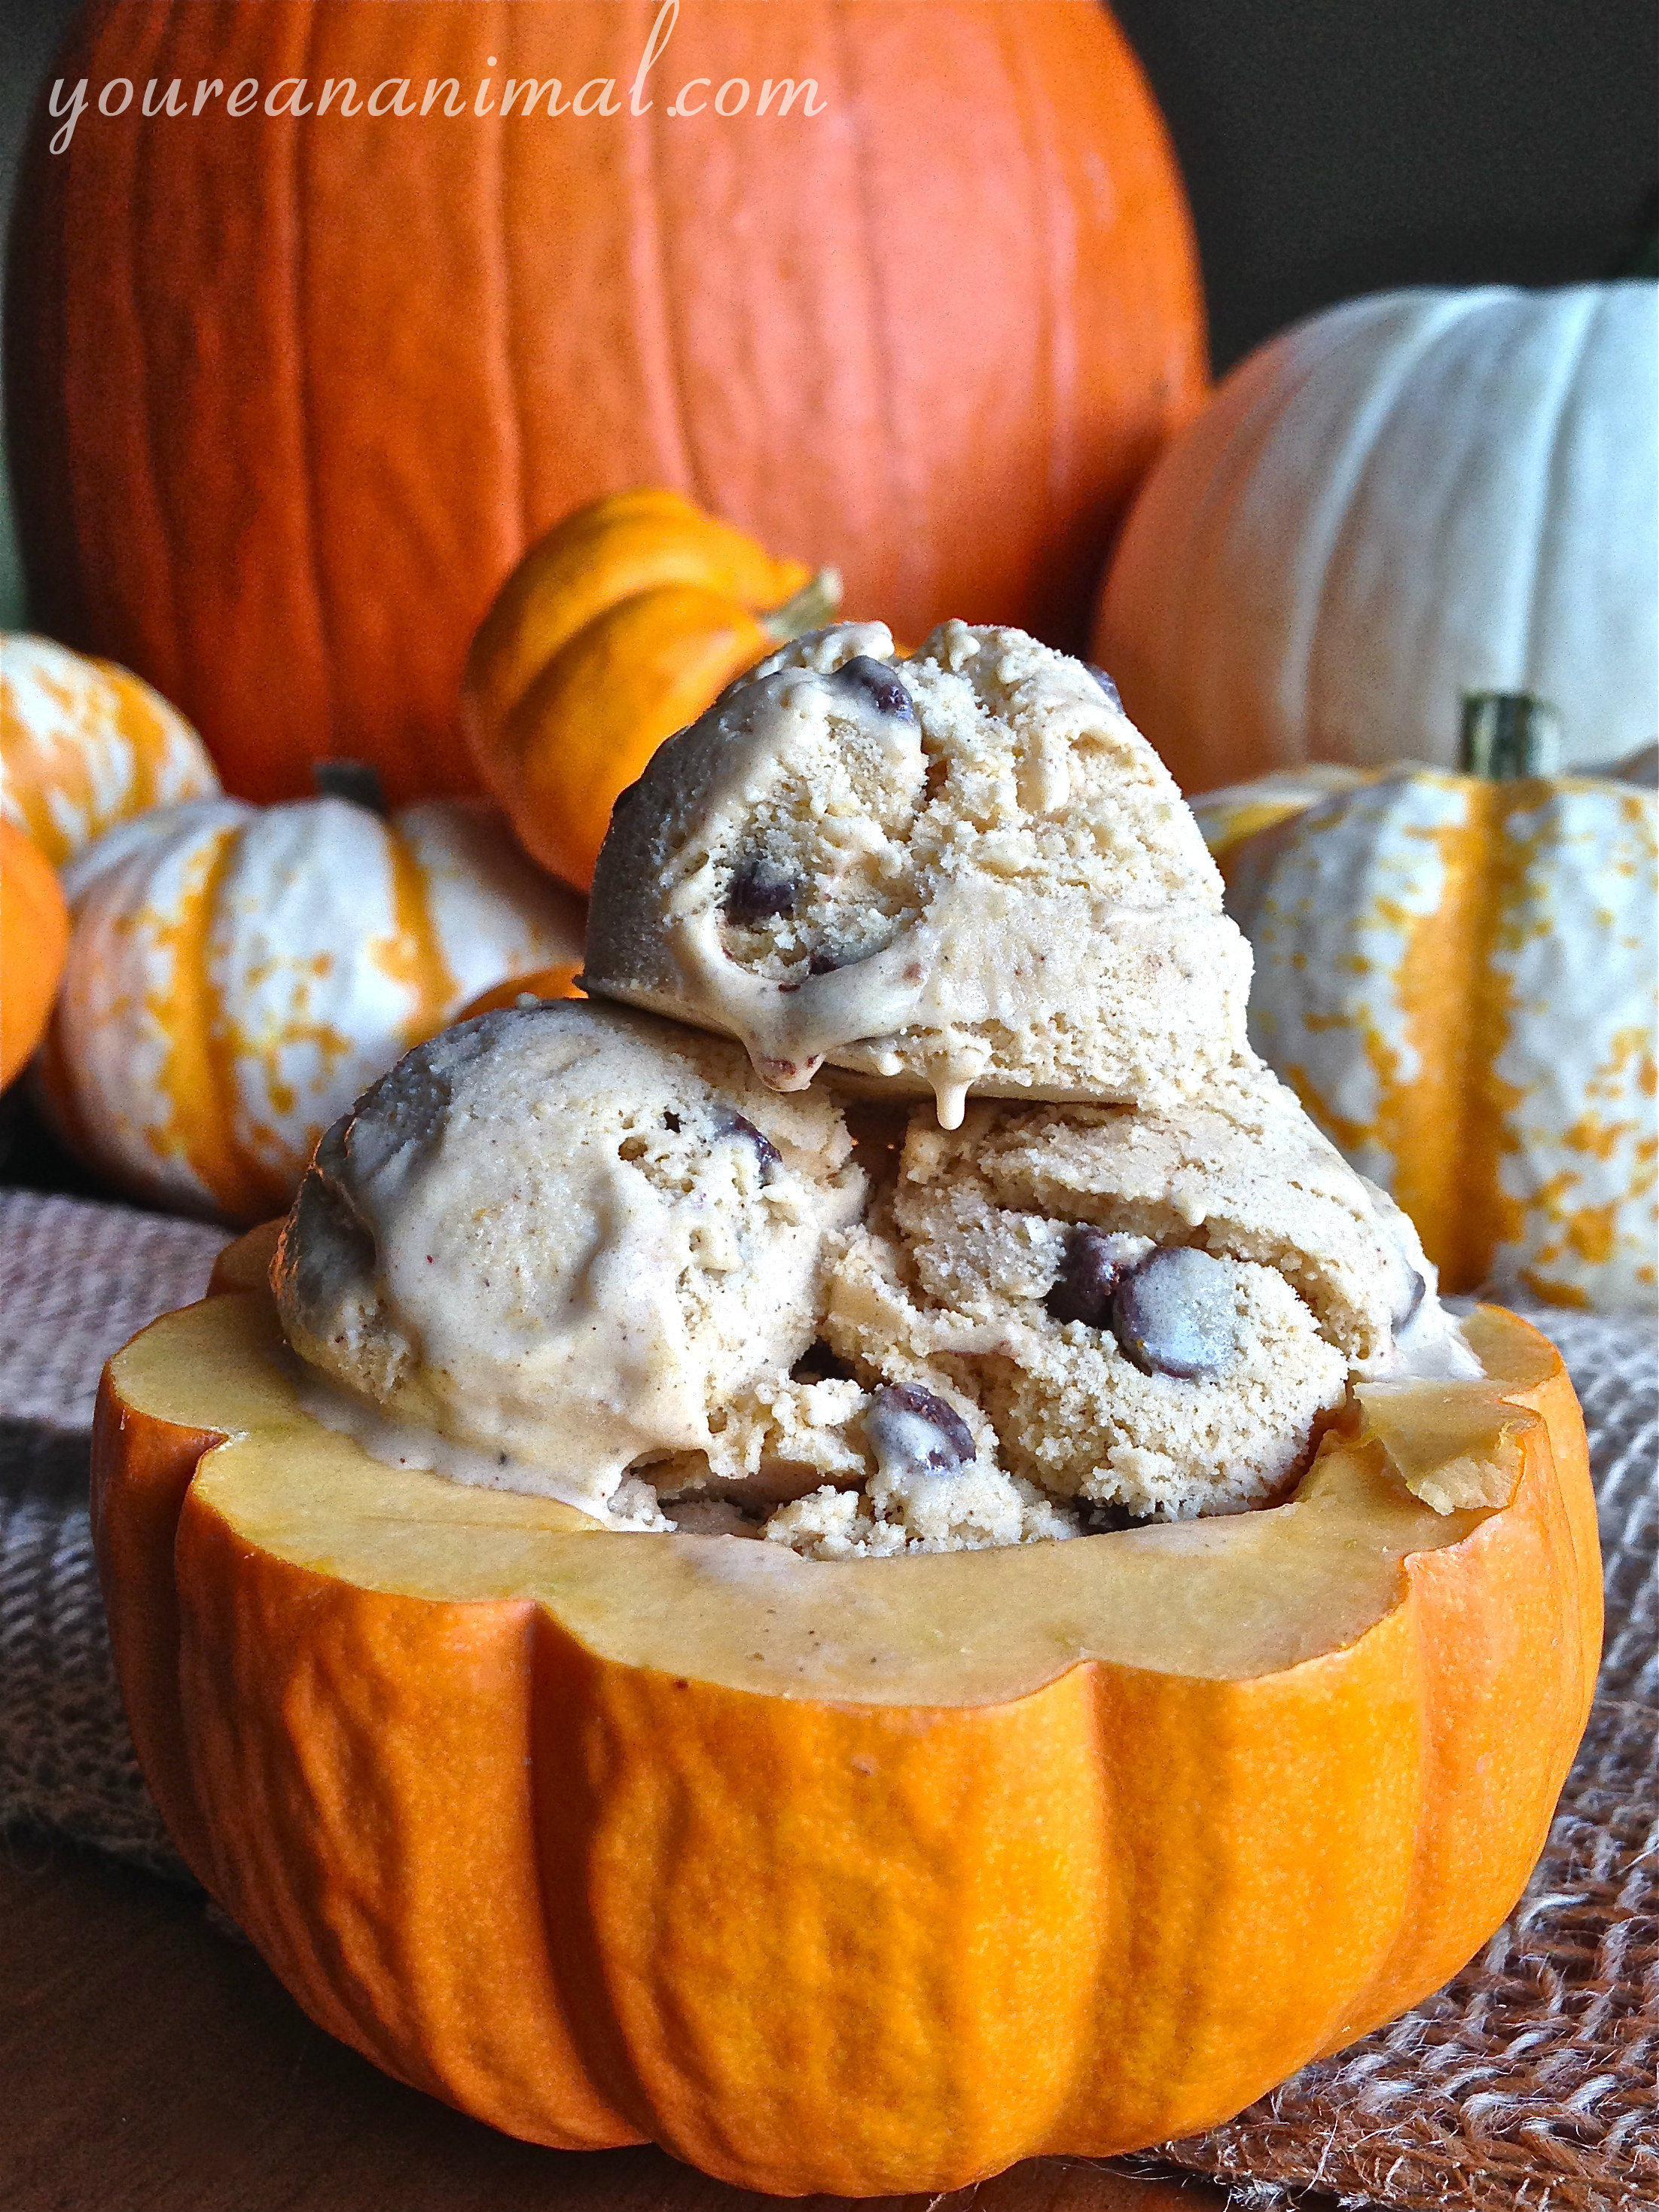
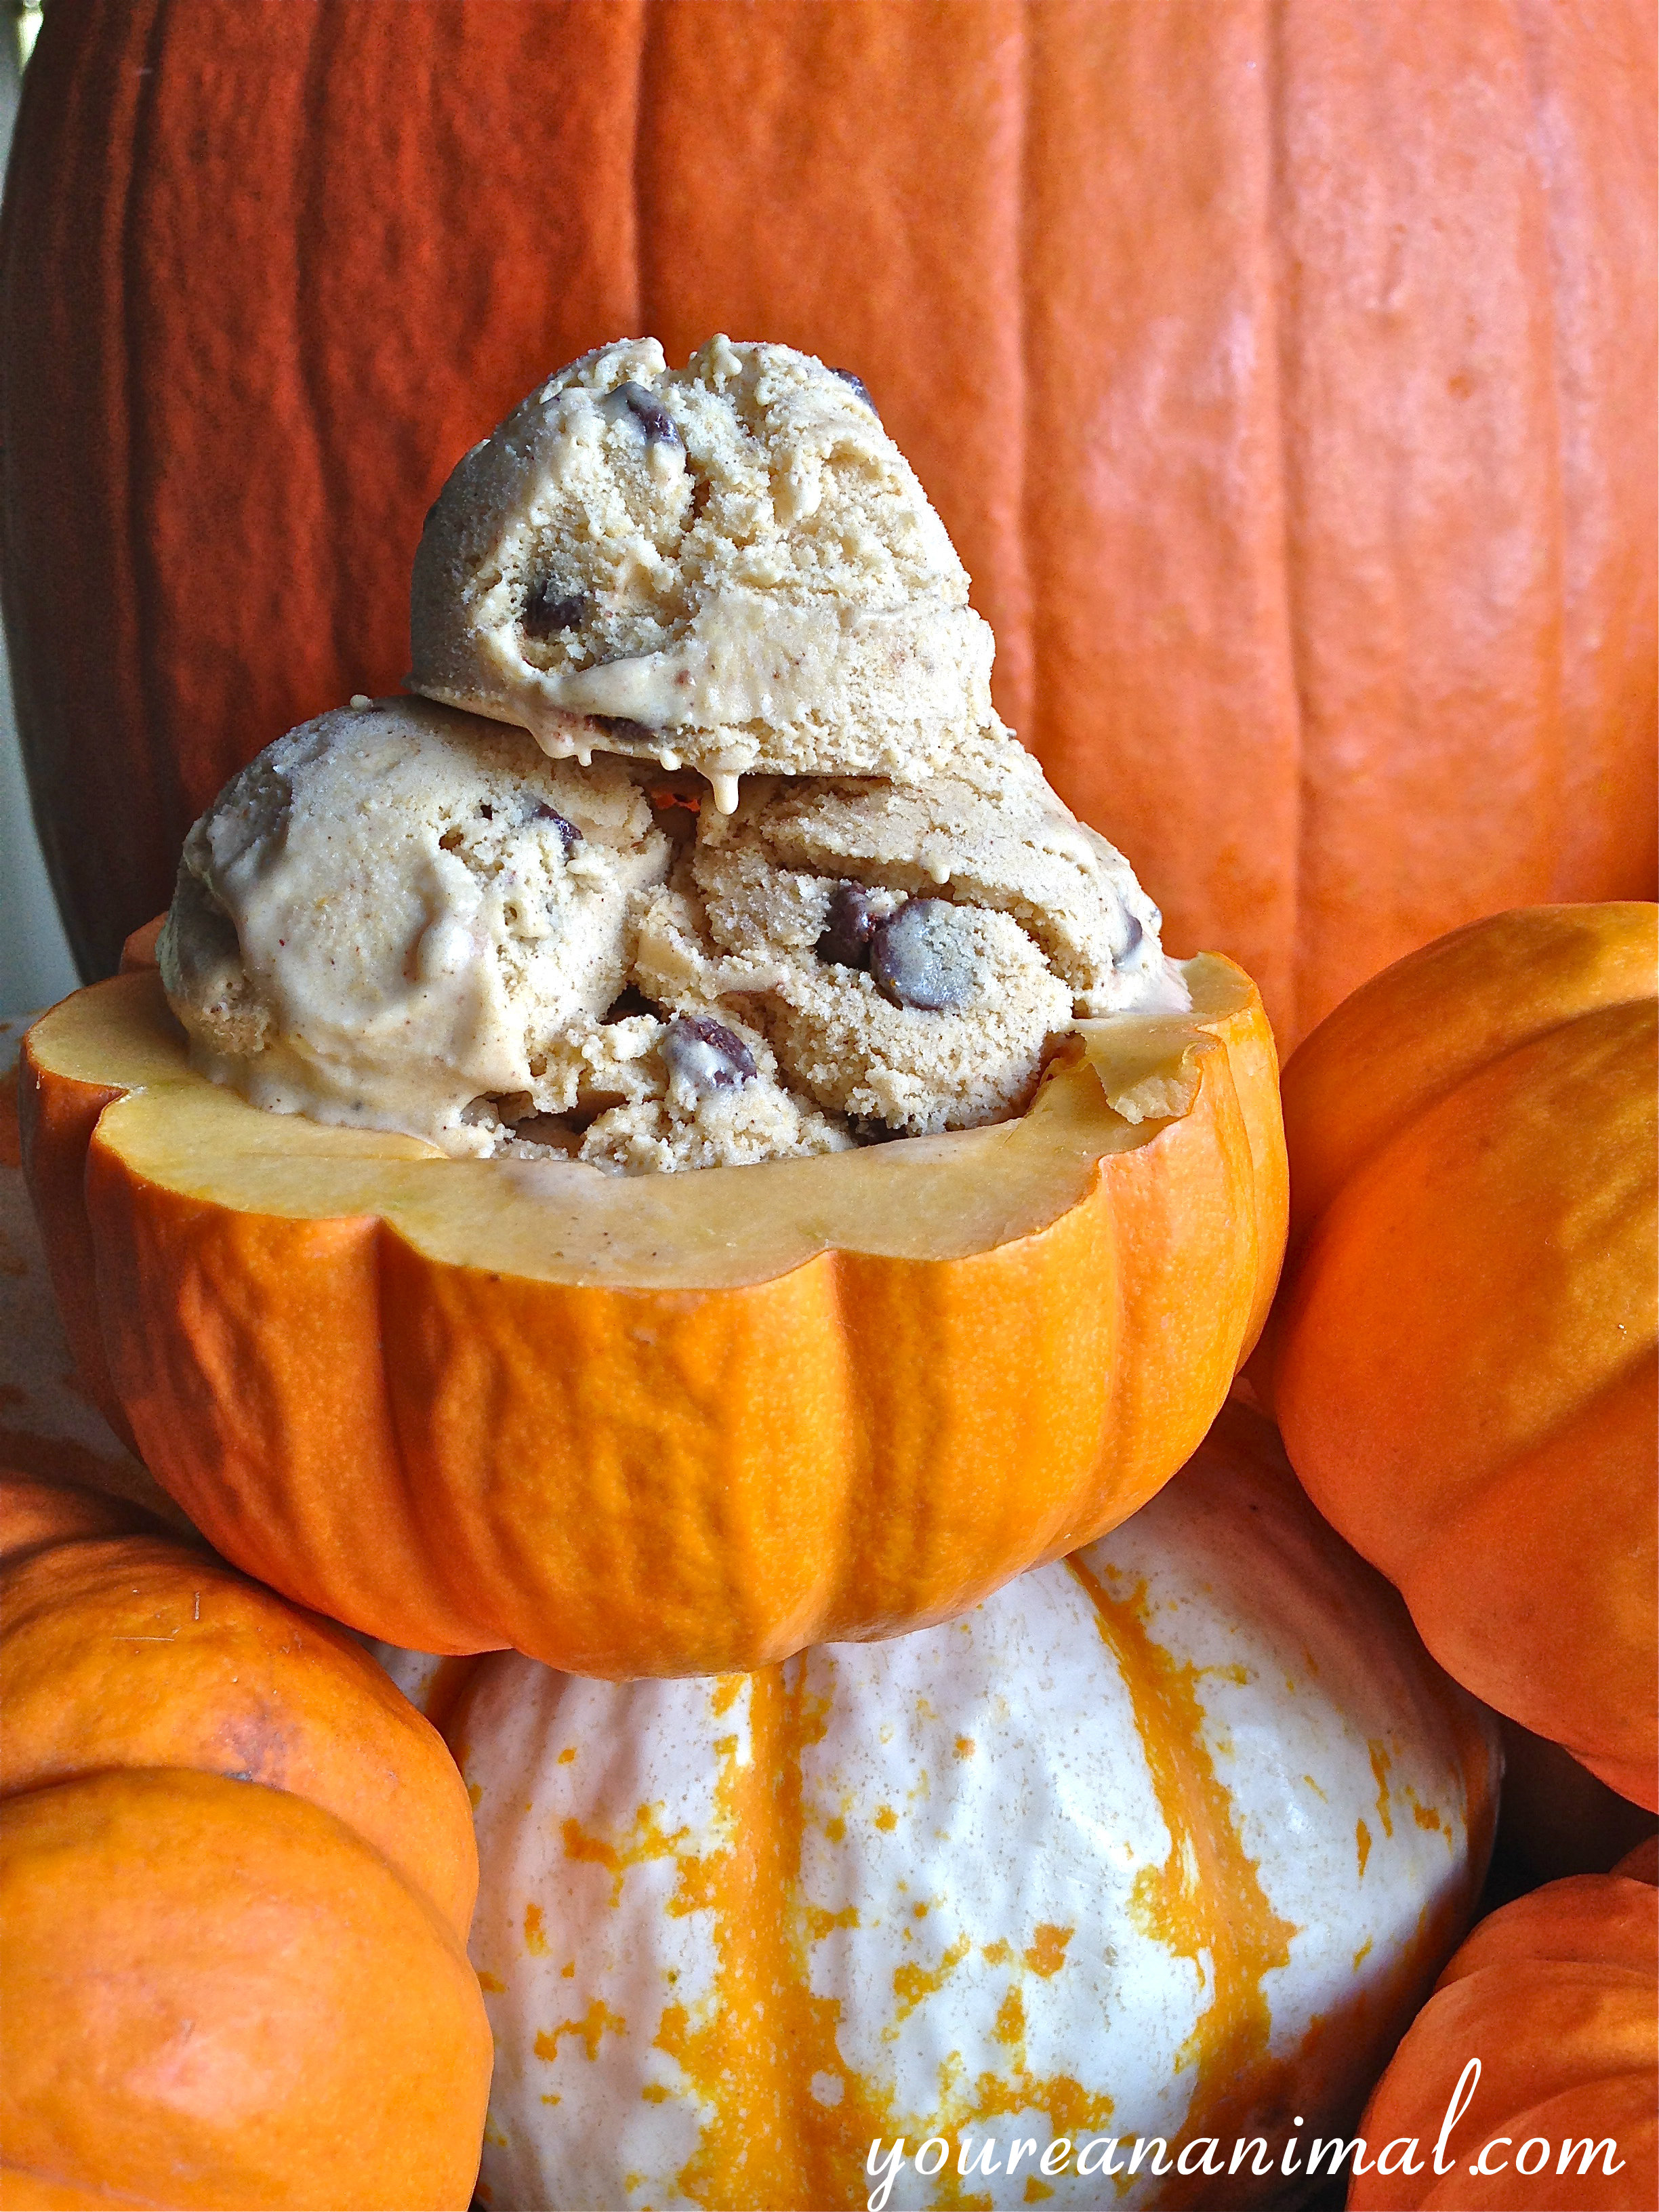
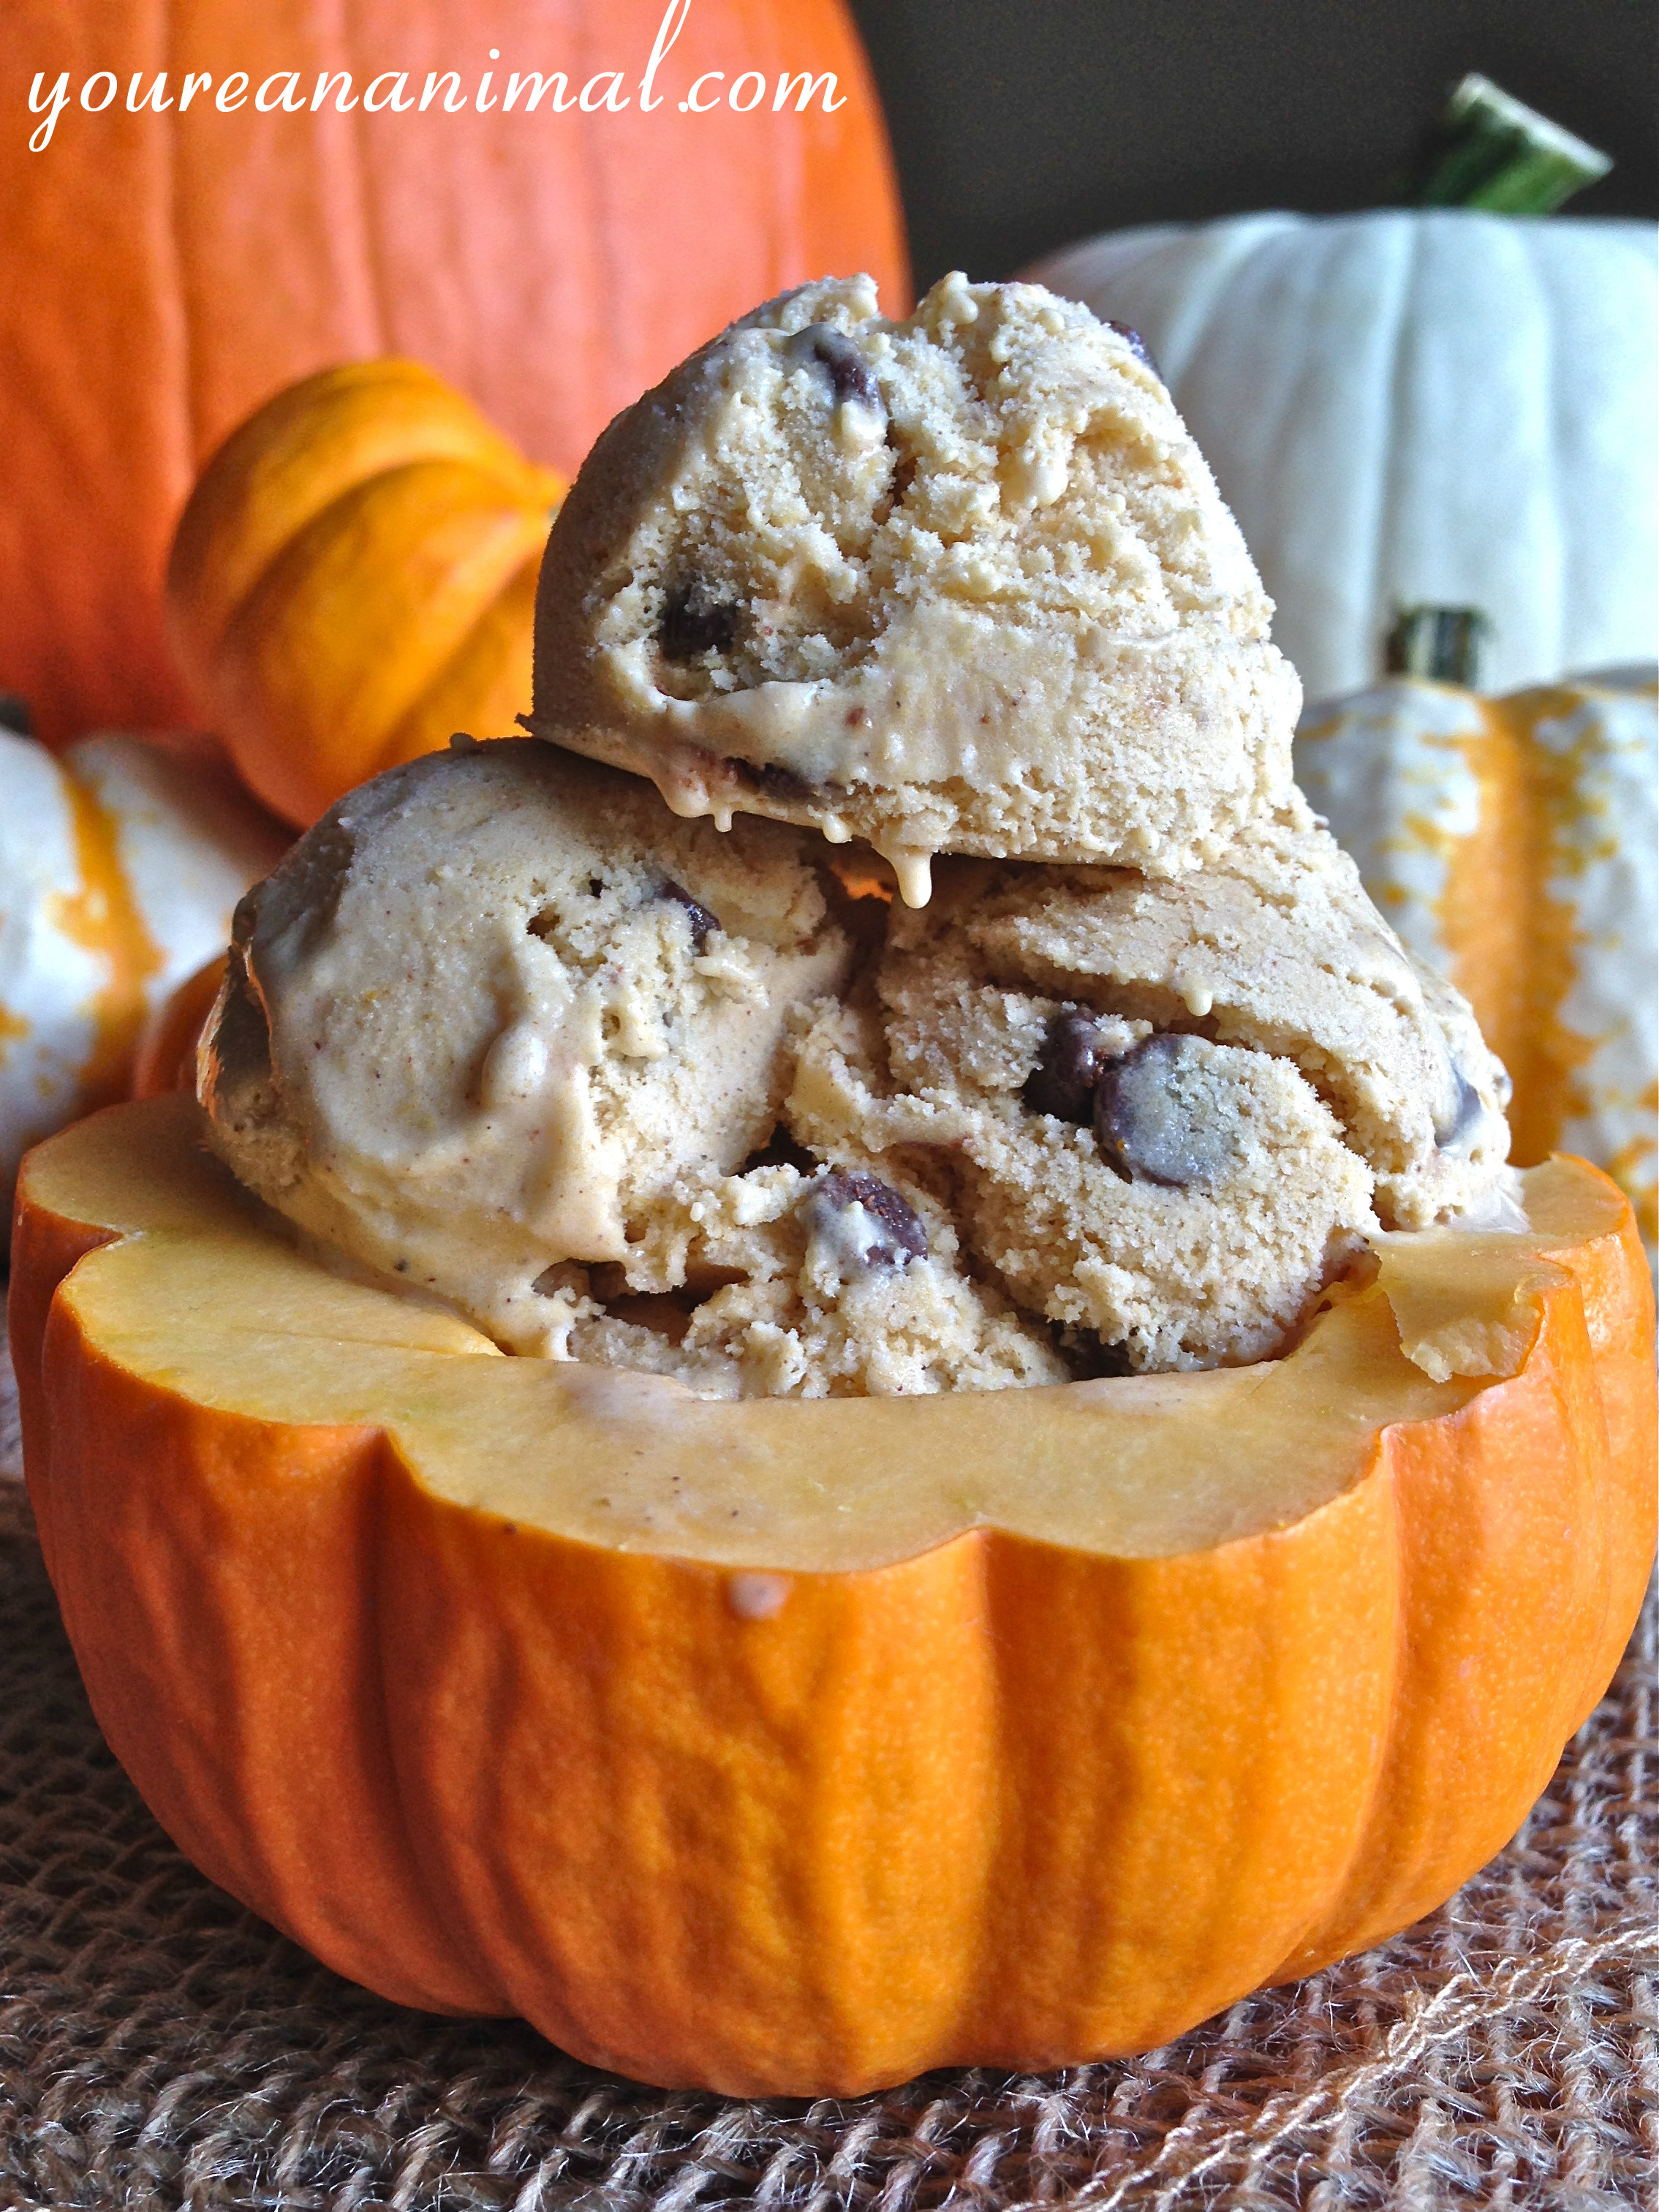
IT’S TIME FOR PUMPKIN EVERYTHING! This trend has grown more and more prevalent in the last couple of years, and I ain’t complainin’. I don’t know why we are all so obsessed with pumpkin season, but I know for me it’s the pumpkin spice combo. Cinnamon, in particular. I love me some cinny-mon. Cinnamon on everything pretty please! I can promise you that while this is the first pumpkin recipe I’ve posted, it most certainly won’t be the last. It’s here, people, it’s here.
Let’s talk about this ice cream. As I mentioned in my Dairy-Free Coconut Ice Cream with Salted Caramel and Chocolate Ganache post, we got this ice cream maker recently and I’m loving it. We haven’t been without ice cream since. I’m sadly (but not so sadly) completely serious. Obviously I had to make my pumpkin recipe debut somehow, and since it’s still currently almost 90 degrees here in VA, ice cream seemed like the way to go. Oh and it was the way to go, my friends, it definitely was. Not to mention allergies are running wild this week (again, darn you VA) so we needed something to sooth our poor wittle scratchy throats. Pumpkin ice cream to the rescue! This stuff is pretty much pumpkin bread in a cold, semi-liquid form. Perfect for those late summer/early fall days when it’s cool at night but still gets toasty during the day. Pumpkin latte for the chilly mornings, then pumpkin ice cream as the day heats up. Sounds like a plan to me! Annnnd it’s dairy-free, so my fellow lactose intolerant (or simply avoiding dairy) people can enjoy freely. And by “freely’ I mean eating the entire quart. Alone. In one sitting. No no, let’s not take it too far. Bring it back in. I know you all have stocked up on pumpkin by now, so go buy some cans of coconut milk while you’re at it, and continue your pumpkin exploration. It’s a lovely, spicy adventure!
Combine all of the ingredients in a medium saucepan.
Heat the mixture over medium heat, stirring frequently, until the mixture is hot but before it boils.
Place the mixture in the fridge (I find it easiest to just put the saucepan directly in the fridge) and let chill for at least 1-2 hours, or longer.
Once completely chilled, strain the mixture through a sieve to remove any lumps and ensure a smooth ice cream. I find it easiest to strain the mixture directly into the ice cream maker.
Process the ice cream in your ice cream maker according to manufacturer directions. If adding the chocolate chips, add them in about 5 minutes before the ice cream is done. Transfer into your storage container. Enjoy!
Please note that some of the links in the above post are affiliate links that will take you to an Amazon.com page. If you choose to purchase a product featured in this post using an affiliate link, you will be directly supporting You’re An Animal. Thanks!
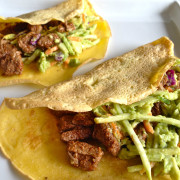
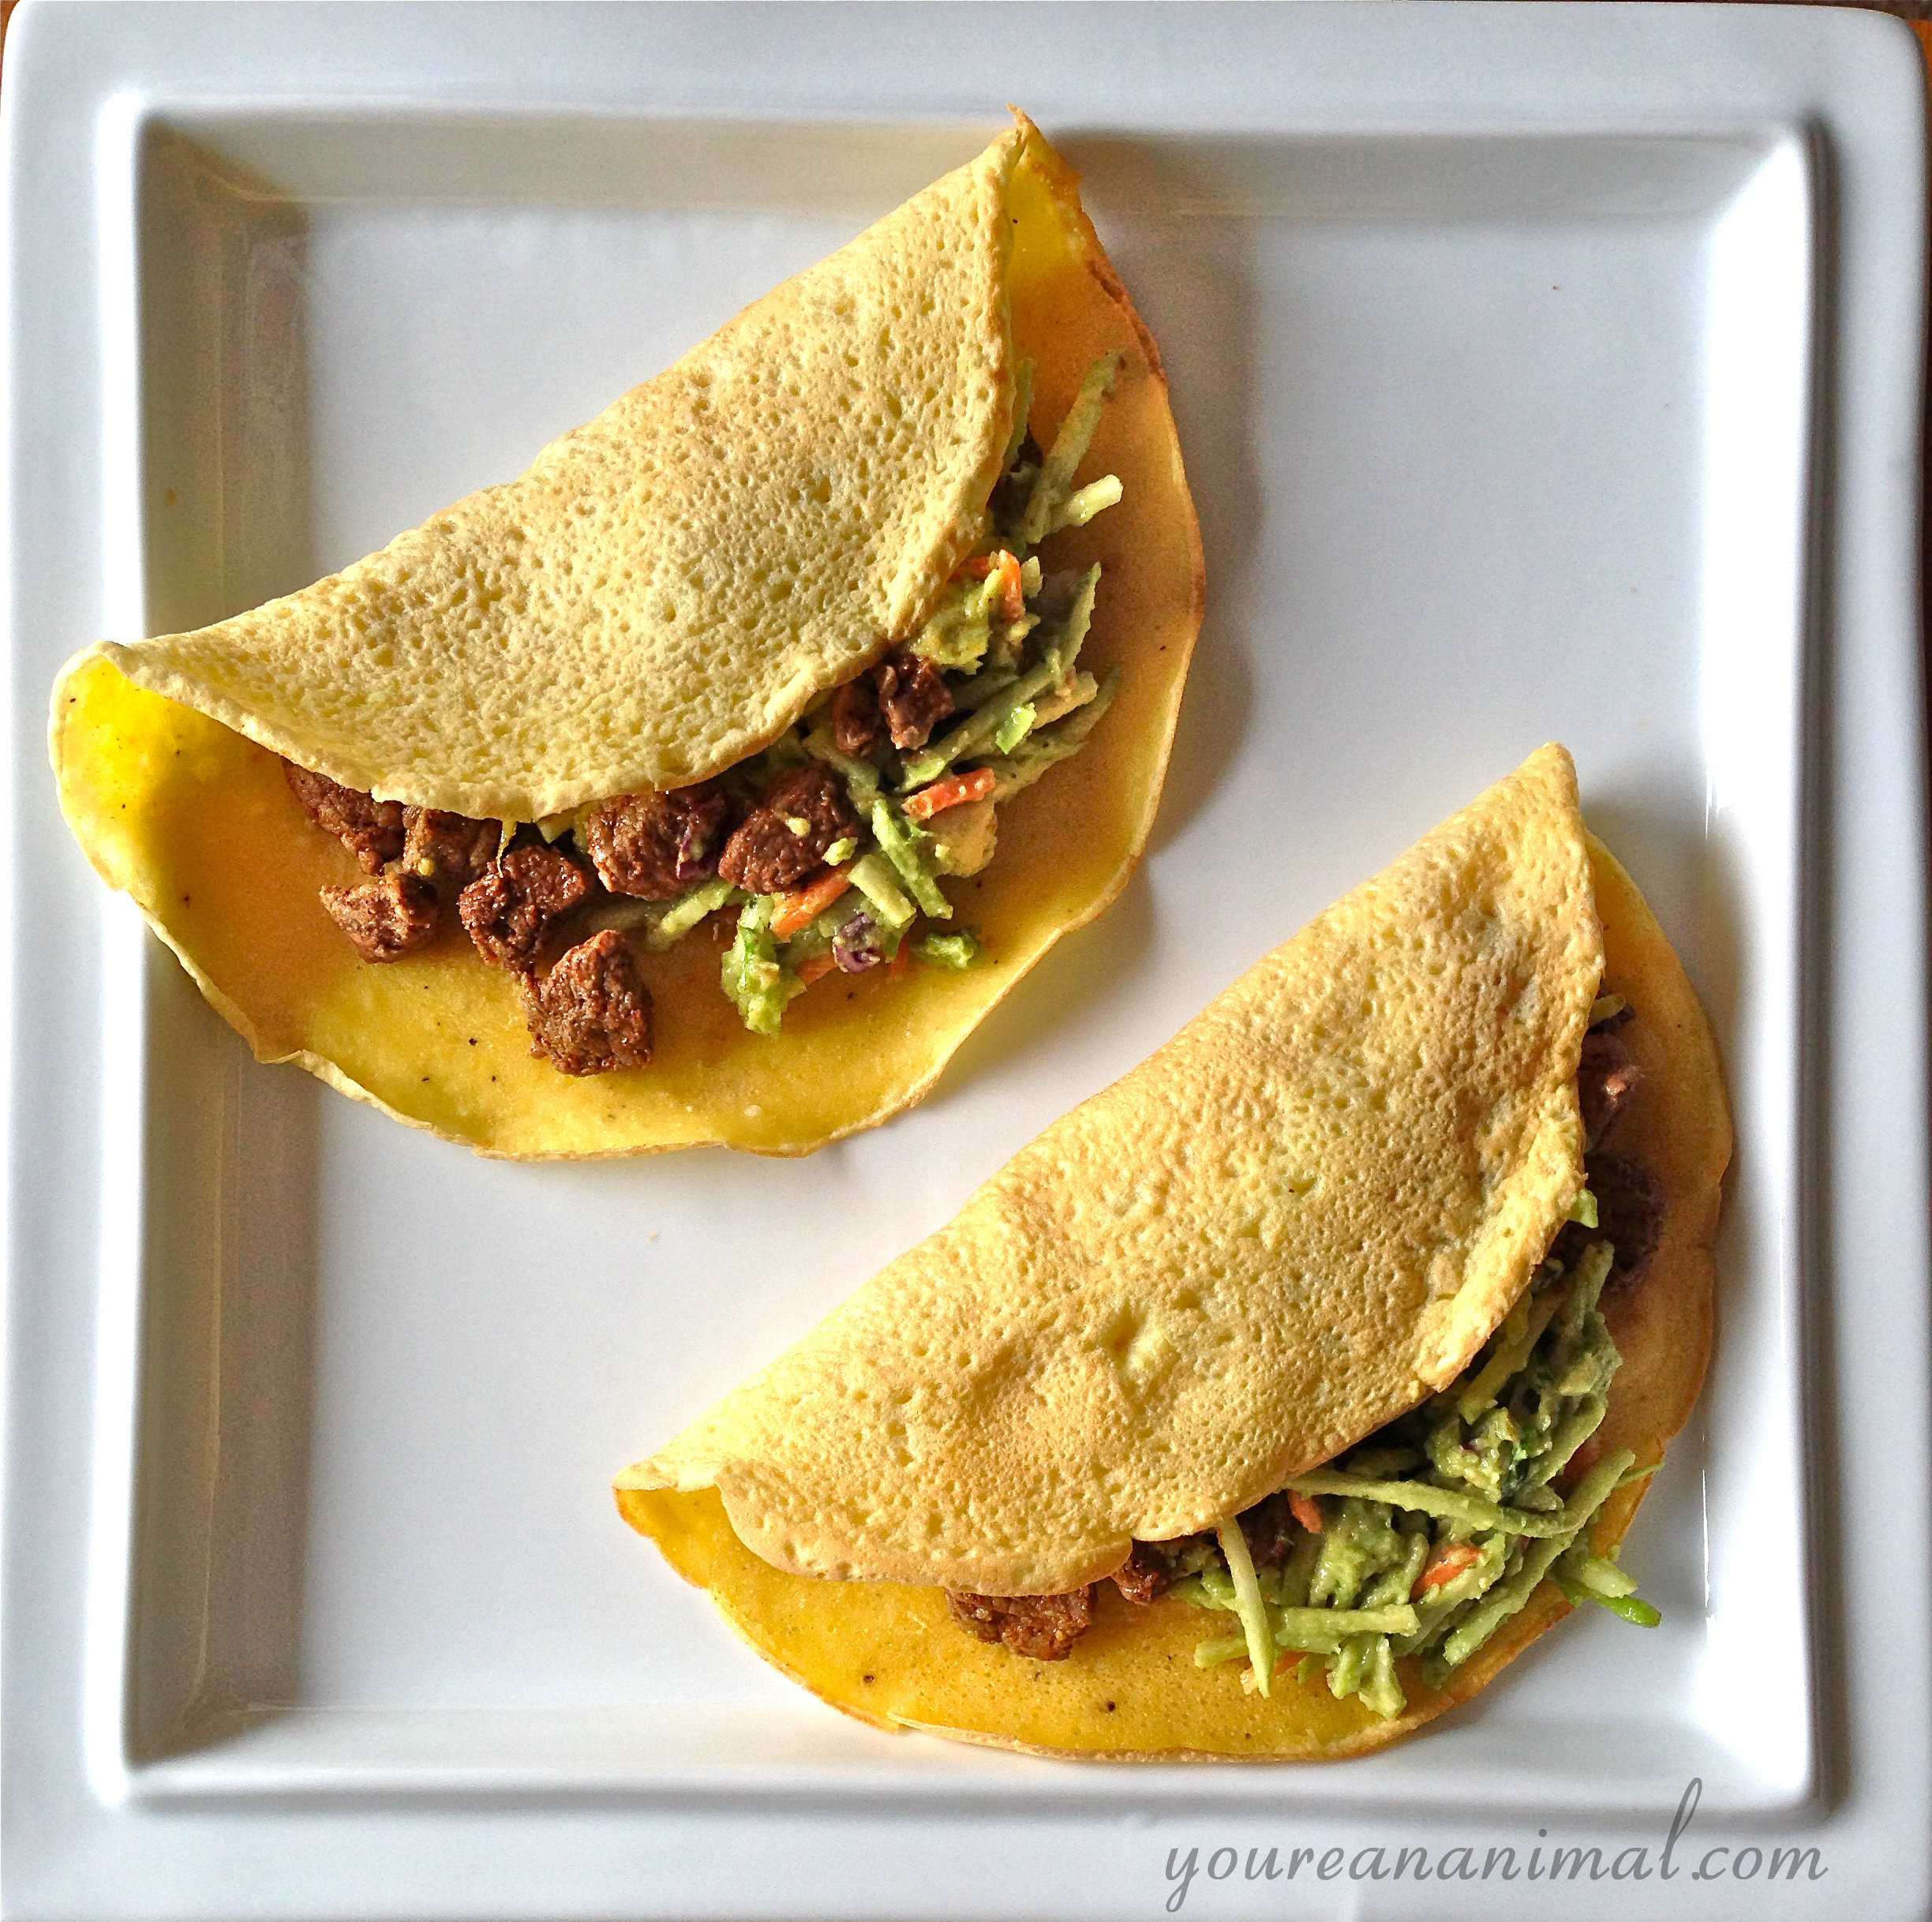
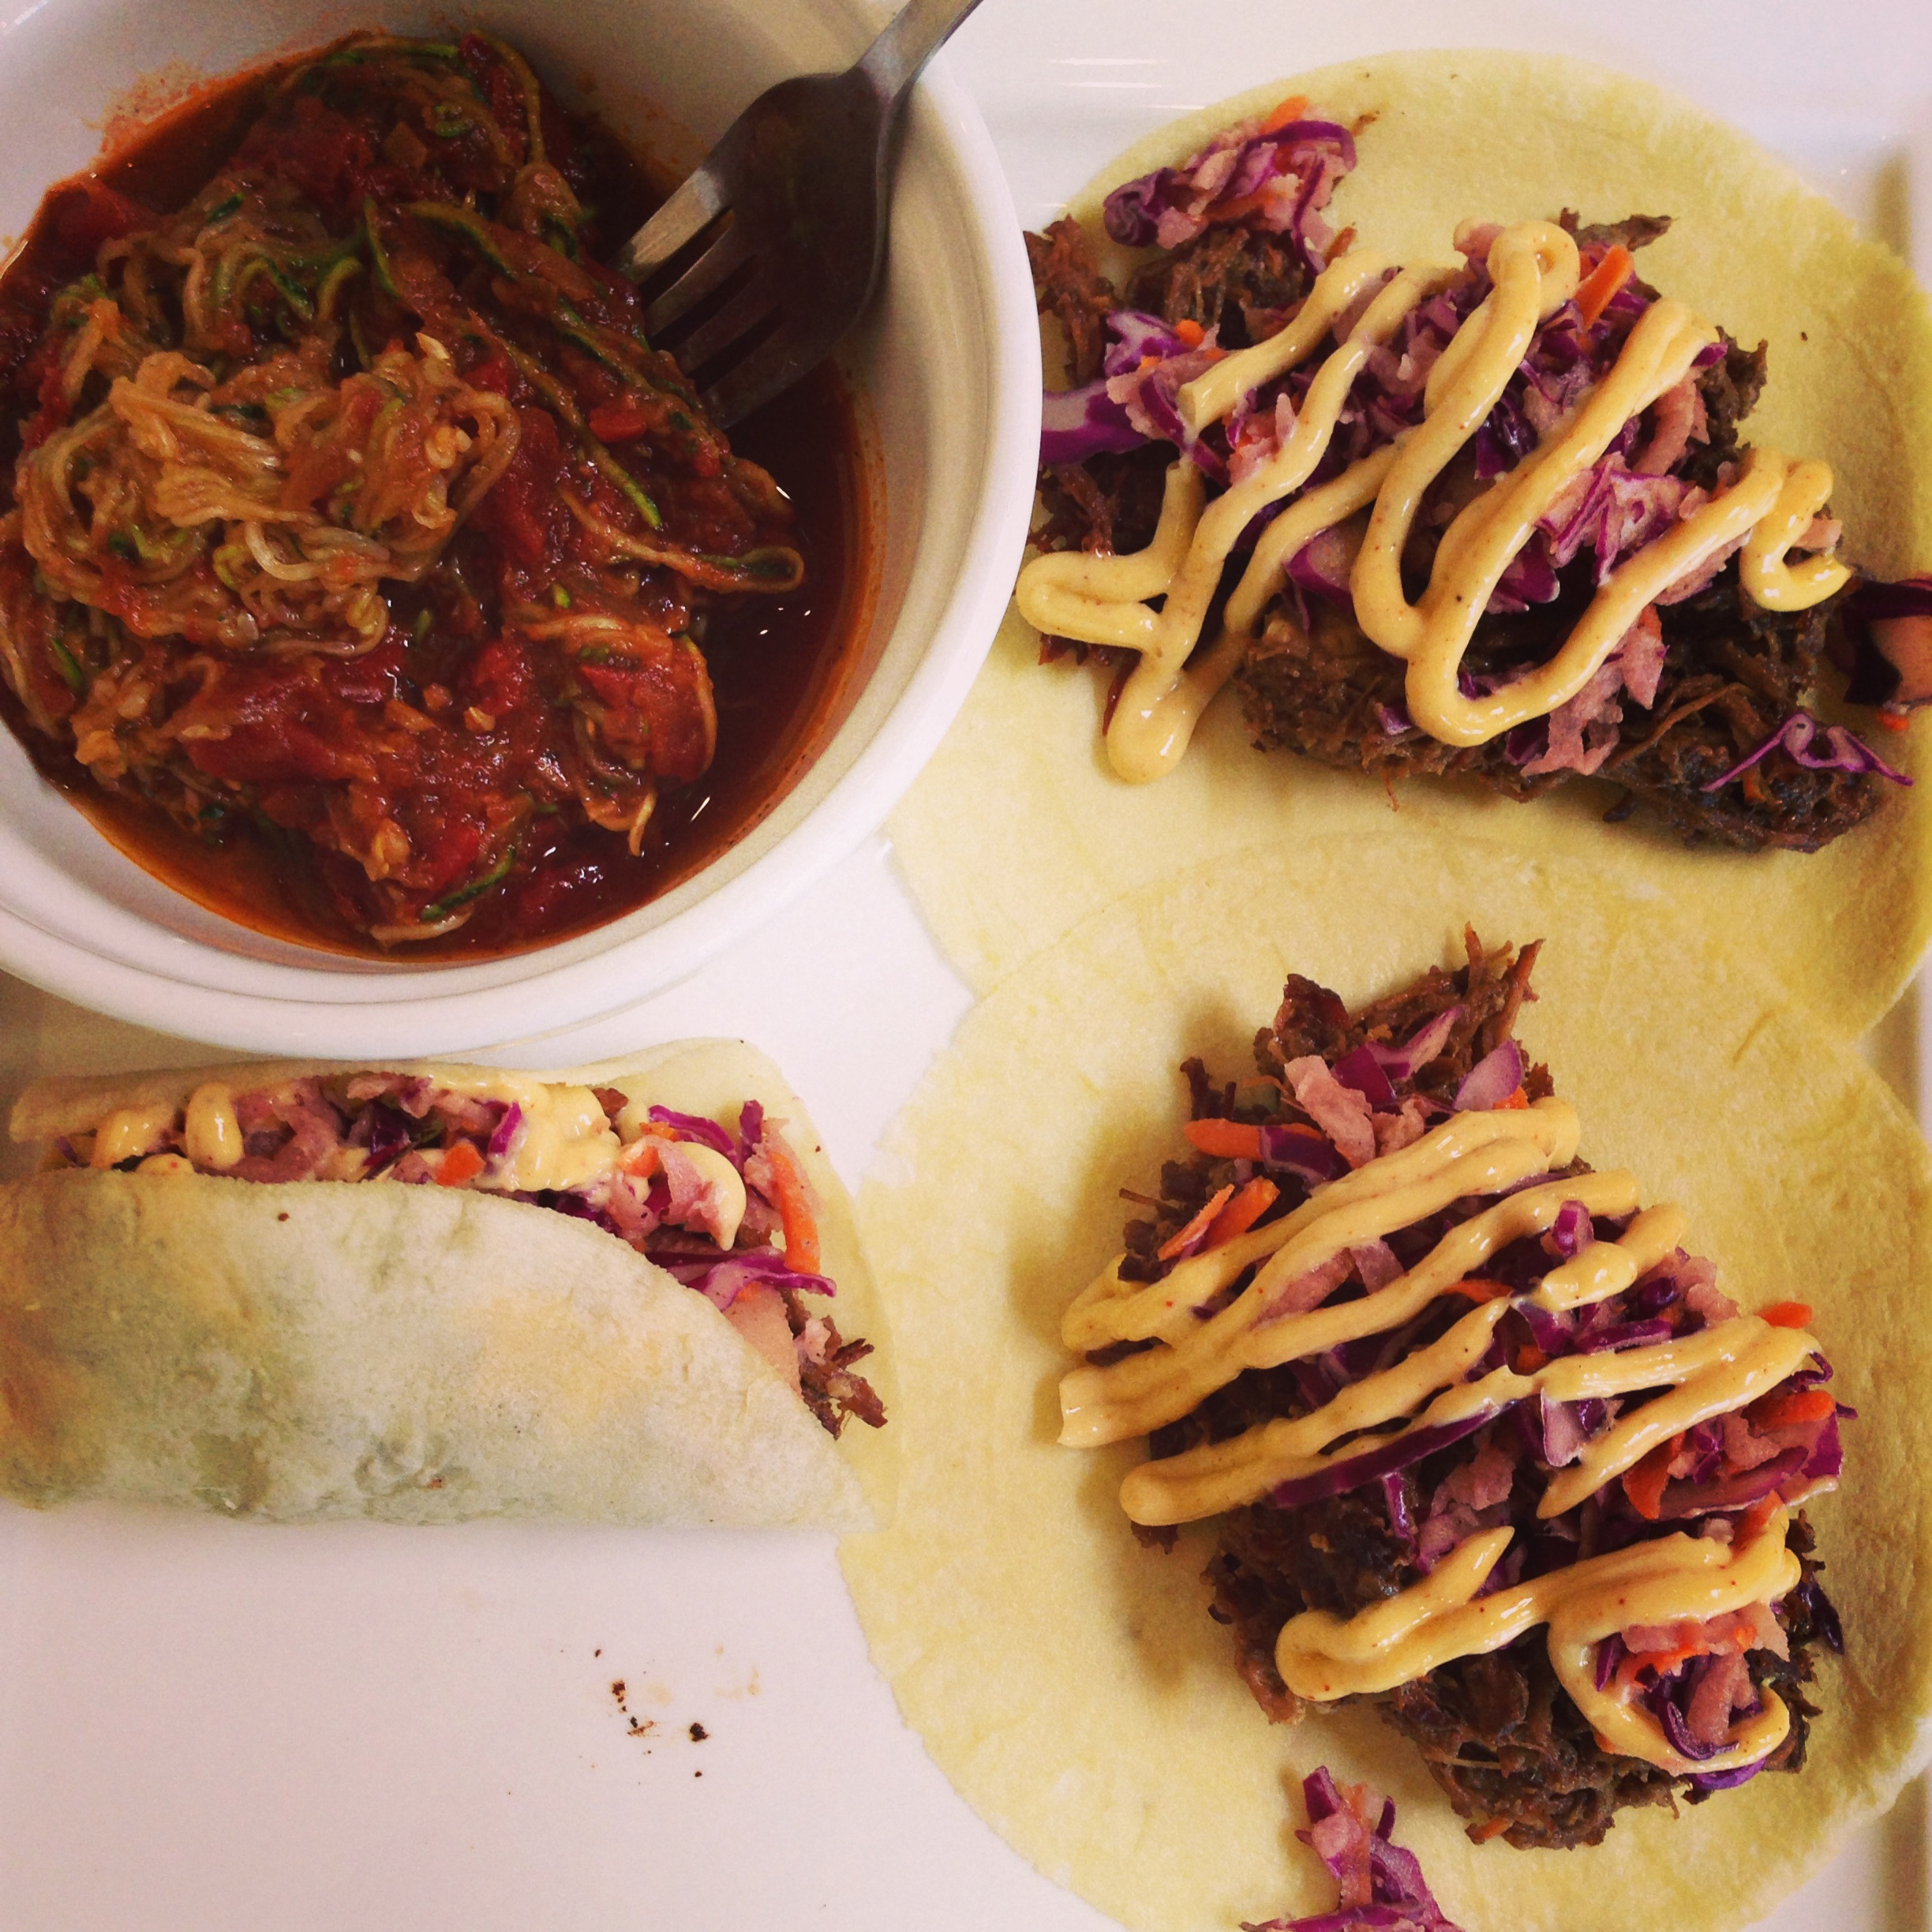
Remember that trip to Portland, Oregon that I keep raving about? Well here’s another recipe inspired by that trip! This one comes from our amazing lunch at Cultured Cavemen, a Paleo restaurant in Portland. This meal is specifically inspired by my lunch of carnitas, complete with grain-free tortillas and slaw. I took a different spin with my recipe, however, and did steak tacos instead. Plus a guacamole broccoli slaw that is the easiest thing you will ever whip up (you’ll wonder why you never thought of it), and grain-free tortillas for an amazing Taco Tuesday (or Taco Errrryday). Every element of this recipe is a star in its own right. The steak tacos are seasoned to perfection, and made with grass-fed steak which makes it wholesome and nutritious on top of being delicioso. And not to mention a great way to get that Vitamin B12 in, a critical member of the Vitamin B complex family! No need for store-bought seasoning with the added sodium and preservatives. This seasoning combo is easy to throw together with spices you likely already have in the cabinet! Then we have the guacamole broccoli slaw. A spectacularly easy way to get in the veggies without even realizing it, in perfect combination with the must-have guac. Oh and then the tortillas. You know, just a grain-free, gluten-free tortilla that is pliable, roll-able, fold-able, hold-able, and delectable. Stupid Easy Paleo nailed it with this one, so I’ve just ever so slightly adapted her recipe to complete this taco night meal. So on that note, who’s bringing the margs? I’m ready to eat!
Steak Tacos with Grain-Free Tortillas & Guacamole Broccoli Slaw
Taco Meat:
Approximately 0.75-1 lb of grass-fed steak (I use Sirloin) cut into cubes that are about 0.5-0.75 of an inch
About 1 tsp each of dark chili powder, garlic powder, onion powder, paprika and cumin
1/4 tsp each of garlic powder, onion powder, salt, and black pepper
Guacamole Broccoli Slaw
about 2 cups of broccoli slaw (I get the pre-made bagged kind, with broccoli, carrots, and red cabbage)
about 0.5-0.75 cups of your favorite guacamole (if I don’t make my own, I love the one Whole Foods makes)
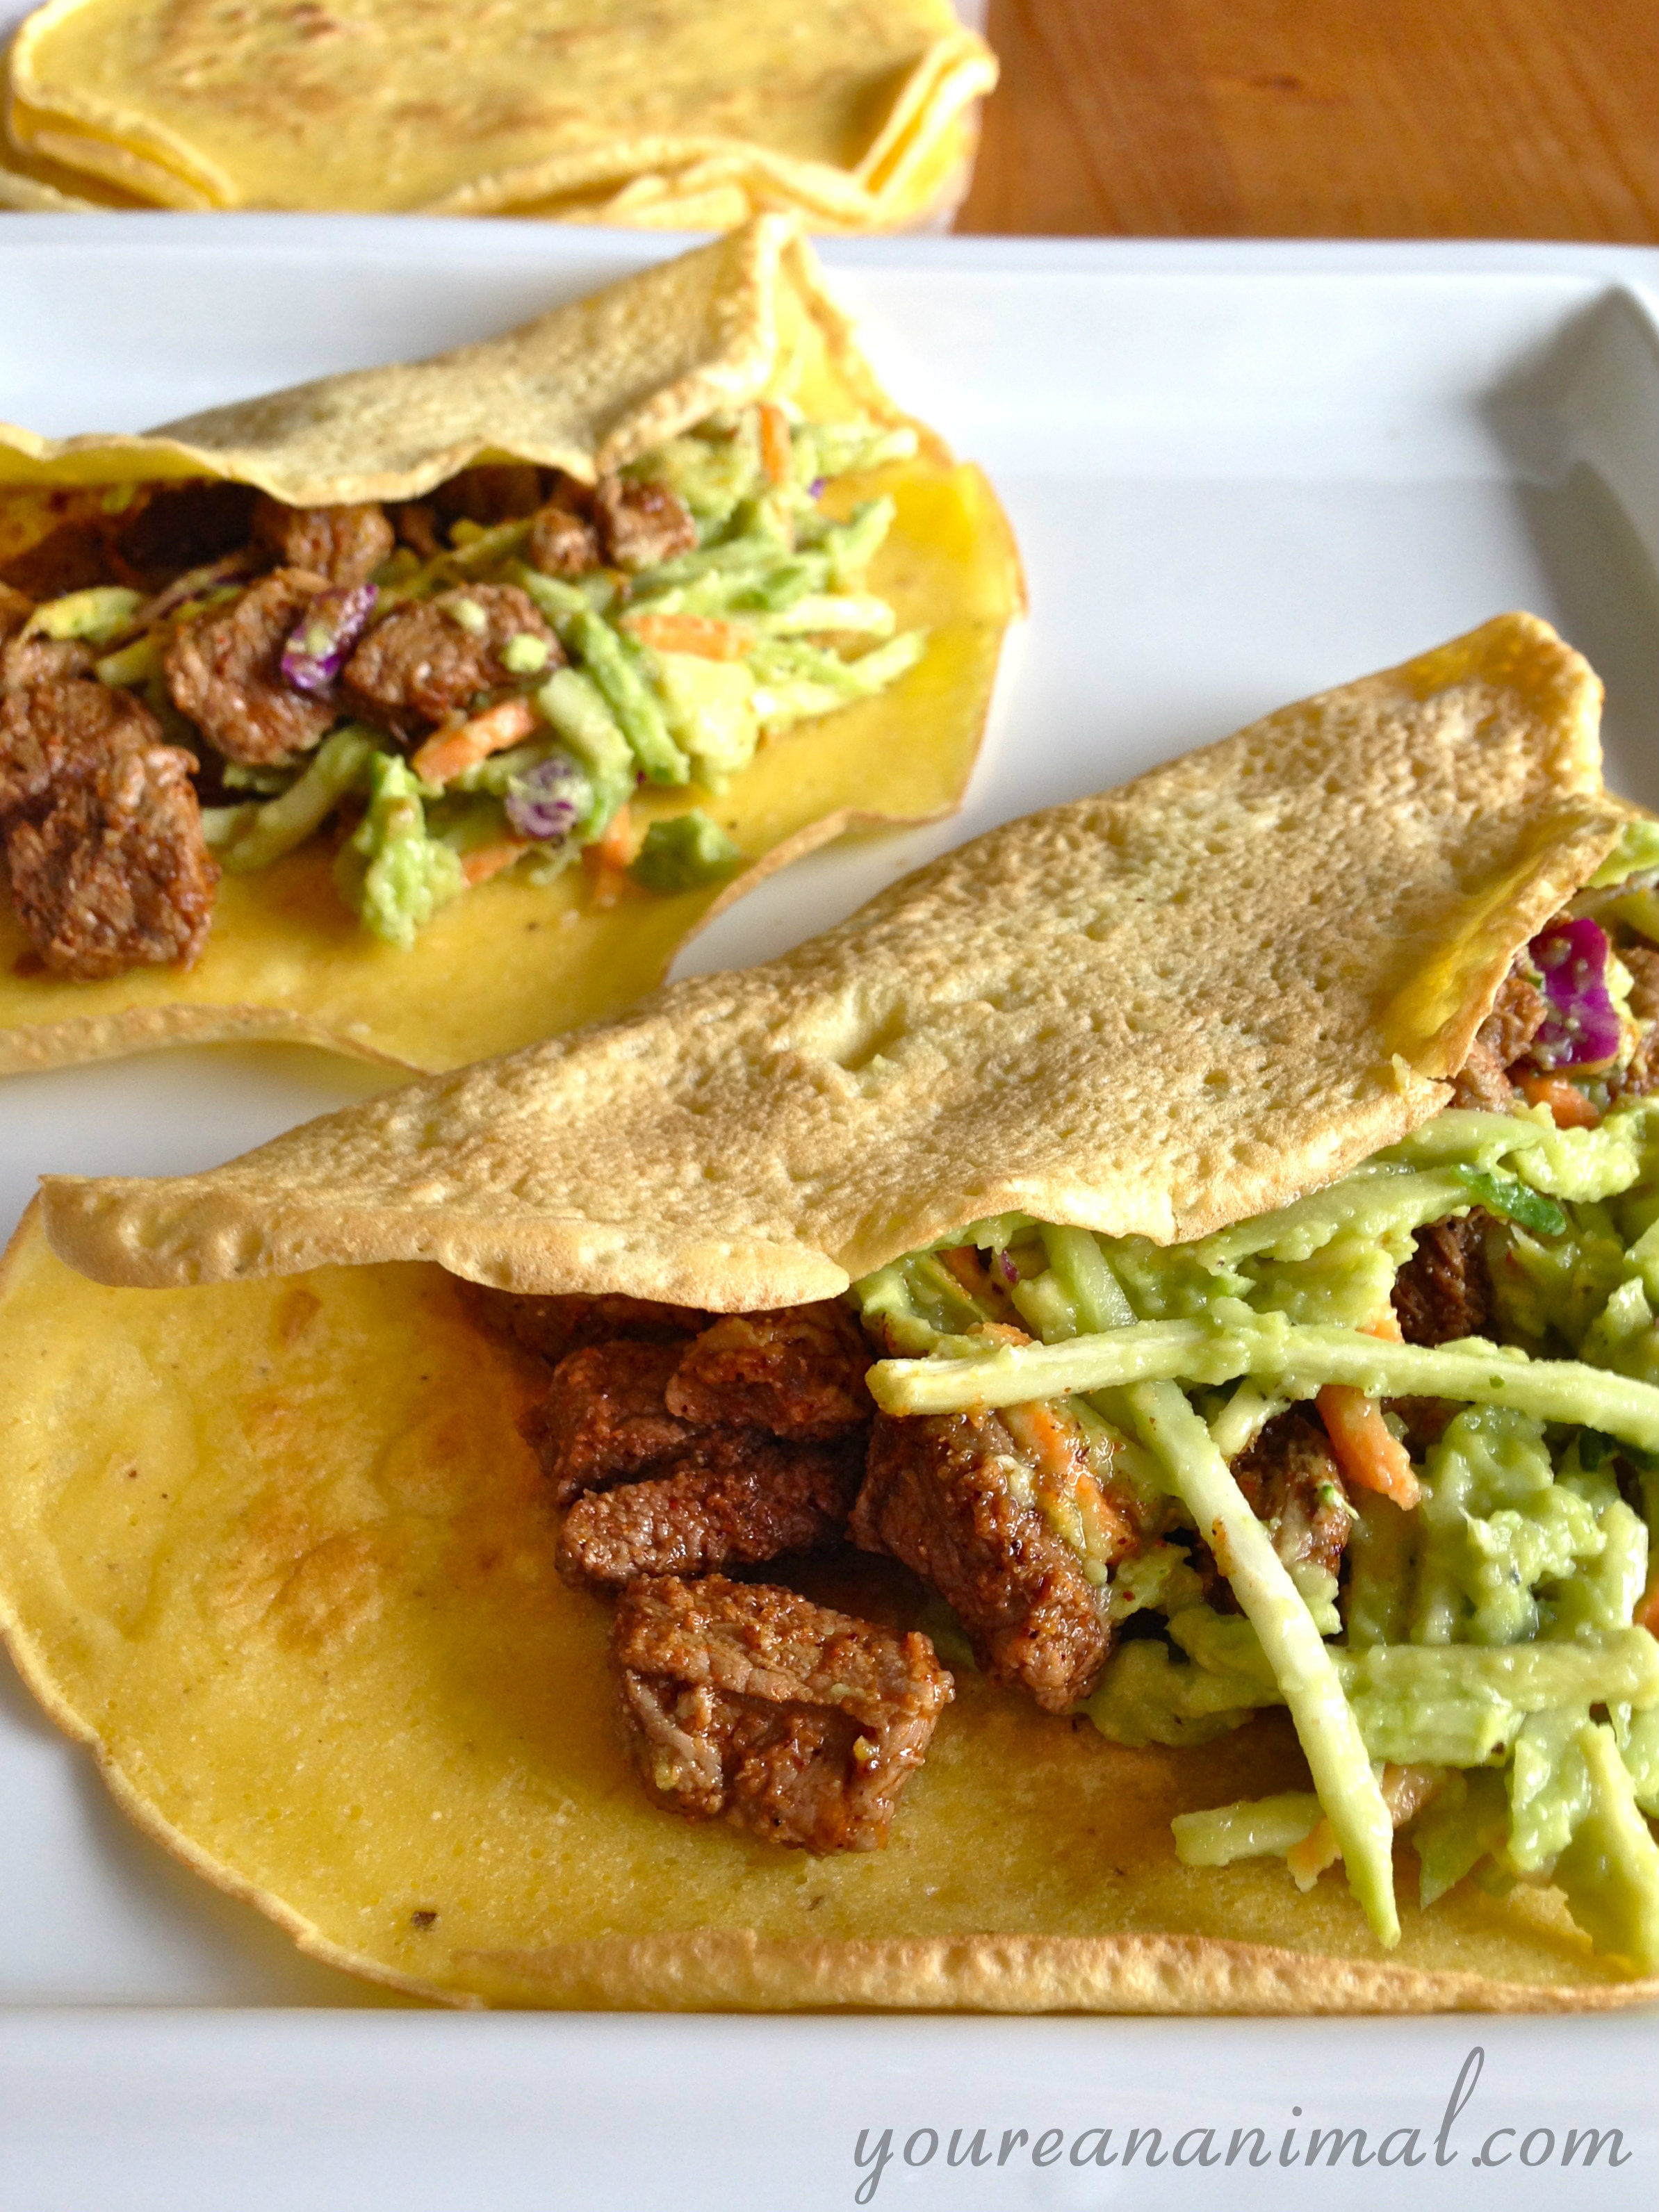
Start with the tortillas. In a large mixing bowl, combine all of your tortilla ingredients. Use an electric mixer to combine the ingredients, in order to most effectively eliminate the lumps from your mixture, until very smooth but not to the point of frothing the eggs.
Use an 8-inch, non-stick skillet to make the tortillas. Heat the skillet on medium heat. Once heated, pour about 1/4 cup of the tortilla batter onto the skillet, and roll the batter around in the skillet so it is evenly coated (like making a french crepe). Cook about 1 minute on each side, until lightly browned. The edges will curl away from the pan. If you have any issues with this process, you can refer to the original recipe and instructions for these tortillas here. This will make 6 tortillas. Allow the tortillas to cool, or keep them warm in a warm oven.
Next, prepare your guacamole broccoli slaw by combining your broccoli slaw with your guacamole in a medium sized mixing bowl. That’s it!
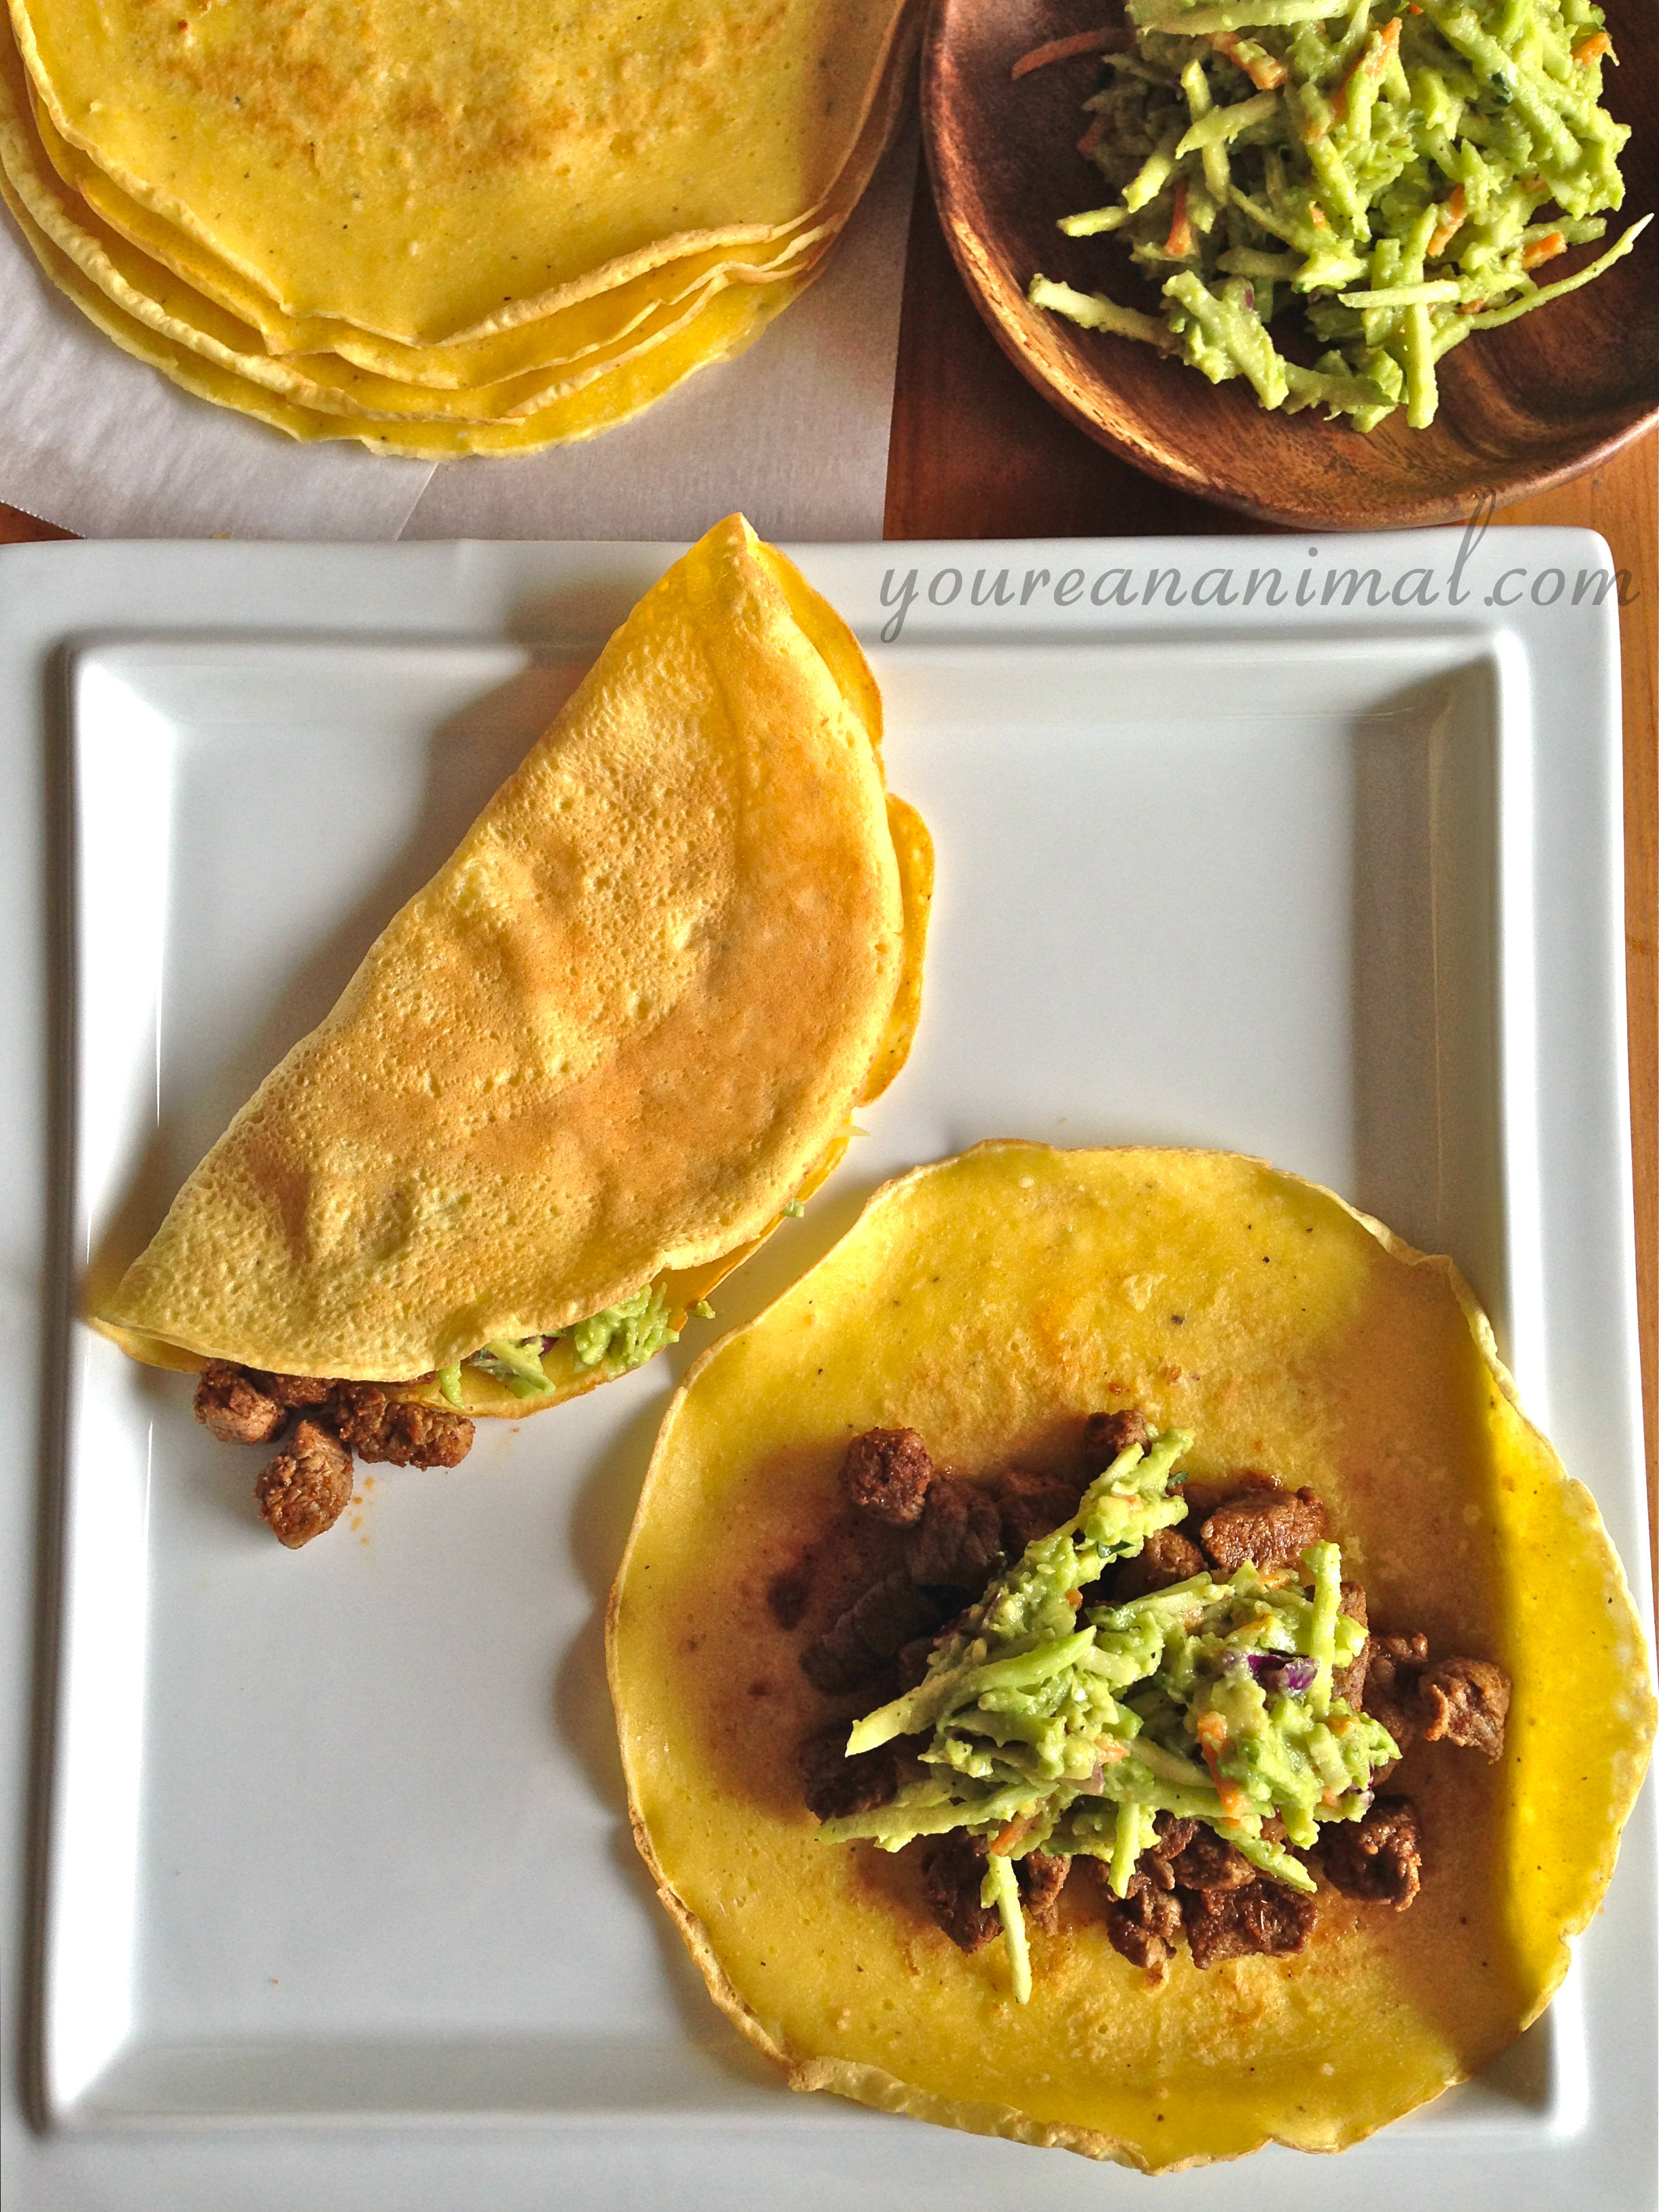
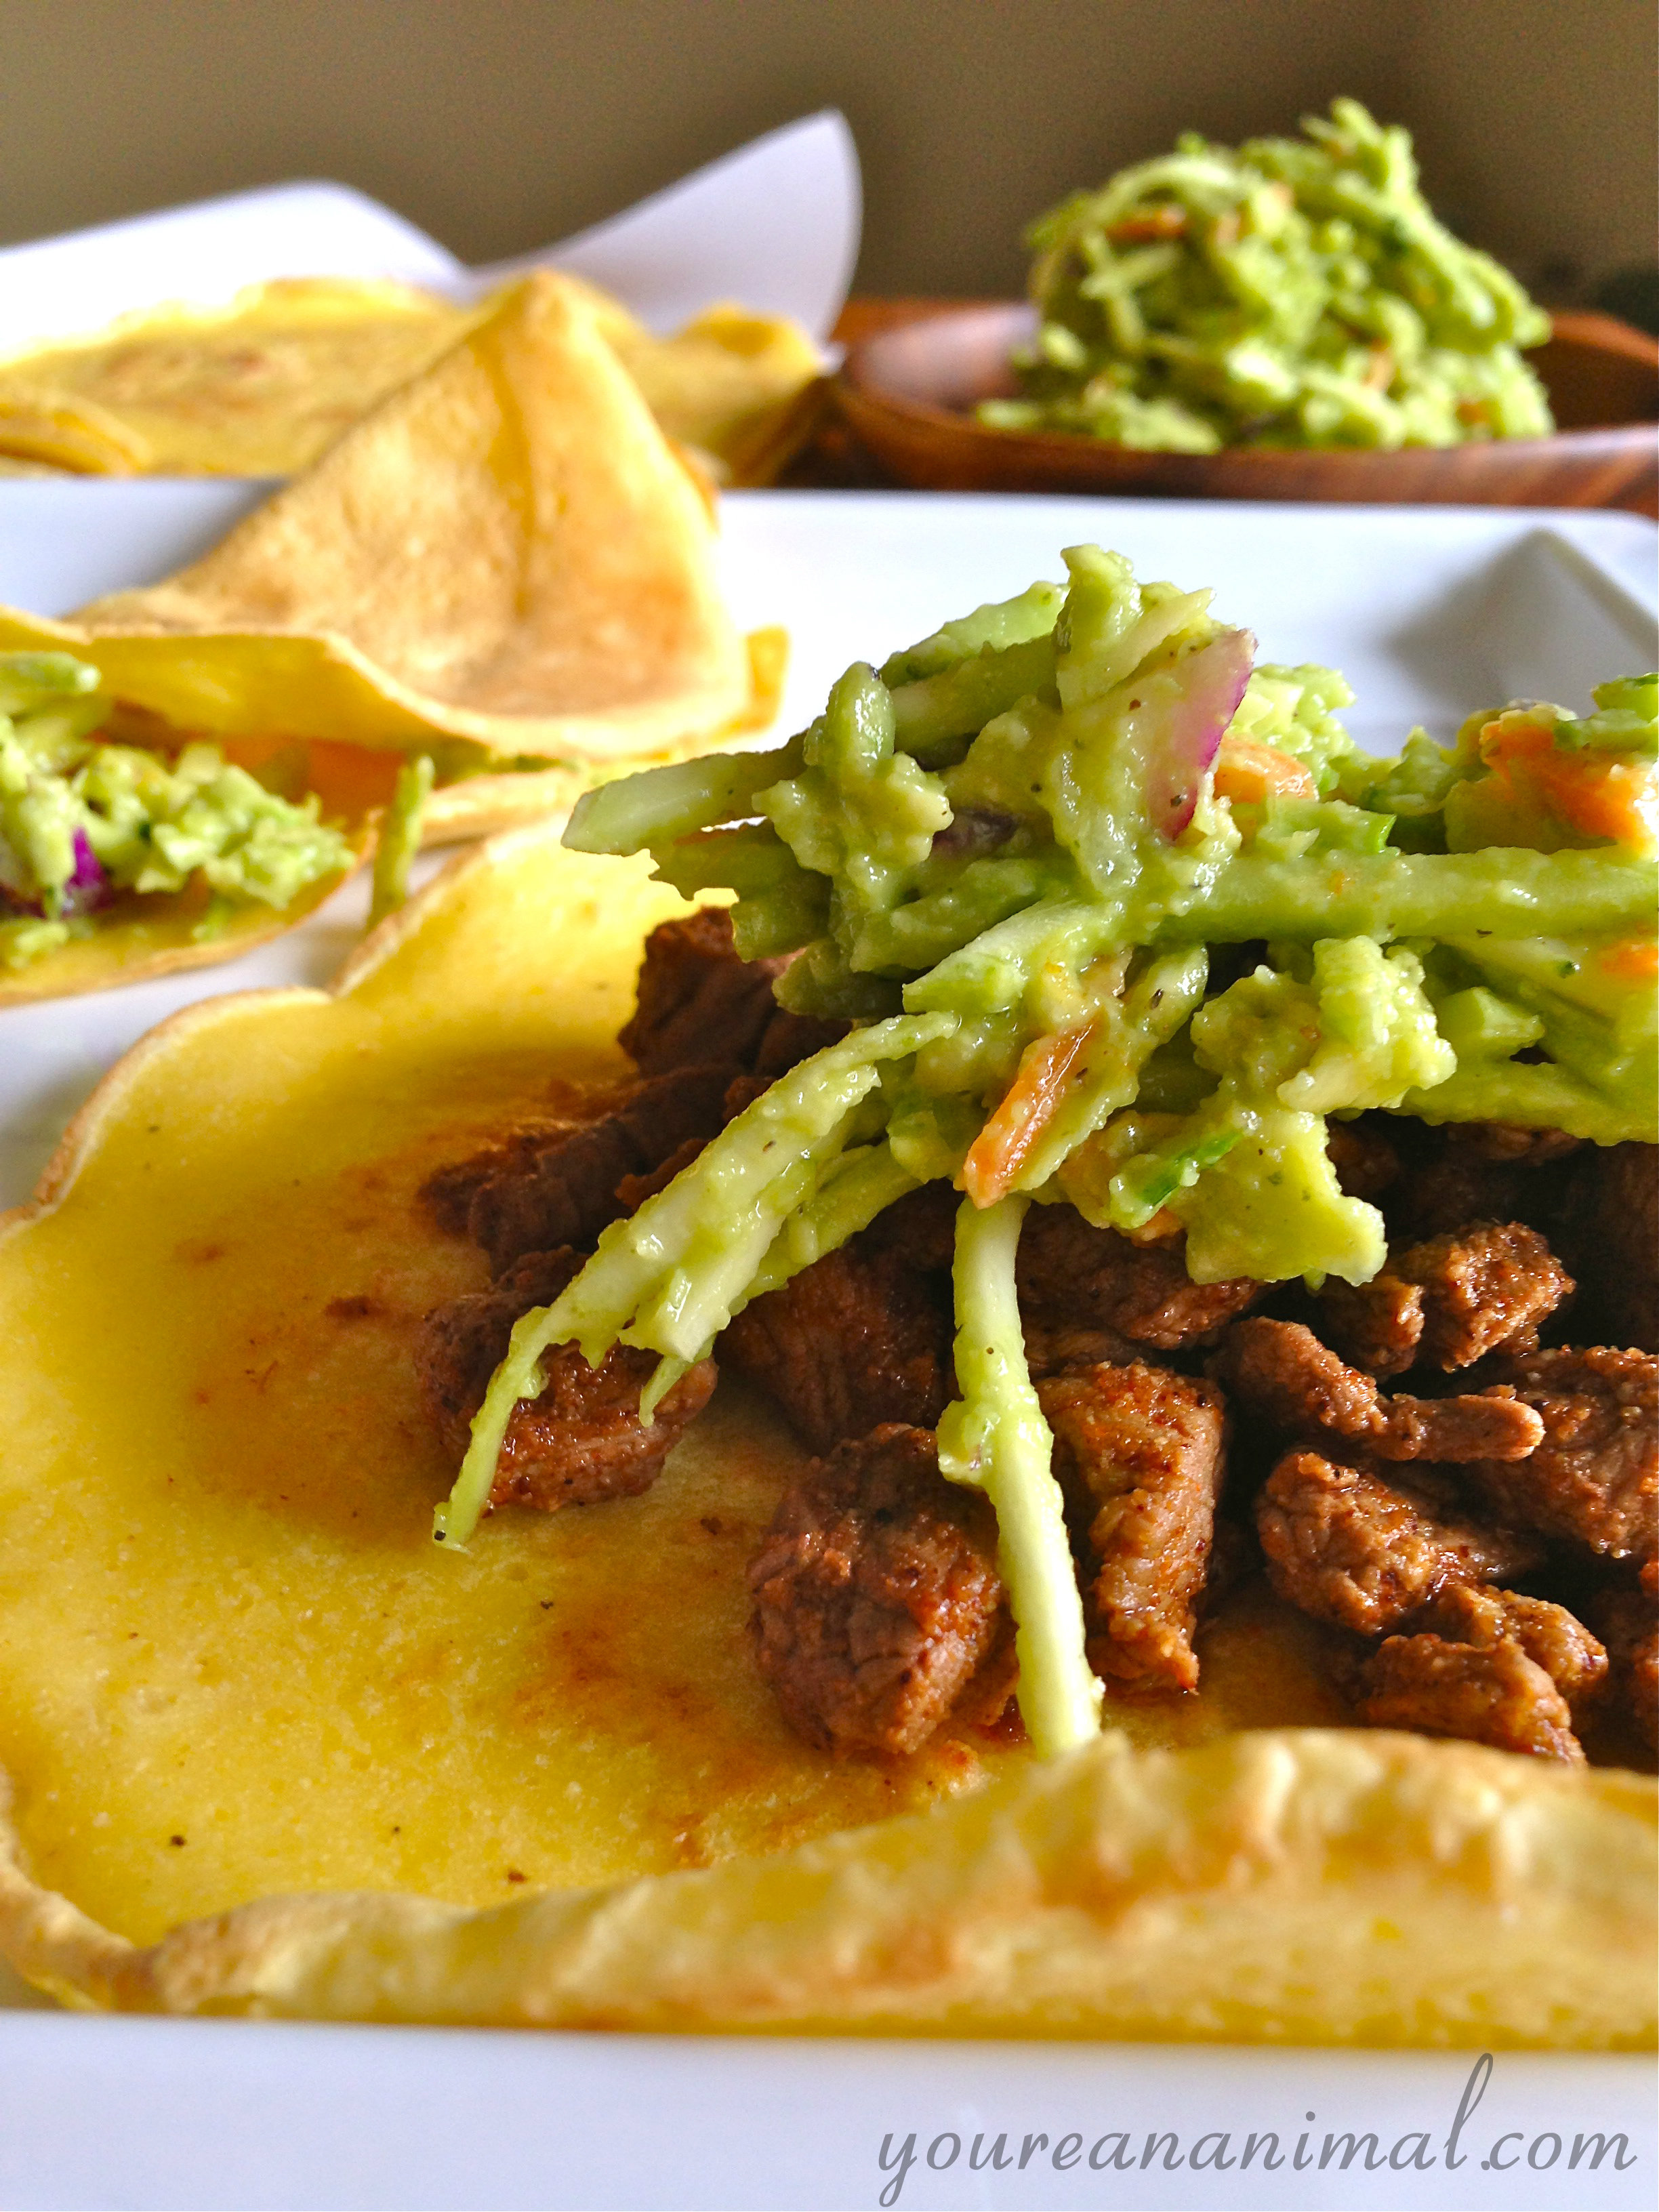
Now, prepare you taco meat. Coat a large skillet with avocado oil (1-2 Tbsp) and heat the skillet over medium-high heat. Once the skillet is heated, add your cubed meat. Stir the meat in the skillet, coating the meat with the oil. Add your taco seasoning spice mix, and stir until it coats the meat and combined with the oil to make a taco sauce. The meat will cook very quickly when cubed! You only need to saute for about 1-3 minutes total, in order to keep the meat nice and tender.
Assemble your goodies, evenly distributing your meat and slaw over the tortillas. Eat up!
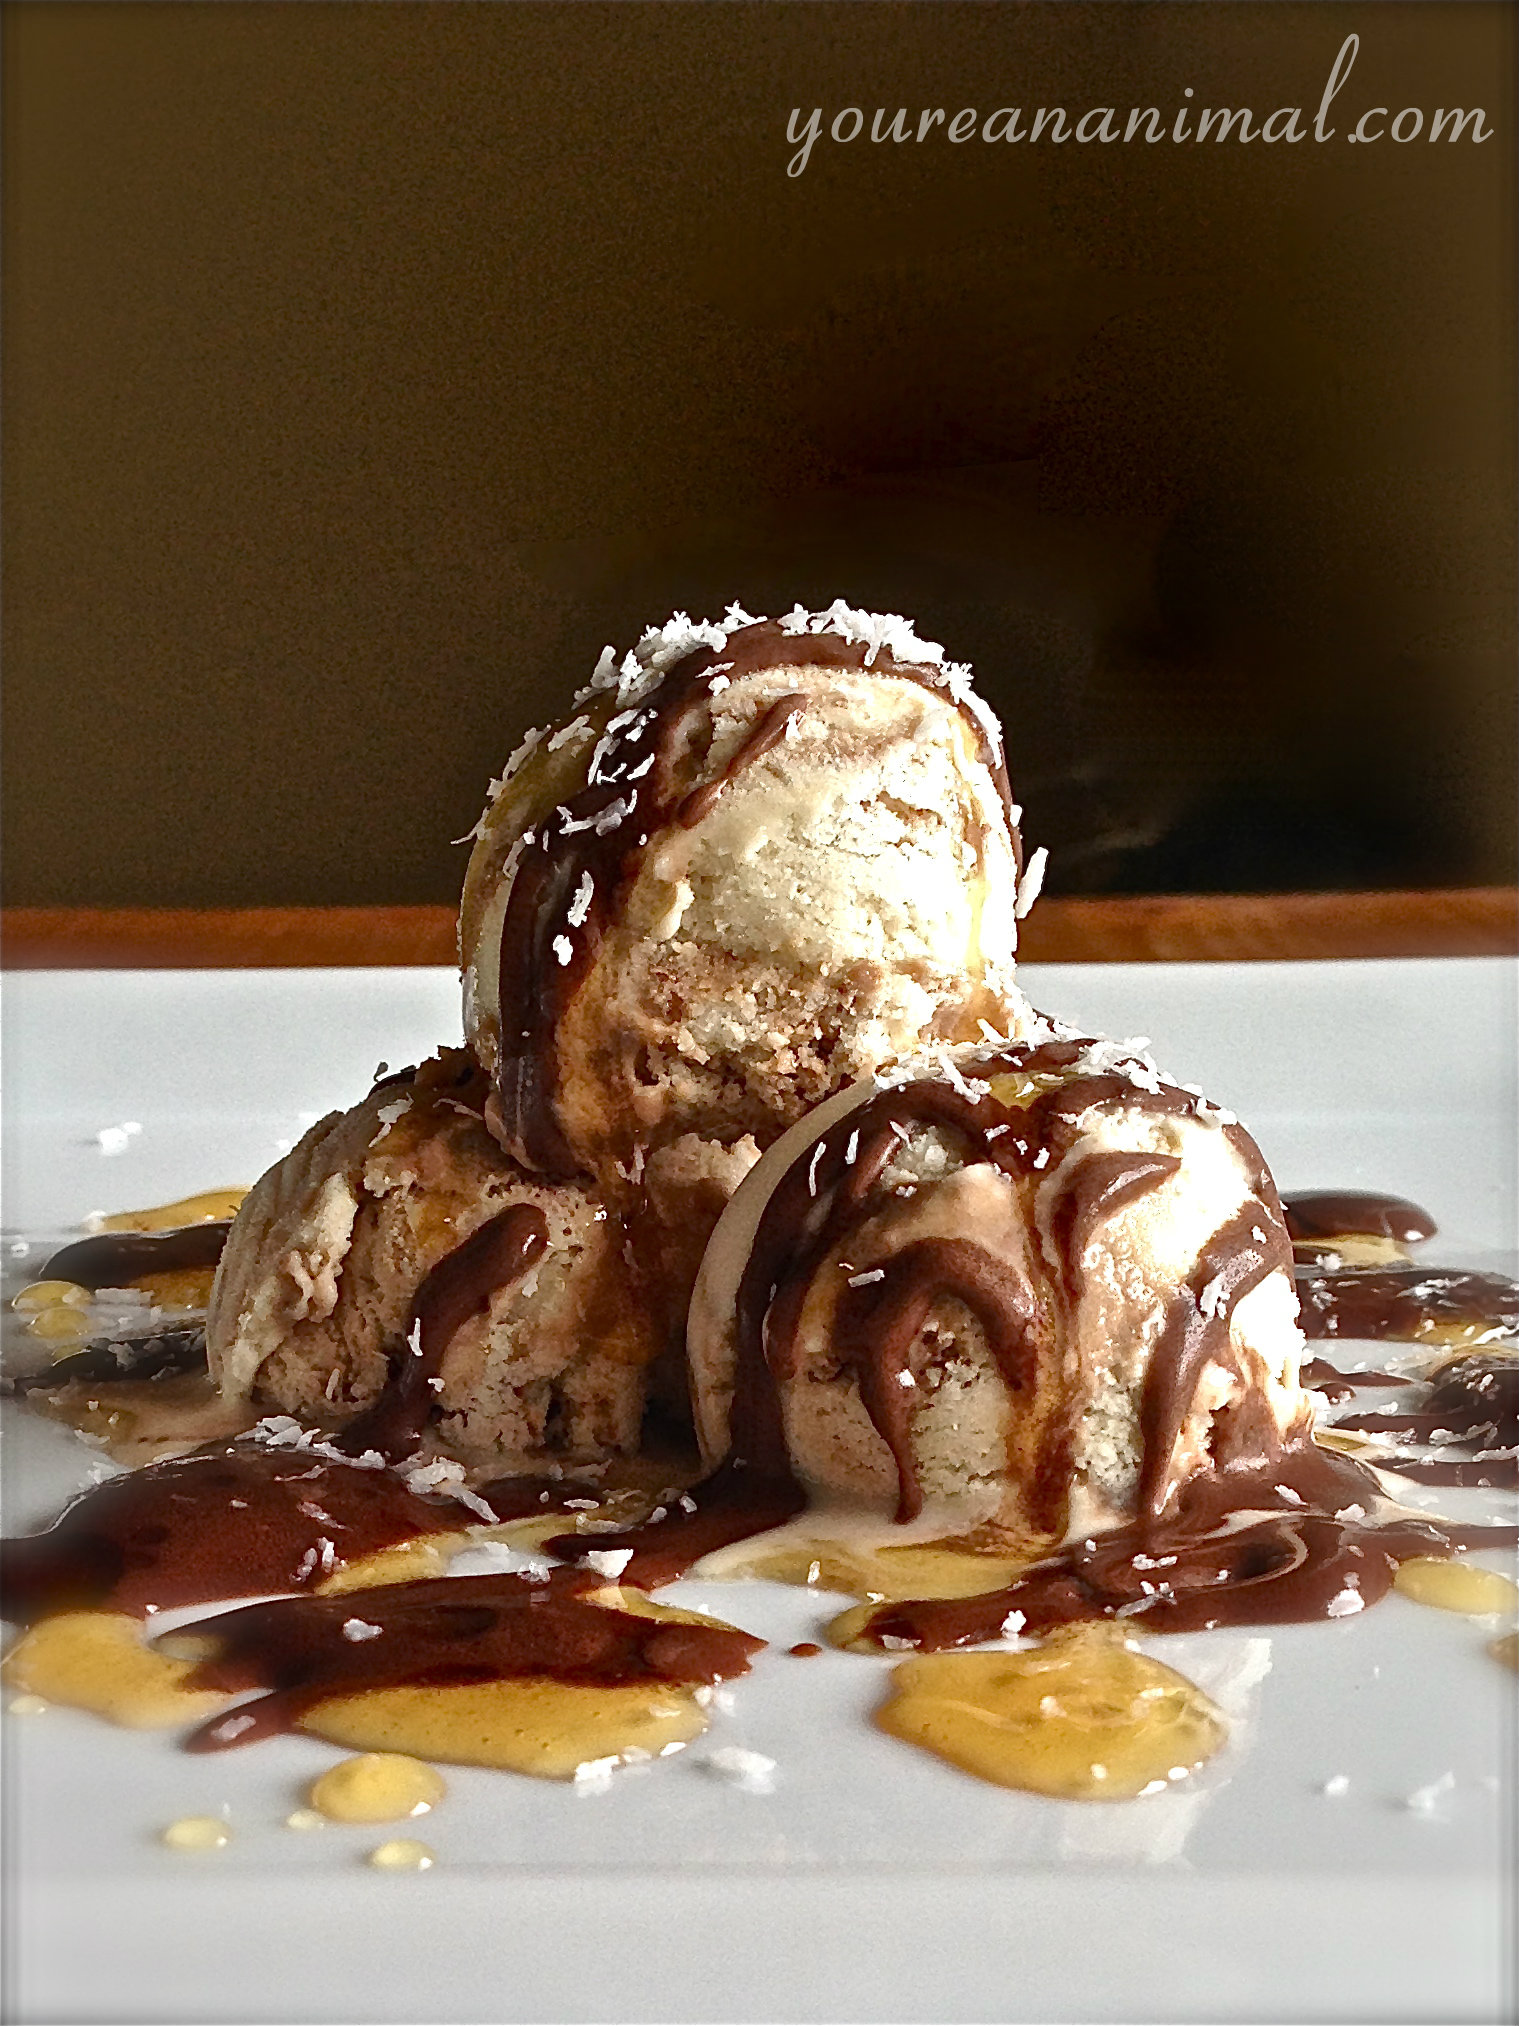
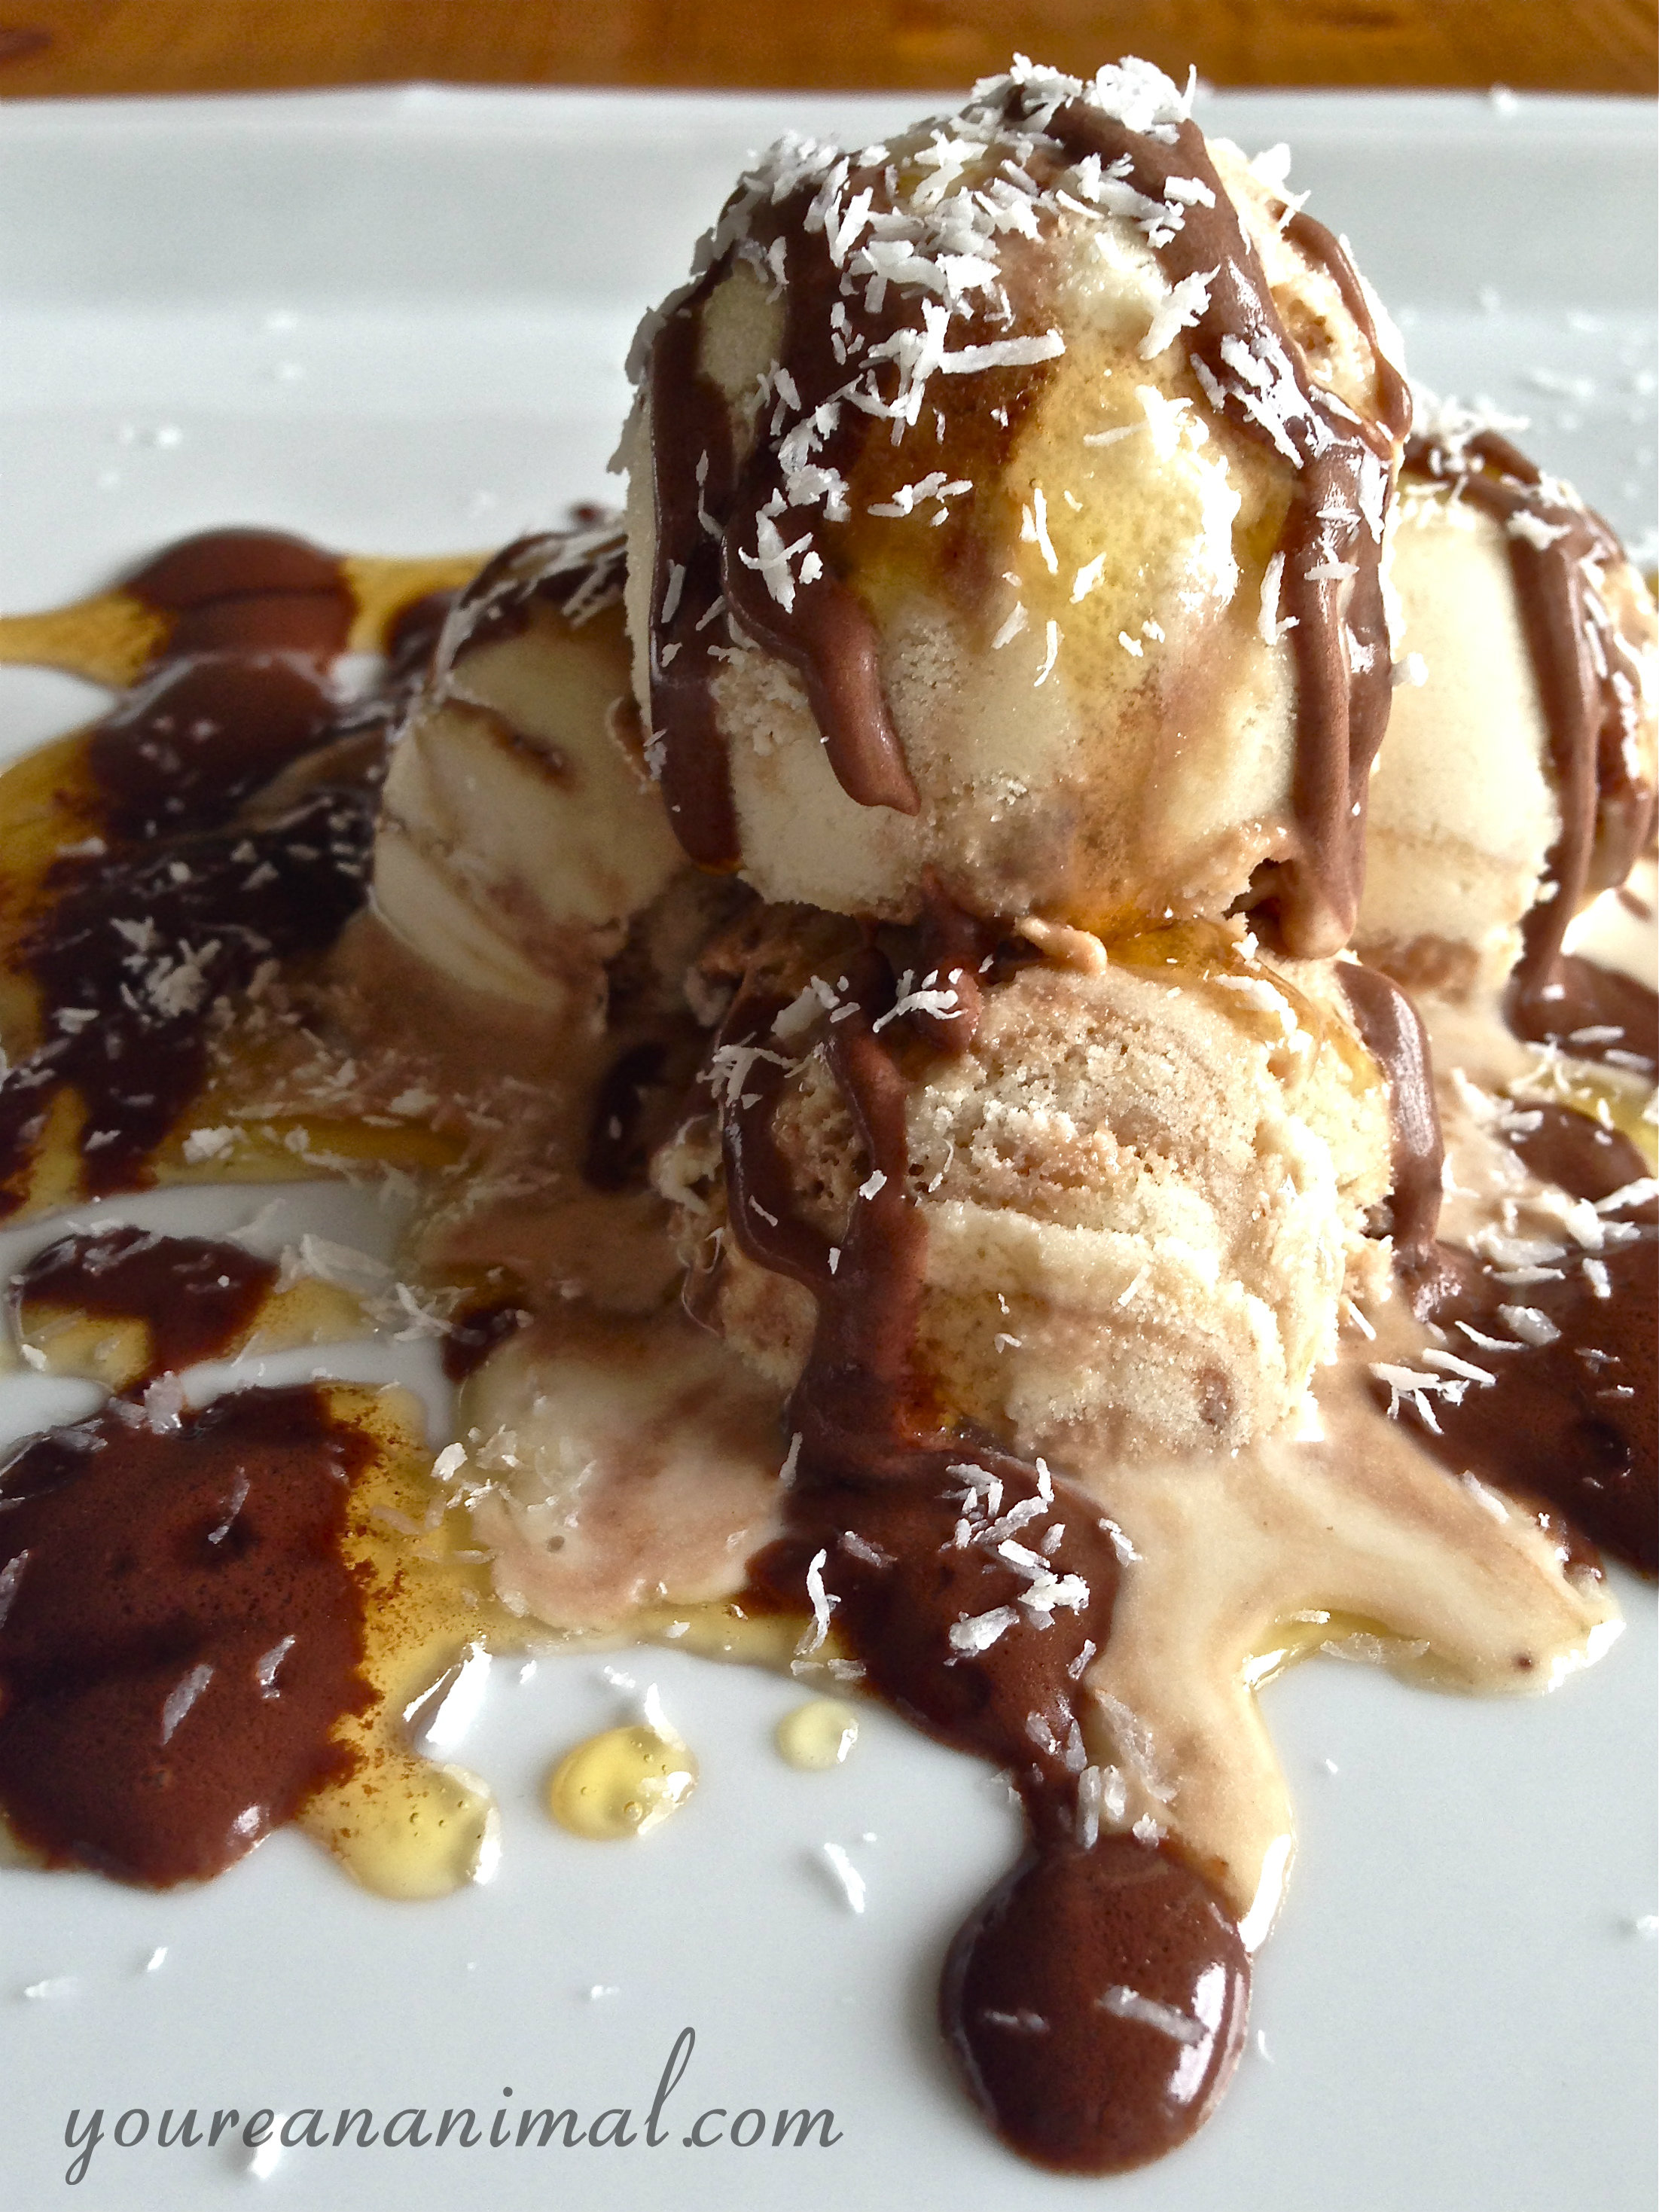
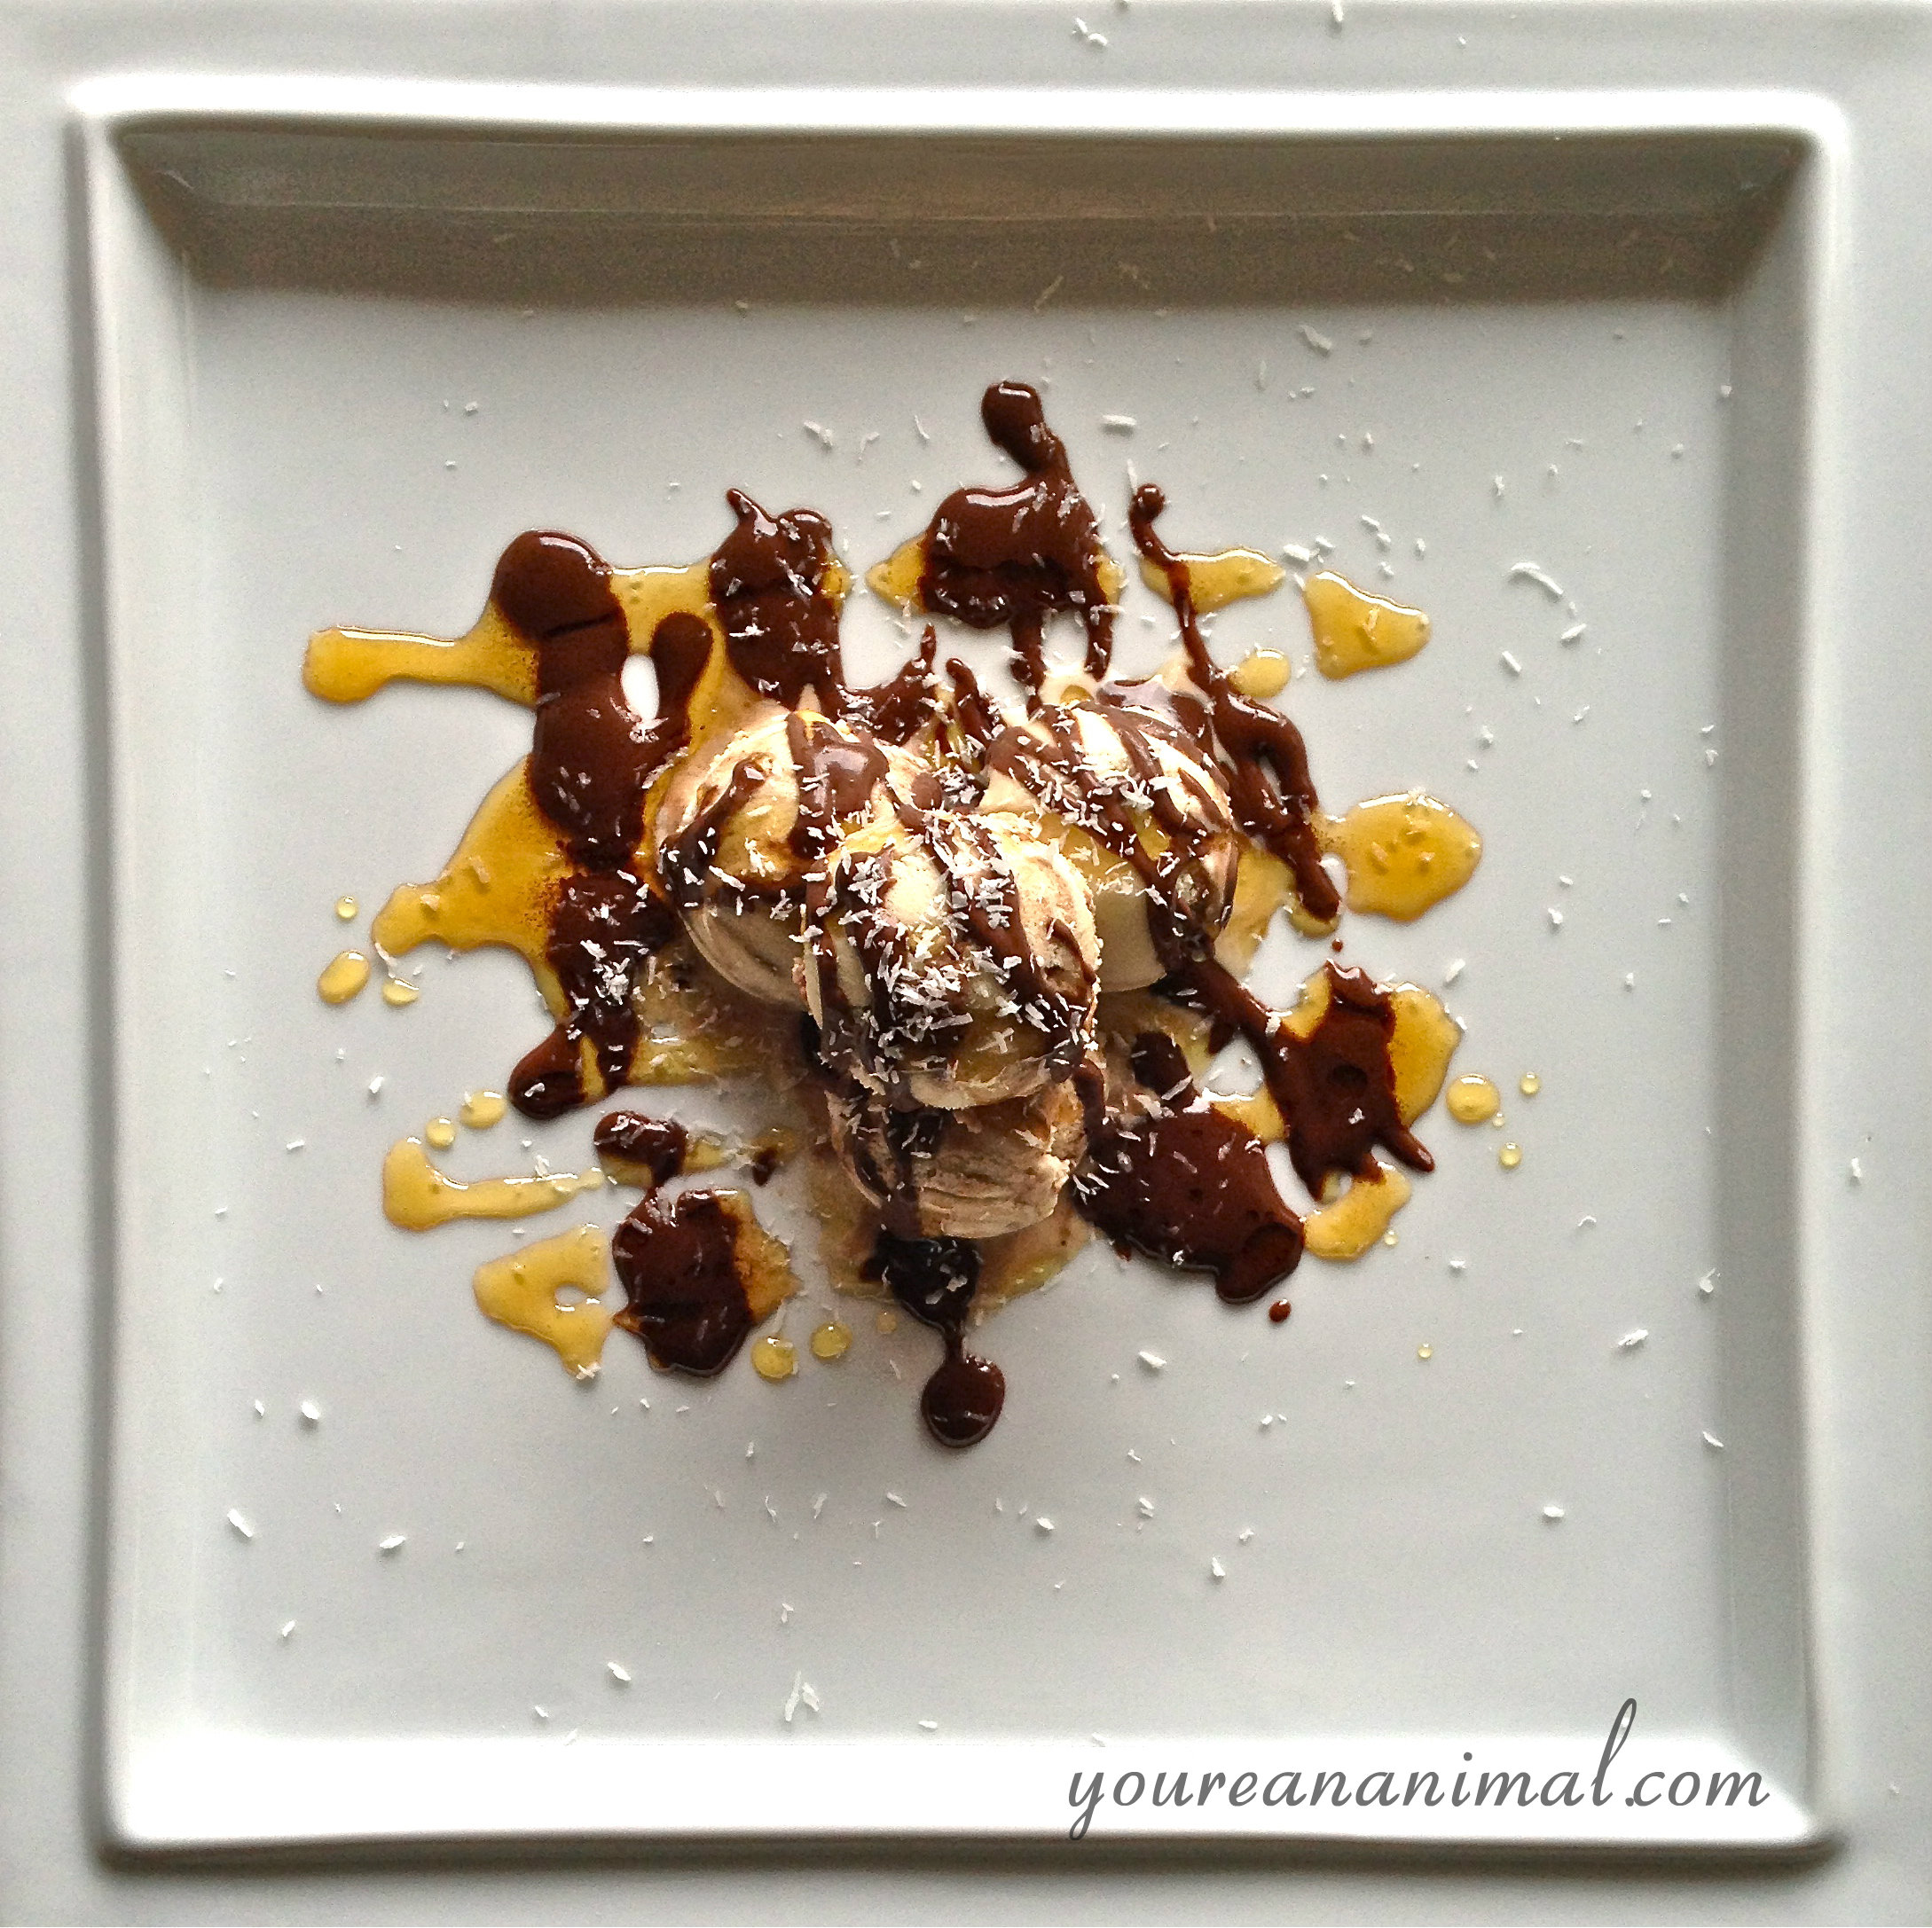
First of all, let me express my excitement about us purchasing an ice cream maker: EEEEHHEEEEEEYEAH! This is the one we got, and we love it! Ice cream is definitely, for sure, abso-posi-lutely my favorite dessert. I don’t know what it is, but I have always been an ice cream addict. Which is kind of odd for a lactose-intolerant girl, but I have found dairy-free heaven. Admittedly, my favorite flavor is mint chocolate chip (which, by the way, I have a recipe for that too… we’ve made it at least 5 times already. Stay tuned :)). But we just got back from our vacation in Portland, Oregon, and in my post about our trip I talked about Salt & Straw and how we both fell hopelessly in love with their dairy-free ice cream. So as soon as we got back, I started working on an ice cream flavor inspired by their Coconut with Petunia’s Salted Caramel Bars flavor. Their ice cream had pieces of a vegan/gluten-free caramel cookie, with ribbons of salted caramel and chocolate ganache. While I haven’t had the opportunity to explore the idea of a vegan/gluten-free caramel cookie, I was able to throw together a pretty awesomely delicious (toot toot) dairy-free, white sugar-free coconut ice cream with salted caramel and chocolate ganache swirled in ever so lovingly. And seriously, I can’t believe how good this stuff is. This is a situation where the whole is certainly greater than the sum of its parts (in my opinion). The ice cream, caramel, or chocolate each alone is good, but together they are fantastic. While I’ve never had a Samoa Girl Scout cookie (weird, I know… and I was even a Girl Scout. I have no excuses.) I imagine the flavor profile is the same. In fact, I almost named this “Dairy-Free Samoa Ice Cream,” except I think they’re called “Caramel Delights” now? All updated and modern… I can’t keep up. I can’t say enough about this ice cream (or its Salt & Straw inspiration), but I think I’m going to let the pictures speak for themselves…
Dairy-Free Coconut Ice Cream with Salted Caramel and Chocolate Ganache Swirl
3 cans (approx 13.5 oz each) of Coconut Milk (often found in the Asian food aisle)
Start with making the ice cream base. In a medium-sized sauce pan, add 2 cans of the coconut milk, the arrowroot starch (this starch helps keep the ice cream creamy and scoopable, even after being in the freezer), the eggs, 1/4 cup of honey or maple syrup, and 1 Tbsp of vanilla extract. Stir to combine, trying to get as many lumps out as you can, and making sure the eggs are broken up and thoroughly mixed in.
Heat this mixture on low, stirring continuously, until it is warm/hot to the touch, but not boiling (you do not want scrambled egg ice cream).
Once the mixture is warm, put the mixture in the refrigerator (I usually just put the whole pot into the fridge so as to not dirty up another bowl) and allow the mixture to completely cool (at least 2-4 hours).
While your ice cream base is chilling, make your caramel and chocolate ganache.
Start with your caramel sauce. I got this caramel recipe from An Edible Mosaic, so if you have any issues, you can also refer to her post.
In a small/medium saucepan, add 1/2 of a can of coconut milk, 2 Tbsp of honey/maple syrup and 2 Tbsp of coconut palm sugar. Bring this mixture to a boil, then reduce to a simmer, and stir frequently for about 15 minutes, or until the mixture thickens and turns a nice, deep amber brown. Remove the mixture from the heat, and add 1 Tbsp of grass-fed butter (or coconut oil for dairy-free), 1/2 tsp of sea salt, and 1/4 tsp of vanilla extract. Stir to incorporate, then pour your caramel into a separate bowl to allow it to cool.
Next, make your chocolate ganache. Again, in a small/medium sauce pan, add the remaining 1/2 can of coconut milk, 1/4 cup of dark chocolate/chocolate chips, 2 Tbsp of coconut oil (this will help the ganache set up and become firm, but not crunchy, when frozen), and 2 Tbsp of cocoa powder. Heat this mixture over medium/medium-high heat to melt all of the ingredient together, and allow it to thicken. I let mine simmer, stirring constantly, until it was the consistency of a thick, hot fudge sauce. Once thickened, strain the sauce into a separate bowl to eliminate any lumps of cocoa powder, and to allow the sauce to cool.
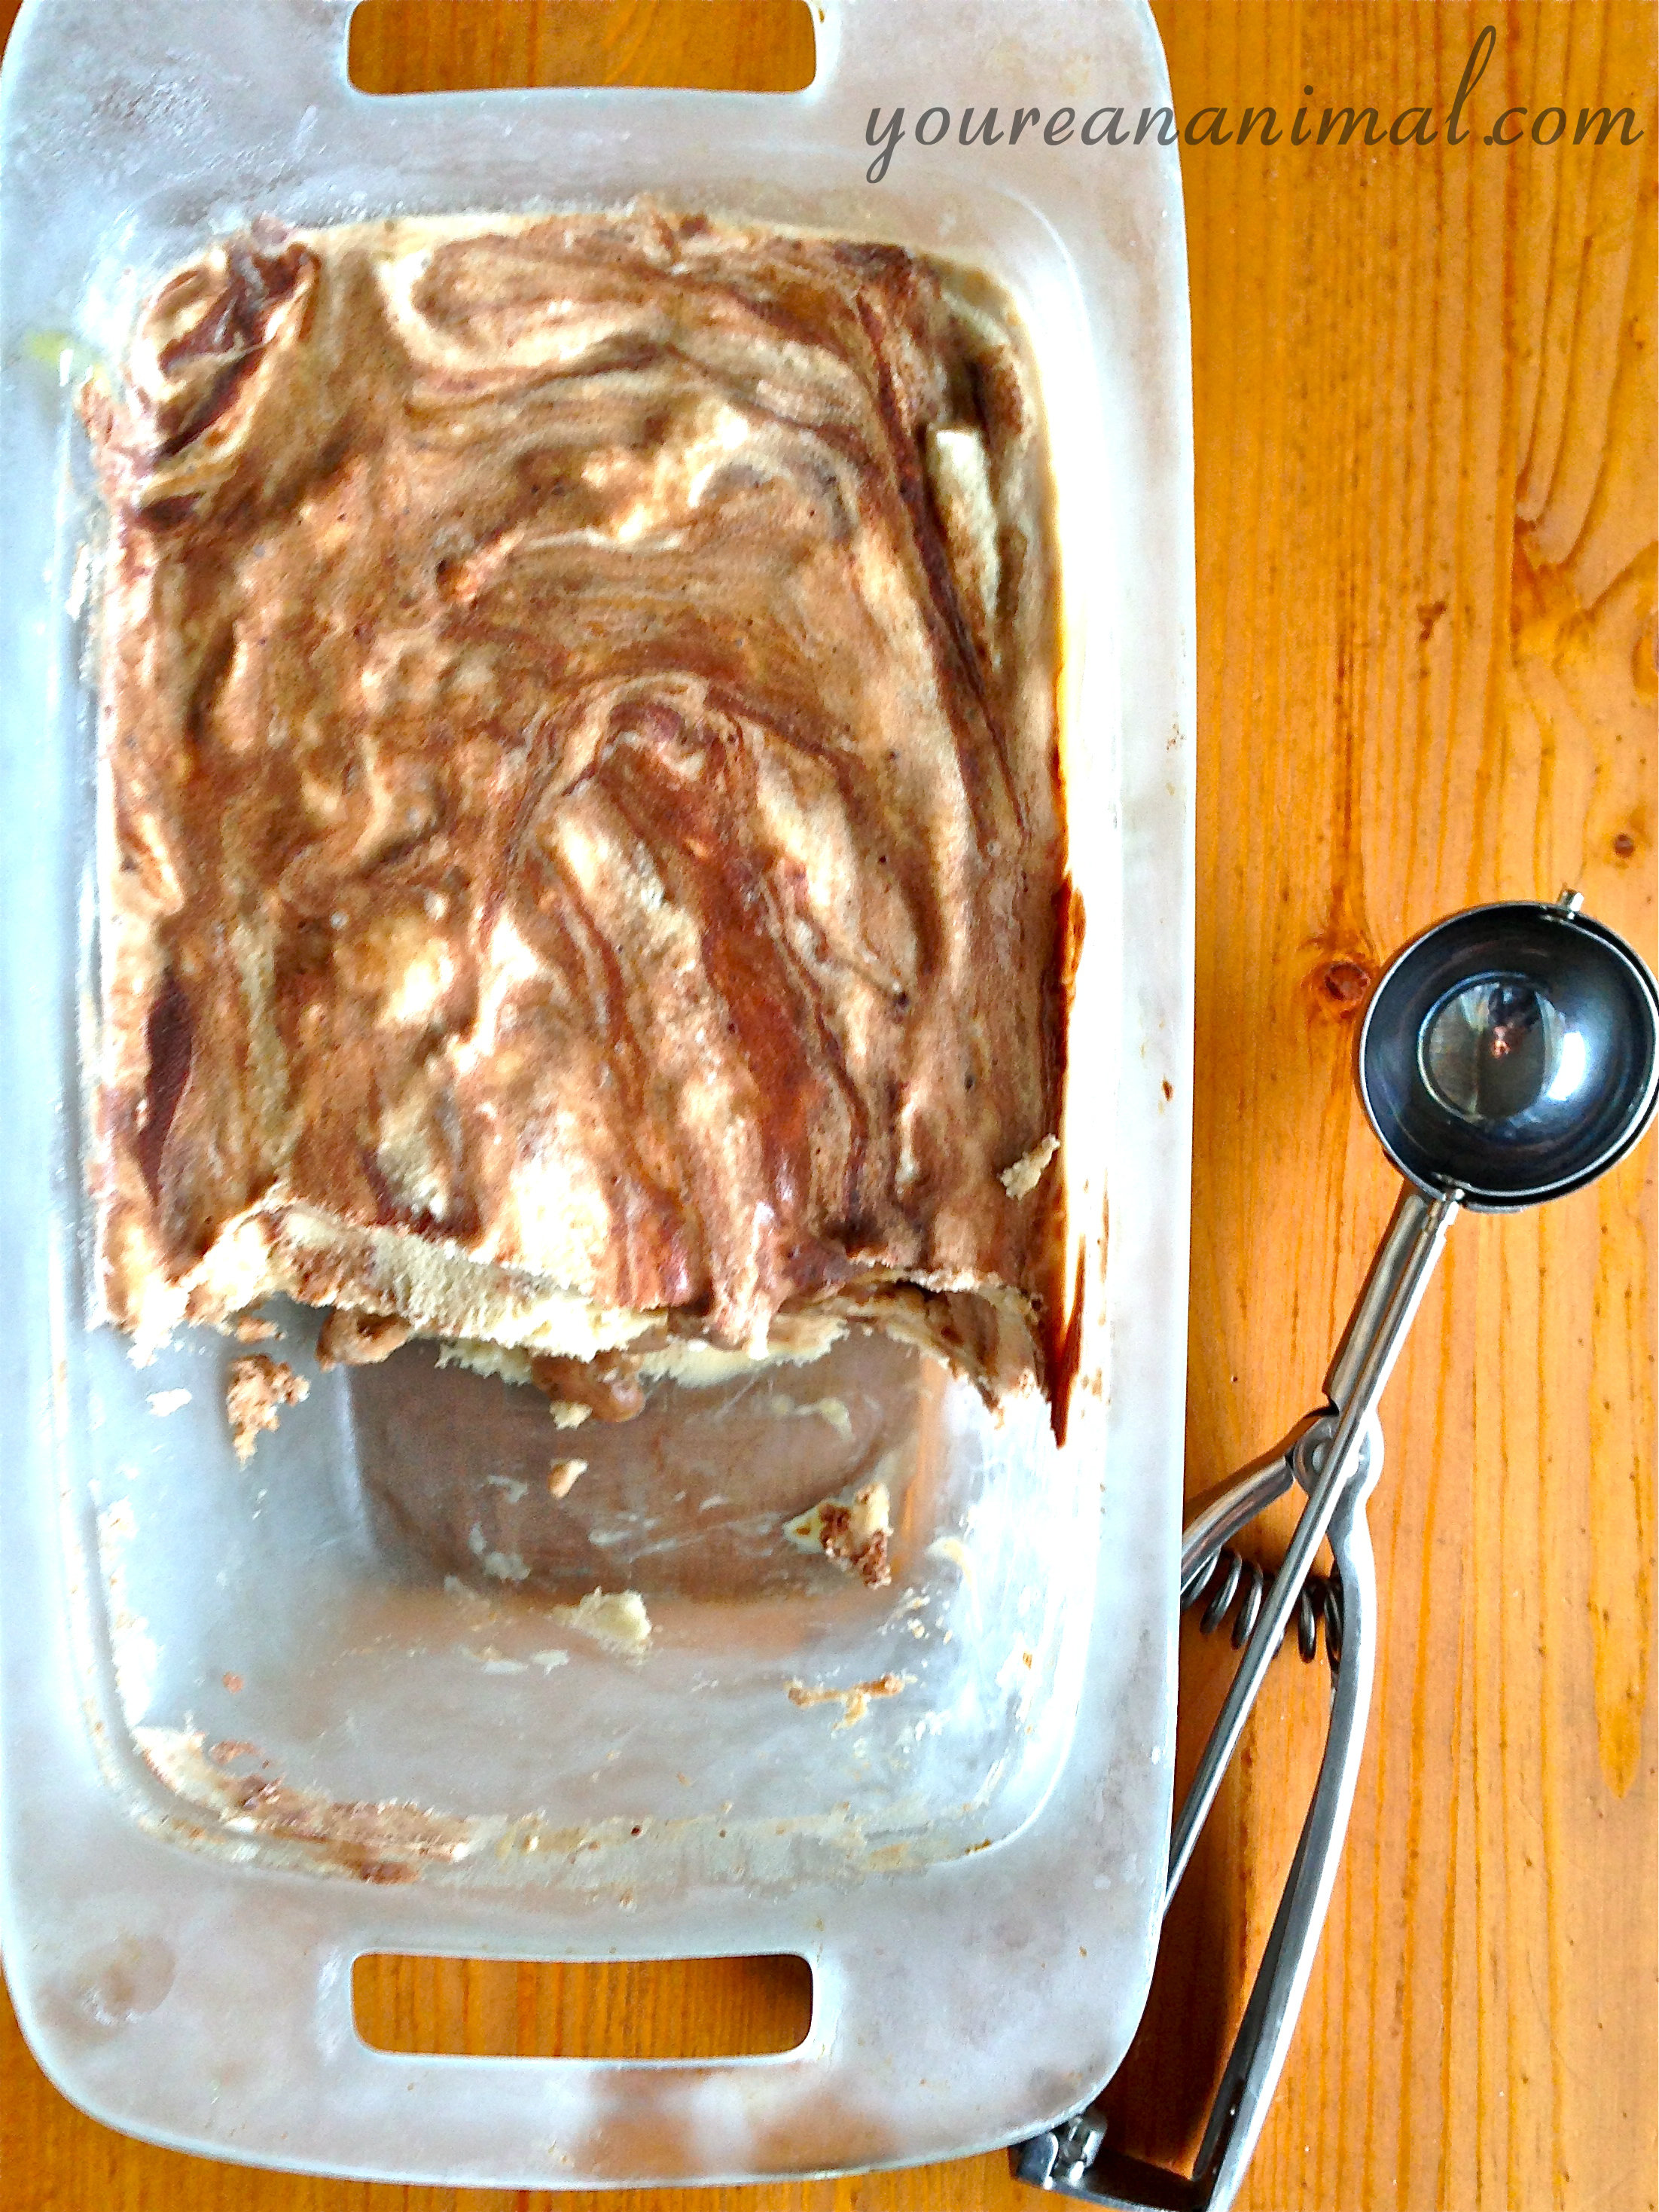
Once your ice cream base is completely cooled, add your base to your ice cream maker, straining it with a sieve as your pour the mixture in in order to eliminate all lumps of arrowroot and egg, and process according to manufacturer instructions.
Scoop about 1/3 of your ice cream into the container you will be storing your ice cream in, and then drizzle about 1/3 each of your caramel sauce and chocolate ganache over your ice cream. Use a butter knife to swirl/fold the caramel and chocolate into your ice cream. Repeat this process two more times, with the rest of your ice cream, caramel, and chocolate. Allow your ice cream to harden in the freezer, and serve when ready! Or eat it as soft serve right away, if you’re like me and can’t resist :).
Items featured in this post:
Please note that some of the links in the above post are affiliate links that will take you to an Amazon.com page. If you choose to purchase a product featured in this post using an affiliate link, you will be directly supporting You’re An Animal. Thanks!
https://nourishwild.com/cms/wp-content/uploads/2014/09/CCCicecream8.jpg20261519Morgan Carrhttps://nourishwild.com/cms/wp-content/uploads/2016/02/Logo-Only-Large-300x212.pngMorgan Carr2014-09-07 14:48:372016-02-27 21:24:05Dairy-Free Coconut Ice Cream with Salted Caramel and Chocolate Ganache Swirl (White Sugar-Free): Inspired by Salt & Straw
We’re back! For those who don’t know, we spent last week exploring Portland, Oregon. As two kids from Richmond, Virginia, Portland was quite a change of scenery. A BEAUTIFUL change of scenery. And food. Holy moly the food options. Richmond is progressing (slowly) but it’s got a long way to go to be on par with Portland in terms of progressive eating habits (whole foods, paleo etc). But what can ya do, we’re southern by heart and stomach here. We spent our days walking around the neighborhood where we stayed (Nob Hill in the Alphabet District), and also the next neighborhood over, the Pearl District, which is a very nice and popular place to be. Luckily, we also had a car, so we were able to head outside of the city and go hiking. While we were only there for 3 full days, we got a lot in! So here’s a synopsis of our trip. And in particular, a review of our favorite things (mostly food, of course).
This was the view from the plane as we crossed into Oregon/Washington territory. Mount Rainier and Mount Adams peeking through the clouds.
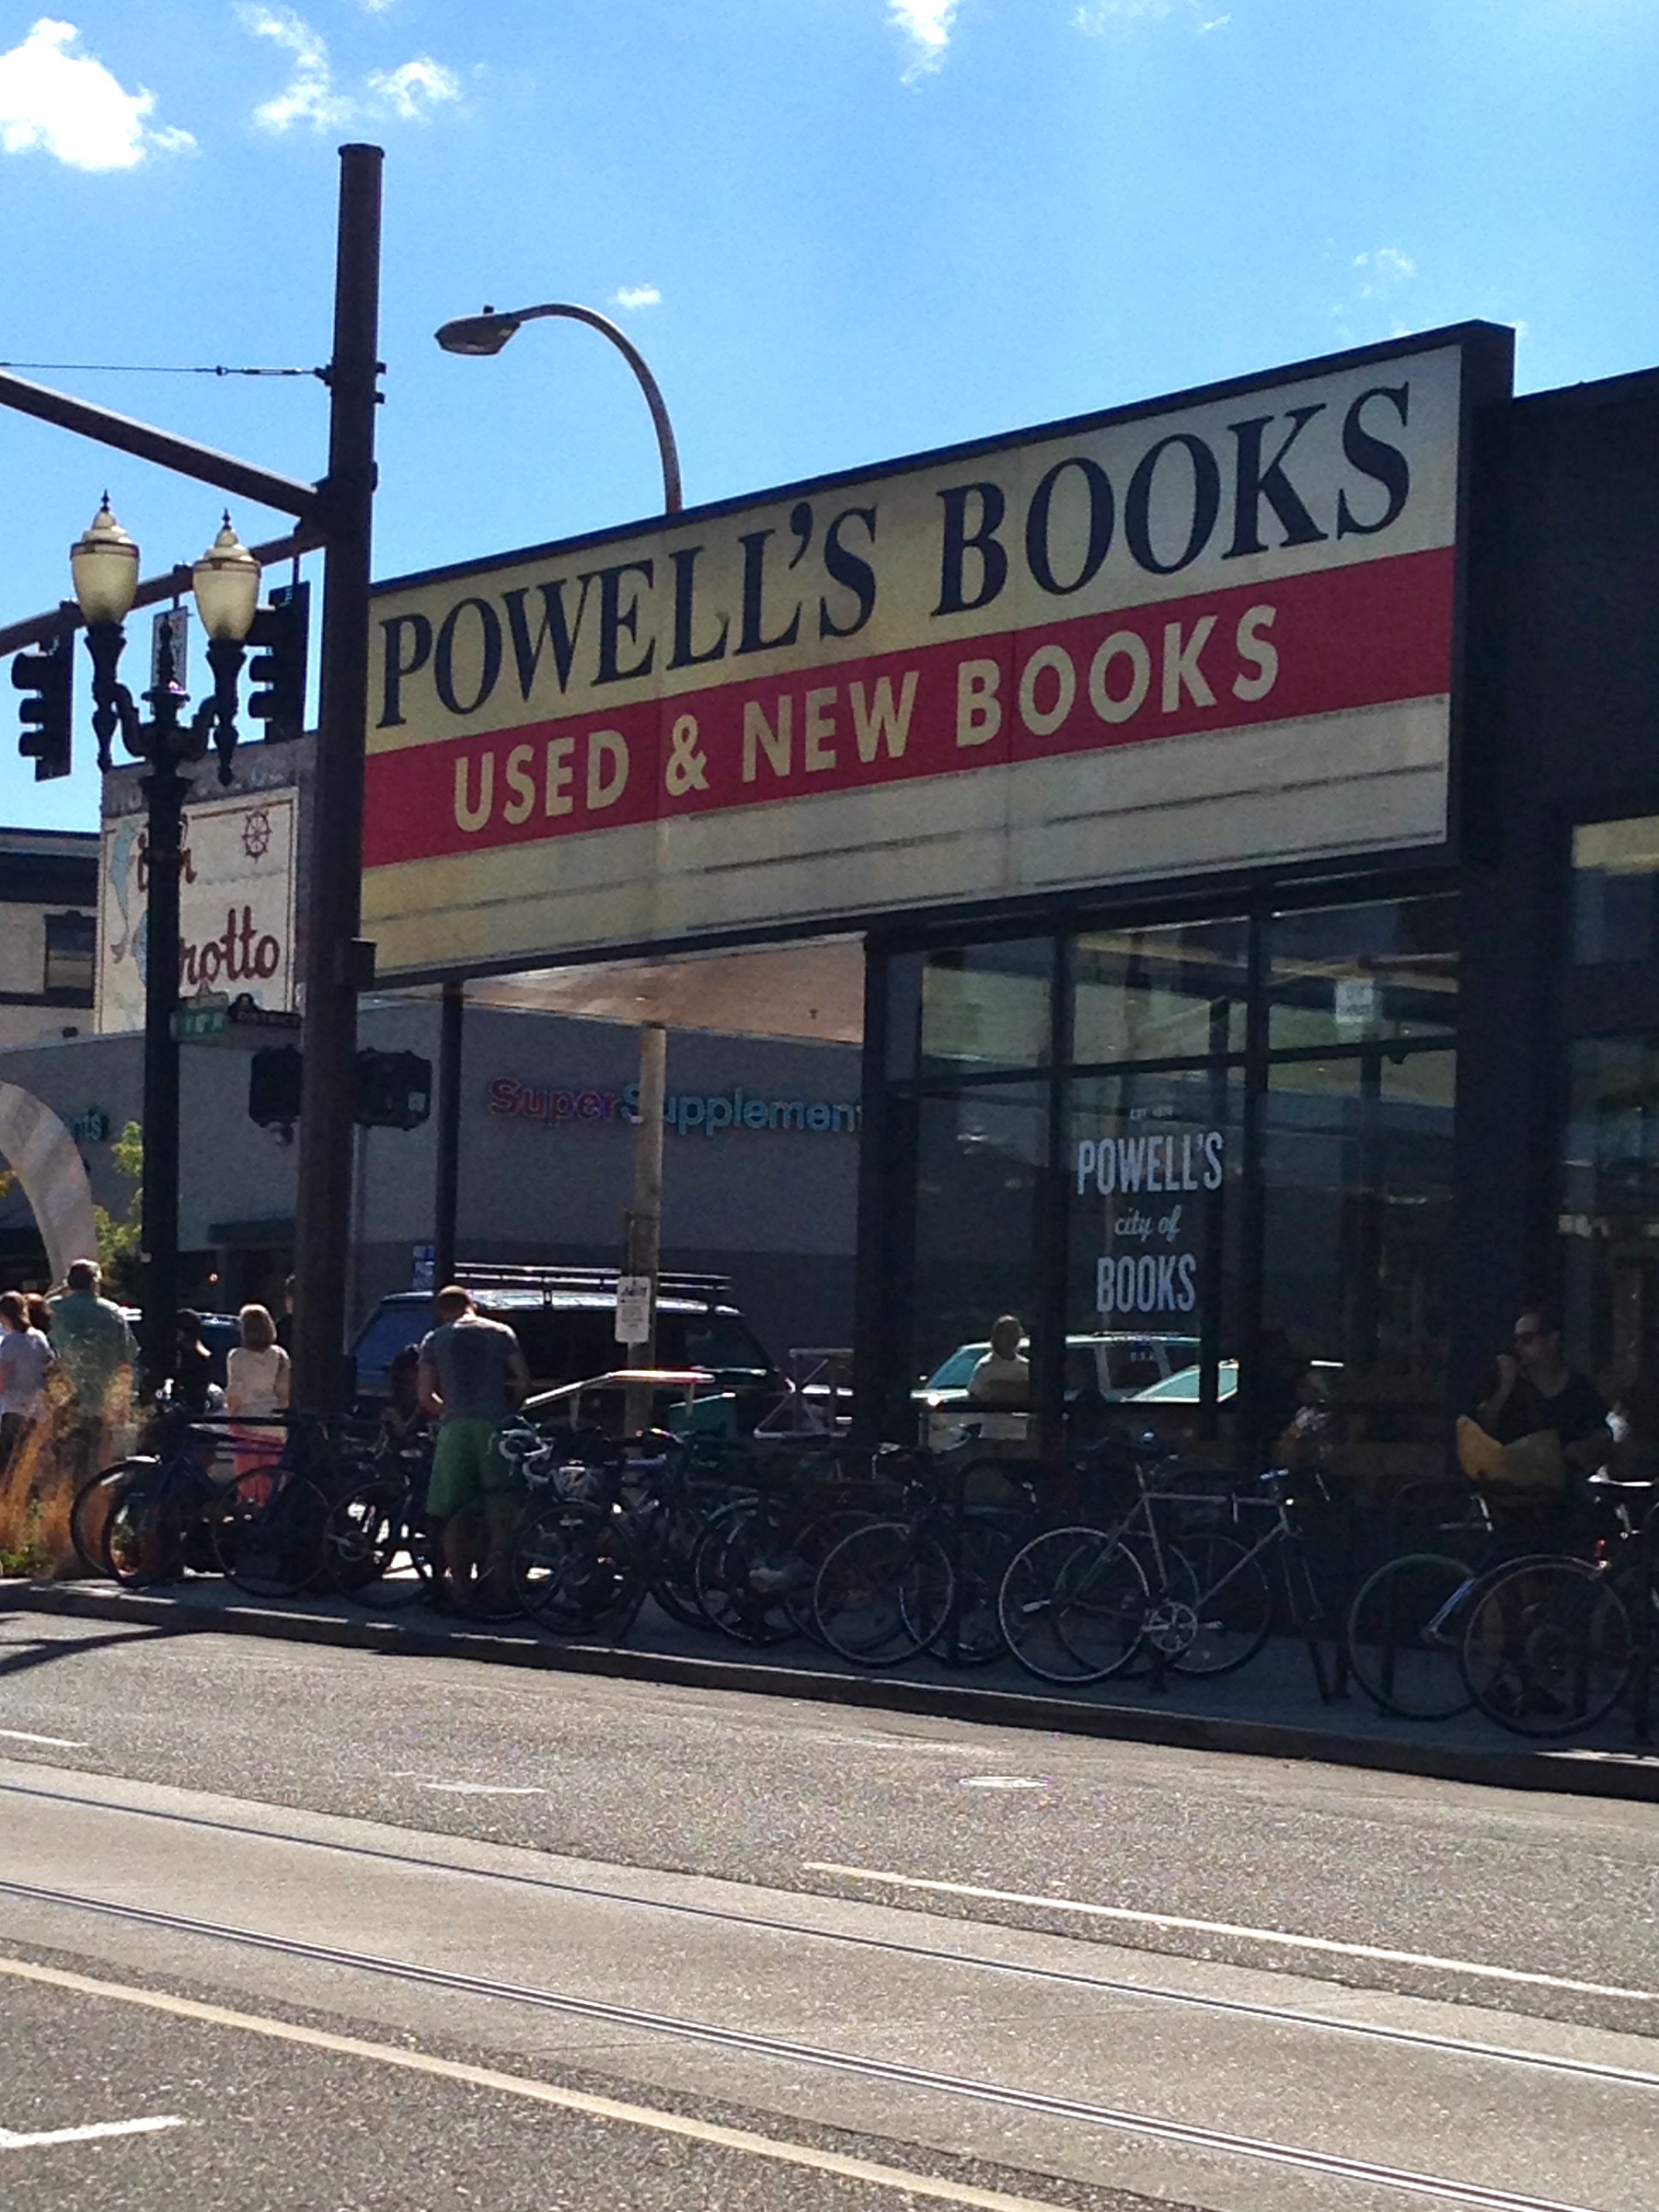
One of the first things we did when we got settled in Portland was visit Powell’s Books. A landmark in Portland, this place takes up a whole city block. Why, yes, yes I did say a whole city block. As two self-proclaimed book nerds, we obviously couldn’t help ourselves. Three hours in this place. Three. Hours. And I’m not even entirely sure I saw every section there. Needless to say, we geeked out for a while and it was awesome!
Image from our Instagram page: youreananimal
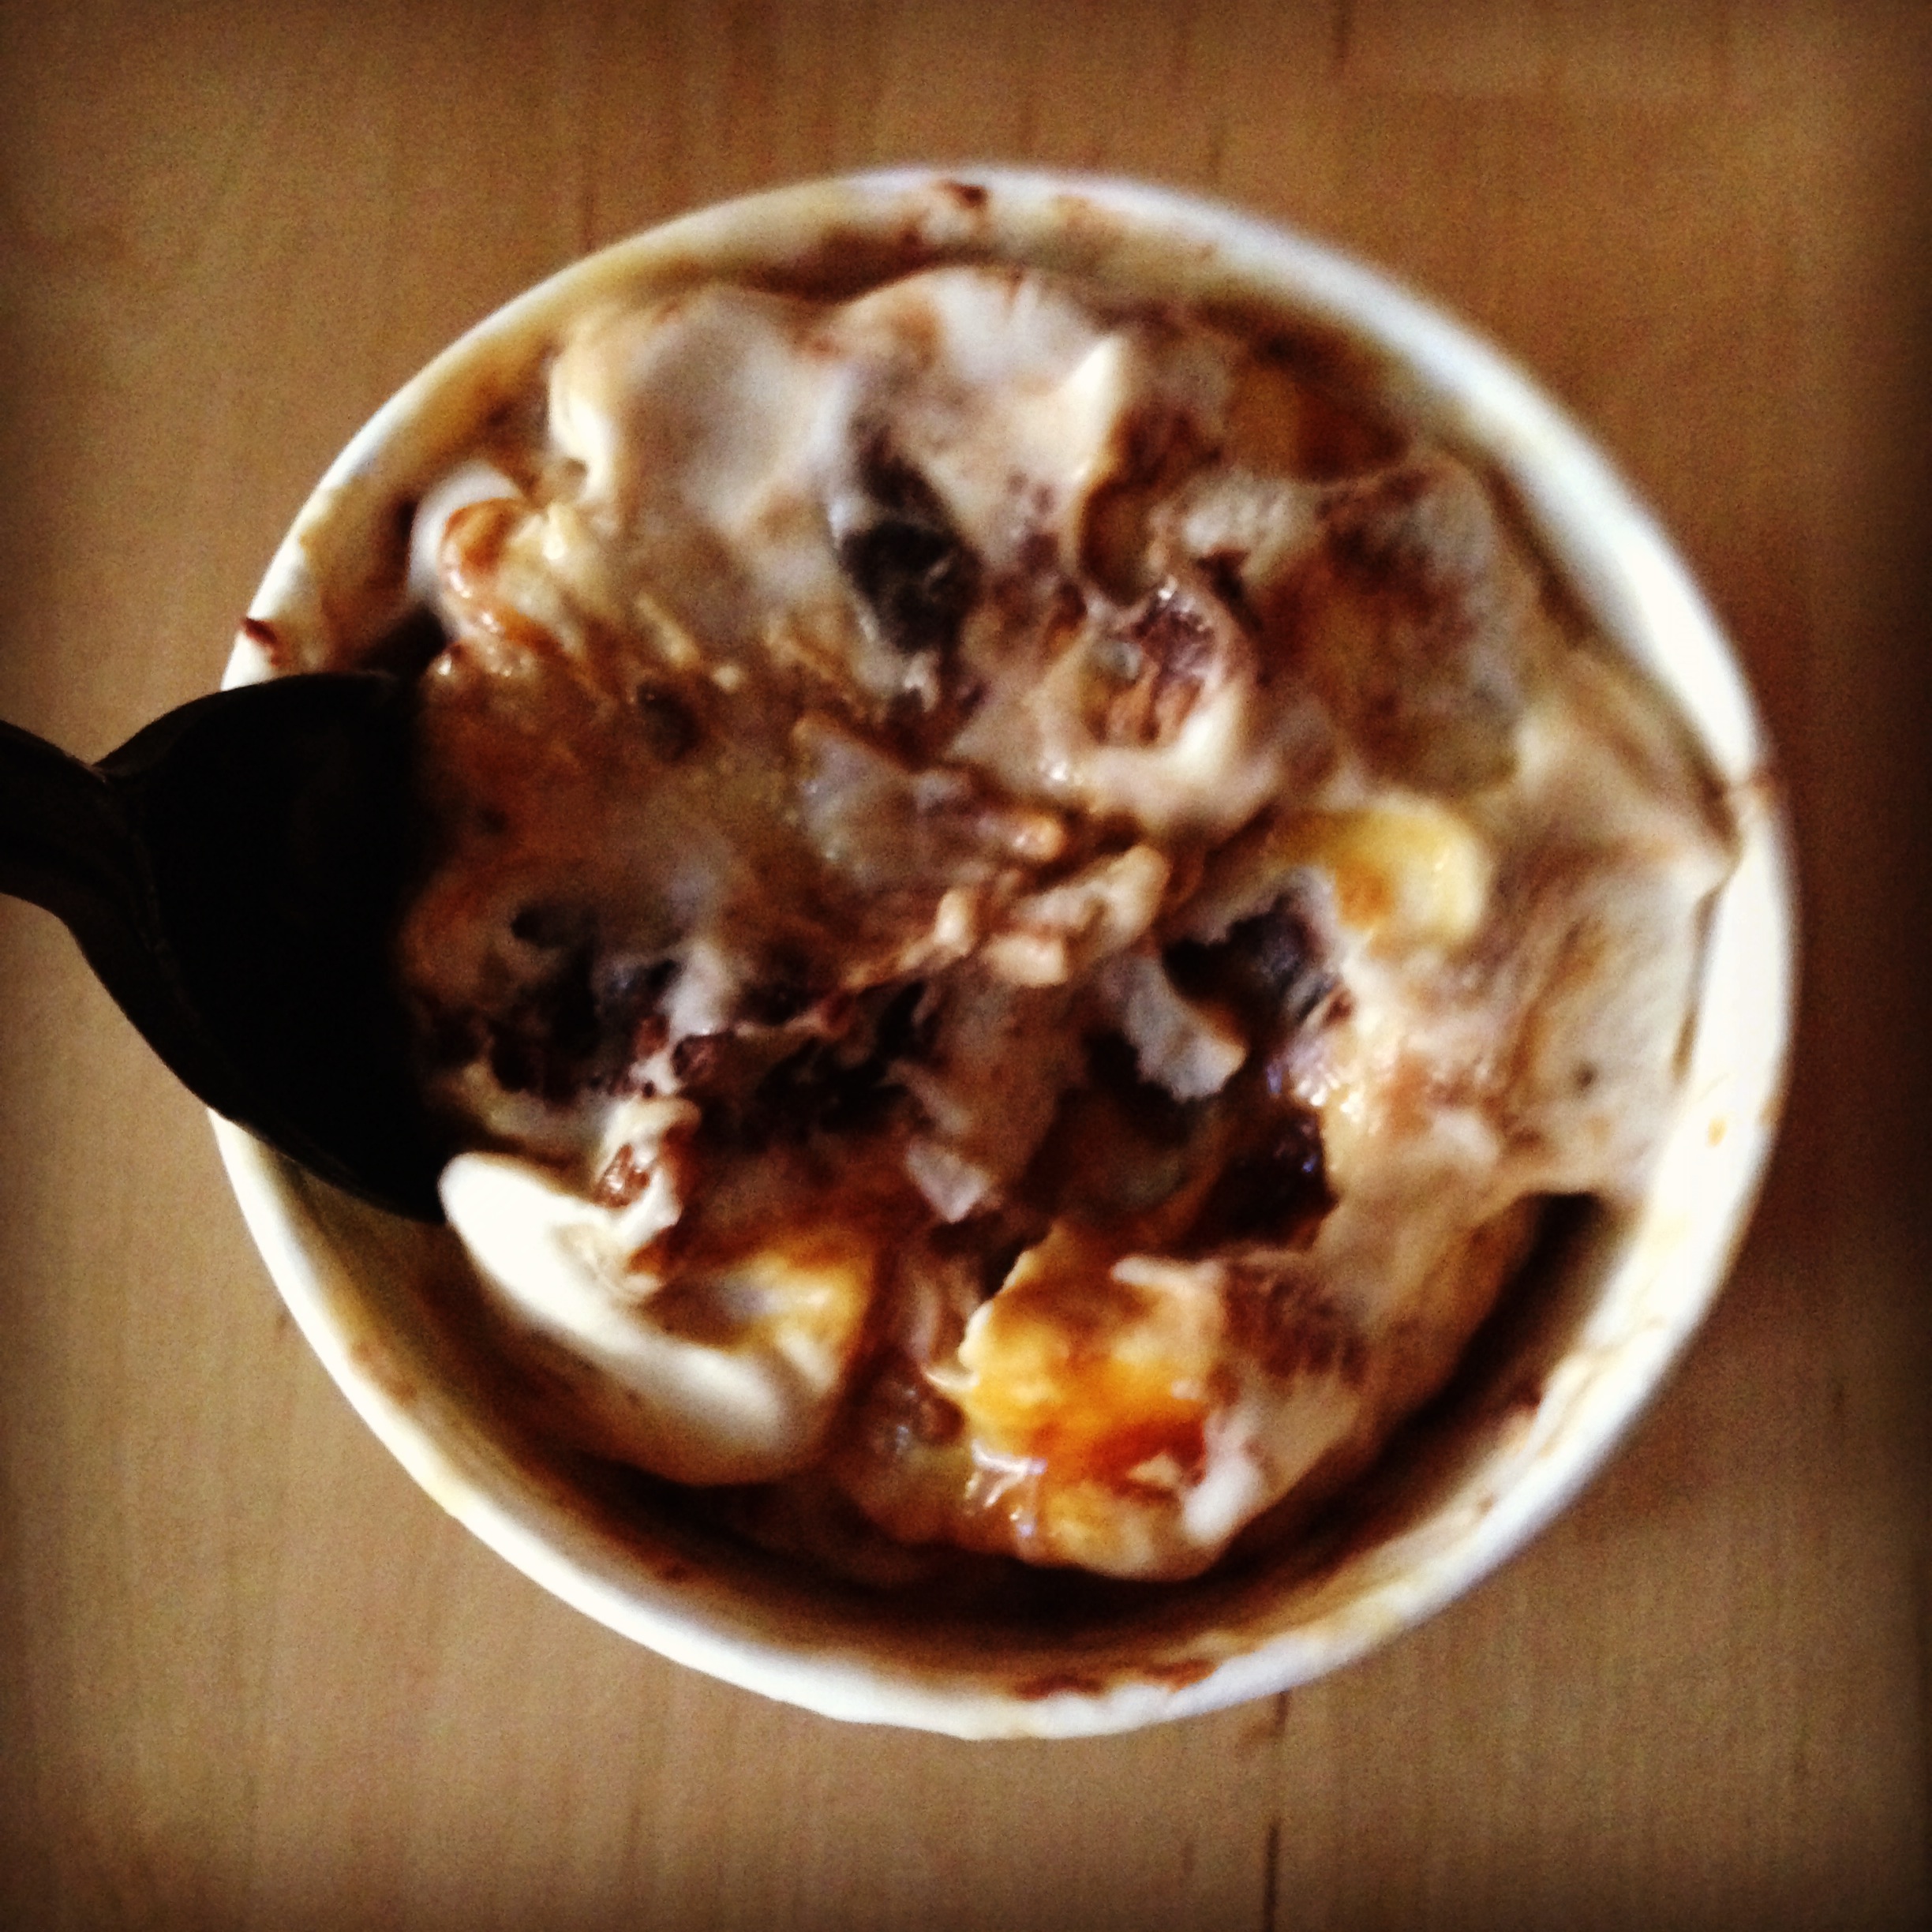
Next on our to-do list (okay, MY to-do list, but let’s just say Andrew didn’t drag his feet too hard) was to visit Salt & Straw. This is another well-known place in Portland, which just ever so luckily was only a block away from where we were staying (a super cute Airbnb find… check it out here. We loved staying there! The location was perfect, and Cynthia, the host, was lovely.) Salt & Straw stole our hearts. It’s become relatively famous because of the innovative flavors they offer (right now they have flavors like Summer Sweet Corn Buttermilk, Plum Sangria Sorbet, Pear with Blue Cheese, and Honey Balsamic Strawberry with Cracked Pepper), and also because of the fresh, quality ingredients they use to create an amazing dessert. Many of their flavors are based on items being sold in the local farmers market at the time. Oh yes, it’s love. We got hooked on their dairy-free flavor, Coconut with Petunia’s Salted Caramel Bars. It’s dairy-free because it uses coconut cream for the base, and then they add in chunks of gluten-free/vegan caramel cookies from a local bakery called Petunia’s, and they also swirl in some extra caramel and chocolate ganache ribbons because YUM. We ate a pint of the stuff. Two days in a row. Yes, yes indeed that really happened. And you know what? I feel okay about it. Oh and by the way, I’m in the process of creating an ice cream recipe inspired by this one. YEEUUS. So look out for that!
We really wanted to get out in nature a little bit (animals, remember?) so we decided to go out to a beautiful waterfall hike called Multnomah Falls. It’s a little bit more touristy than I would typically like a hike to be, but we knew that before hand and were told that even with the touristy vibe, it was worth it. This definitely was true. The waterfall itself is definitely very popular, and there were many, many people milling about at the bottom (where the first couple of pictures were taken). However, there is a trail to hike to the top of the waterfall that is much less populated. So that’s exactly what we did. It was a gorgeous hike, with lots of streams and rocks, and peekaboo views throughout. Getting to the top of the waterfall was a little anti-climatic, but the hike itself was worth it. We were walking pretty quickly, and it took us about 1.5 hours to get to the top and then back down. Definitely a steep hike, though. You can see in the last picture the entire waterfall. There is a little overlook right at the top that you hike up to, so you can tell how high and steep the mountain actually is.
Image from our Instagram page: youreananimal
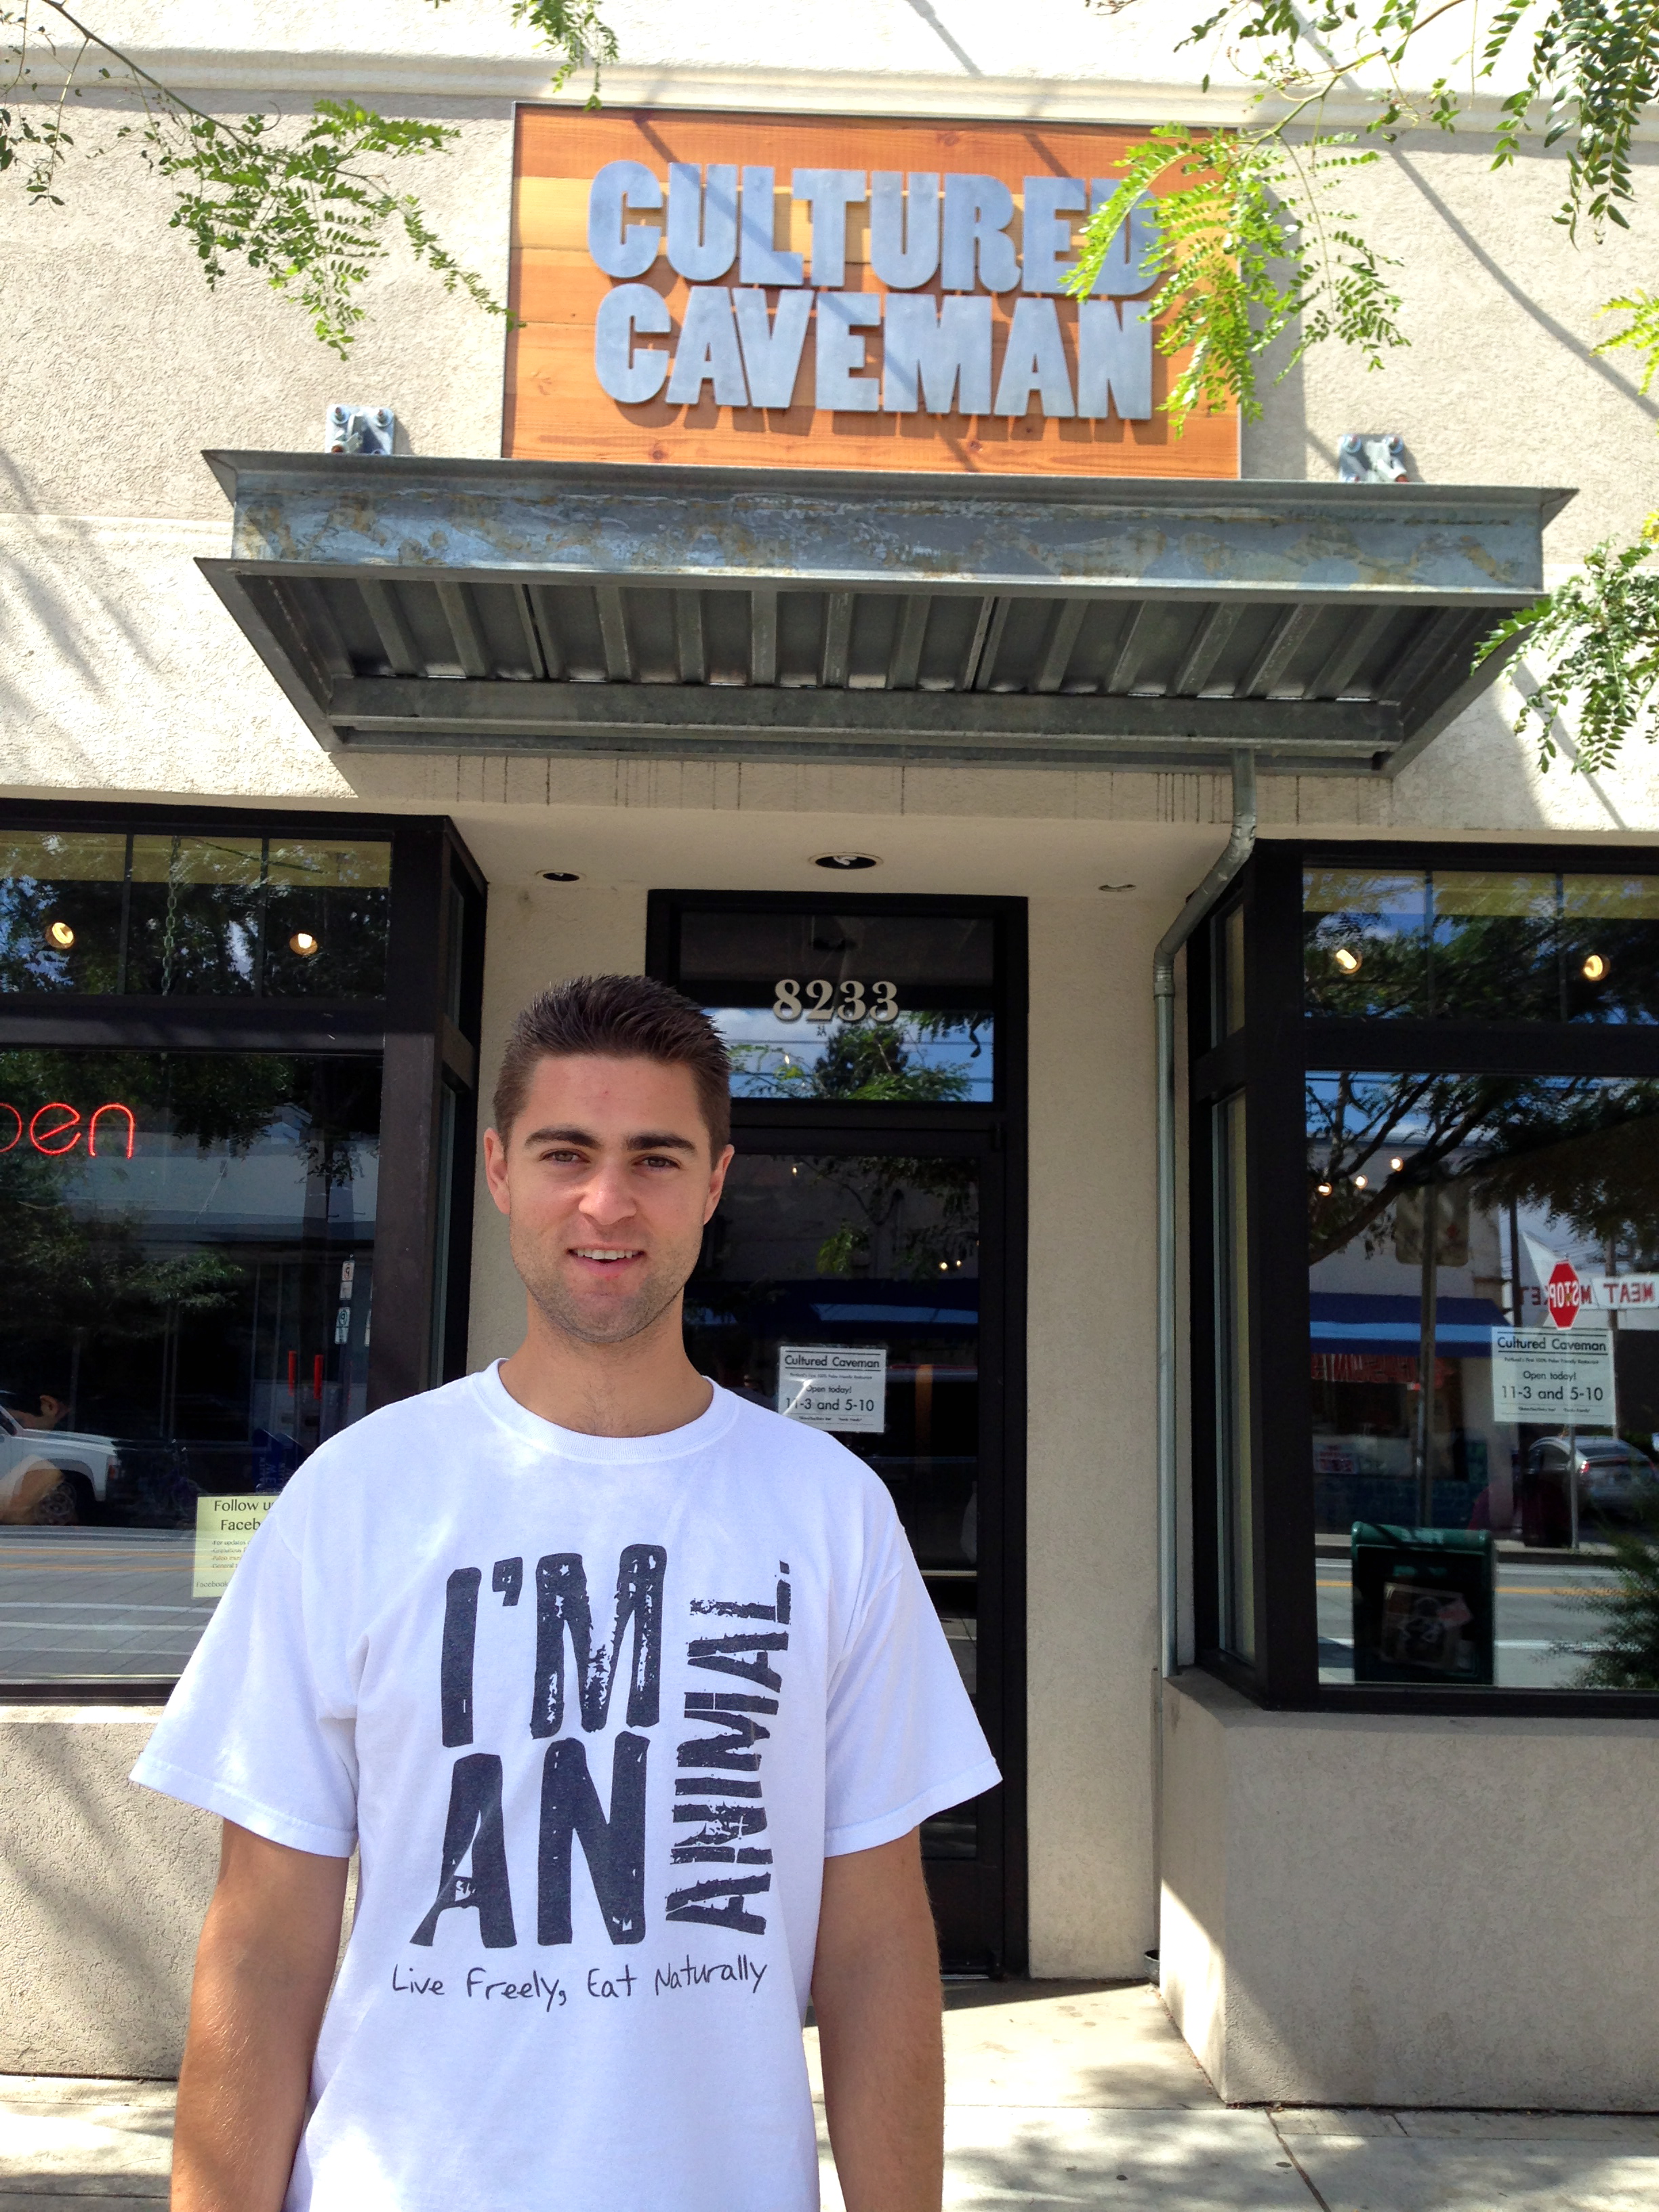
We found out that there is a Paleo-based restaurant in Portland, and our stomachs cried out in jubilation. Cultured Caveman started as a food cart, and has now evolved (he. he. he.) into 3 carts and a restaurant throughout the Portland area. We met one of the owners, Heather, and she was SO sweet. We could hardly contain ourselves with the menu, beyond thrilled that we felt comfortable eating any and all of it. I went for the Carnitas with a side of Zoodles, and Andrew had the main dish of Zoodles and Meatballs with a side of broccoli and bacon slaw. Holy holy holy. I’m still excited just remembering it. Not only was it grain-free (yes, those tortillas are grain-free), dairy-free, whole-food goodness, but it was absolutely de-li-cious. Don’t be surprised if a Cultured Caveman-inspired recipe shows up on here soon too.
For our last dinner in Portland, we wanted to have a nice, sit-down meal, so after two different people’s recommendations, we chose Andina. Andina is a Peruvian-based restaurant in the Pearl District, and certainly lived up to the recommendations. We started with a pitcher of sangria, and after letting the waiter know that we didn’t need any bread, he asked if we were gluten-free and we said yes. So he instead (to our surprise) brought us a gluten-free replacement of fried cactus (tasted very similar to potatoes). I ordered the Pescado Al Rocoto Y Kion, which is pictured above (half eaten… oopsie). It was a deep-sea fish, with mushrooms, bok choy, and ginger slices in a pork broth. Absolutely divine. Andrew had Conchas Del Senor Sipan, which were scallops on top of a parsnip and potato puree, with “cannelloni,” which were thinly sliced beets, rolled and stuffed with crab meat. We finished up with a quinoa flour brownie. Oh boy, so worth it.
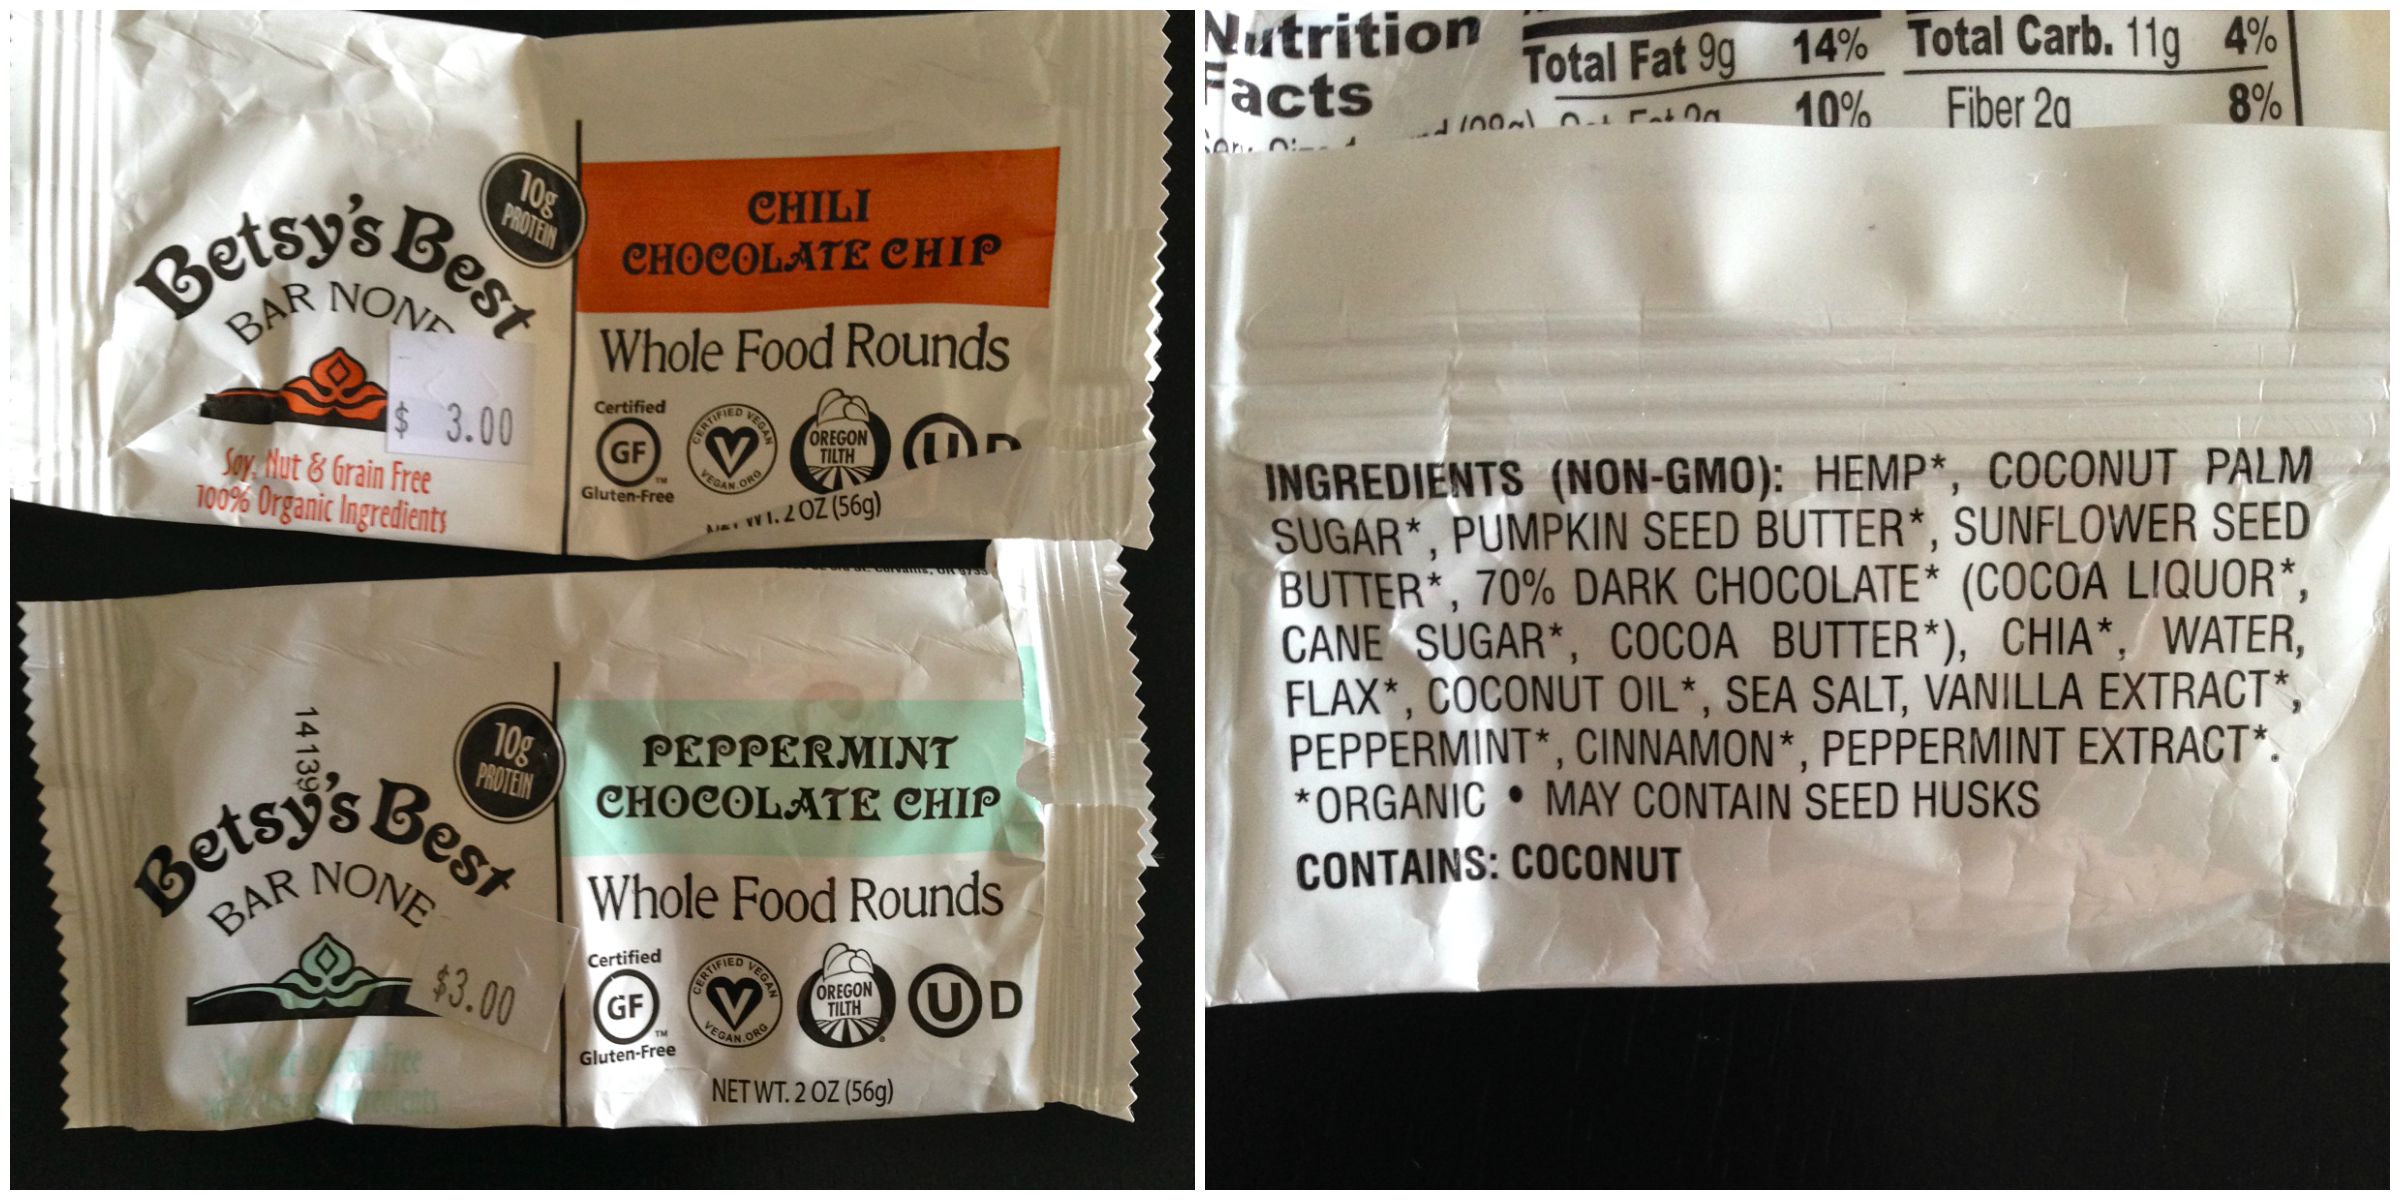
One gem I found for my plane snack were these bars. They are called Betsy’s Best Bar None, and are based out of Portland, but you can also order them through Amazon here.Just look at those ingredients! I didn’t actually believe a protein bar like this existed, and I’m so pleased I was wrong. Plus, there aren’t any nuts, which is great for me because I tend to be a little itchy/sensitive with too many nuts. Usually, I just make my own if I’m in need of a bar that I actually like the ingredients, but in a situation like this, these bars were perfect. I liked the Peppermint Chocolate the best, but she has several different flavors, including Dark Chocolate Chip, Lemon Coconut, Cinnamon Cardamom, and Chili Chocolate Chip.
Image from our Instagram page: youreananimal
After a 20 hour delay in Detroit (yeah, let’s not talk about it…), we finally made it back to good old RVA. Portland was an amazing place to visit, and I’m so grateful we got to take the time to head across the country and experience something new together! Thanks, Portland, for showing us a good time 🙂
Please note that some of the links in the above post are affiliate links that will take you to an Amazon.com page. If you choose to purchase a product featured in this post using an affiliate link, you will be directly supporting You’re An Animal. Thanks!
https://nourishwild.com/cms/wp-content/uploads/2014/09/portland16.jpg29372203Morgan Carrhttps://nourishwild.com/cms/wp-content/uploads/2016/02/Logo-Only-Large-300x212.pngMorgan Carr2014-09-06 17:13:582015-07-29 22:38:06Animals On Vacation: Portland, Oregon
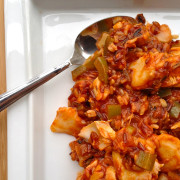
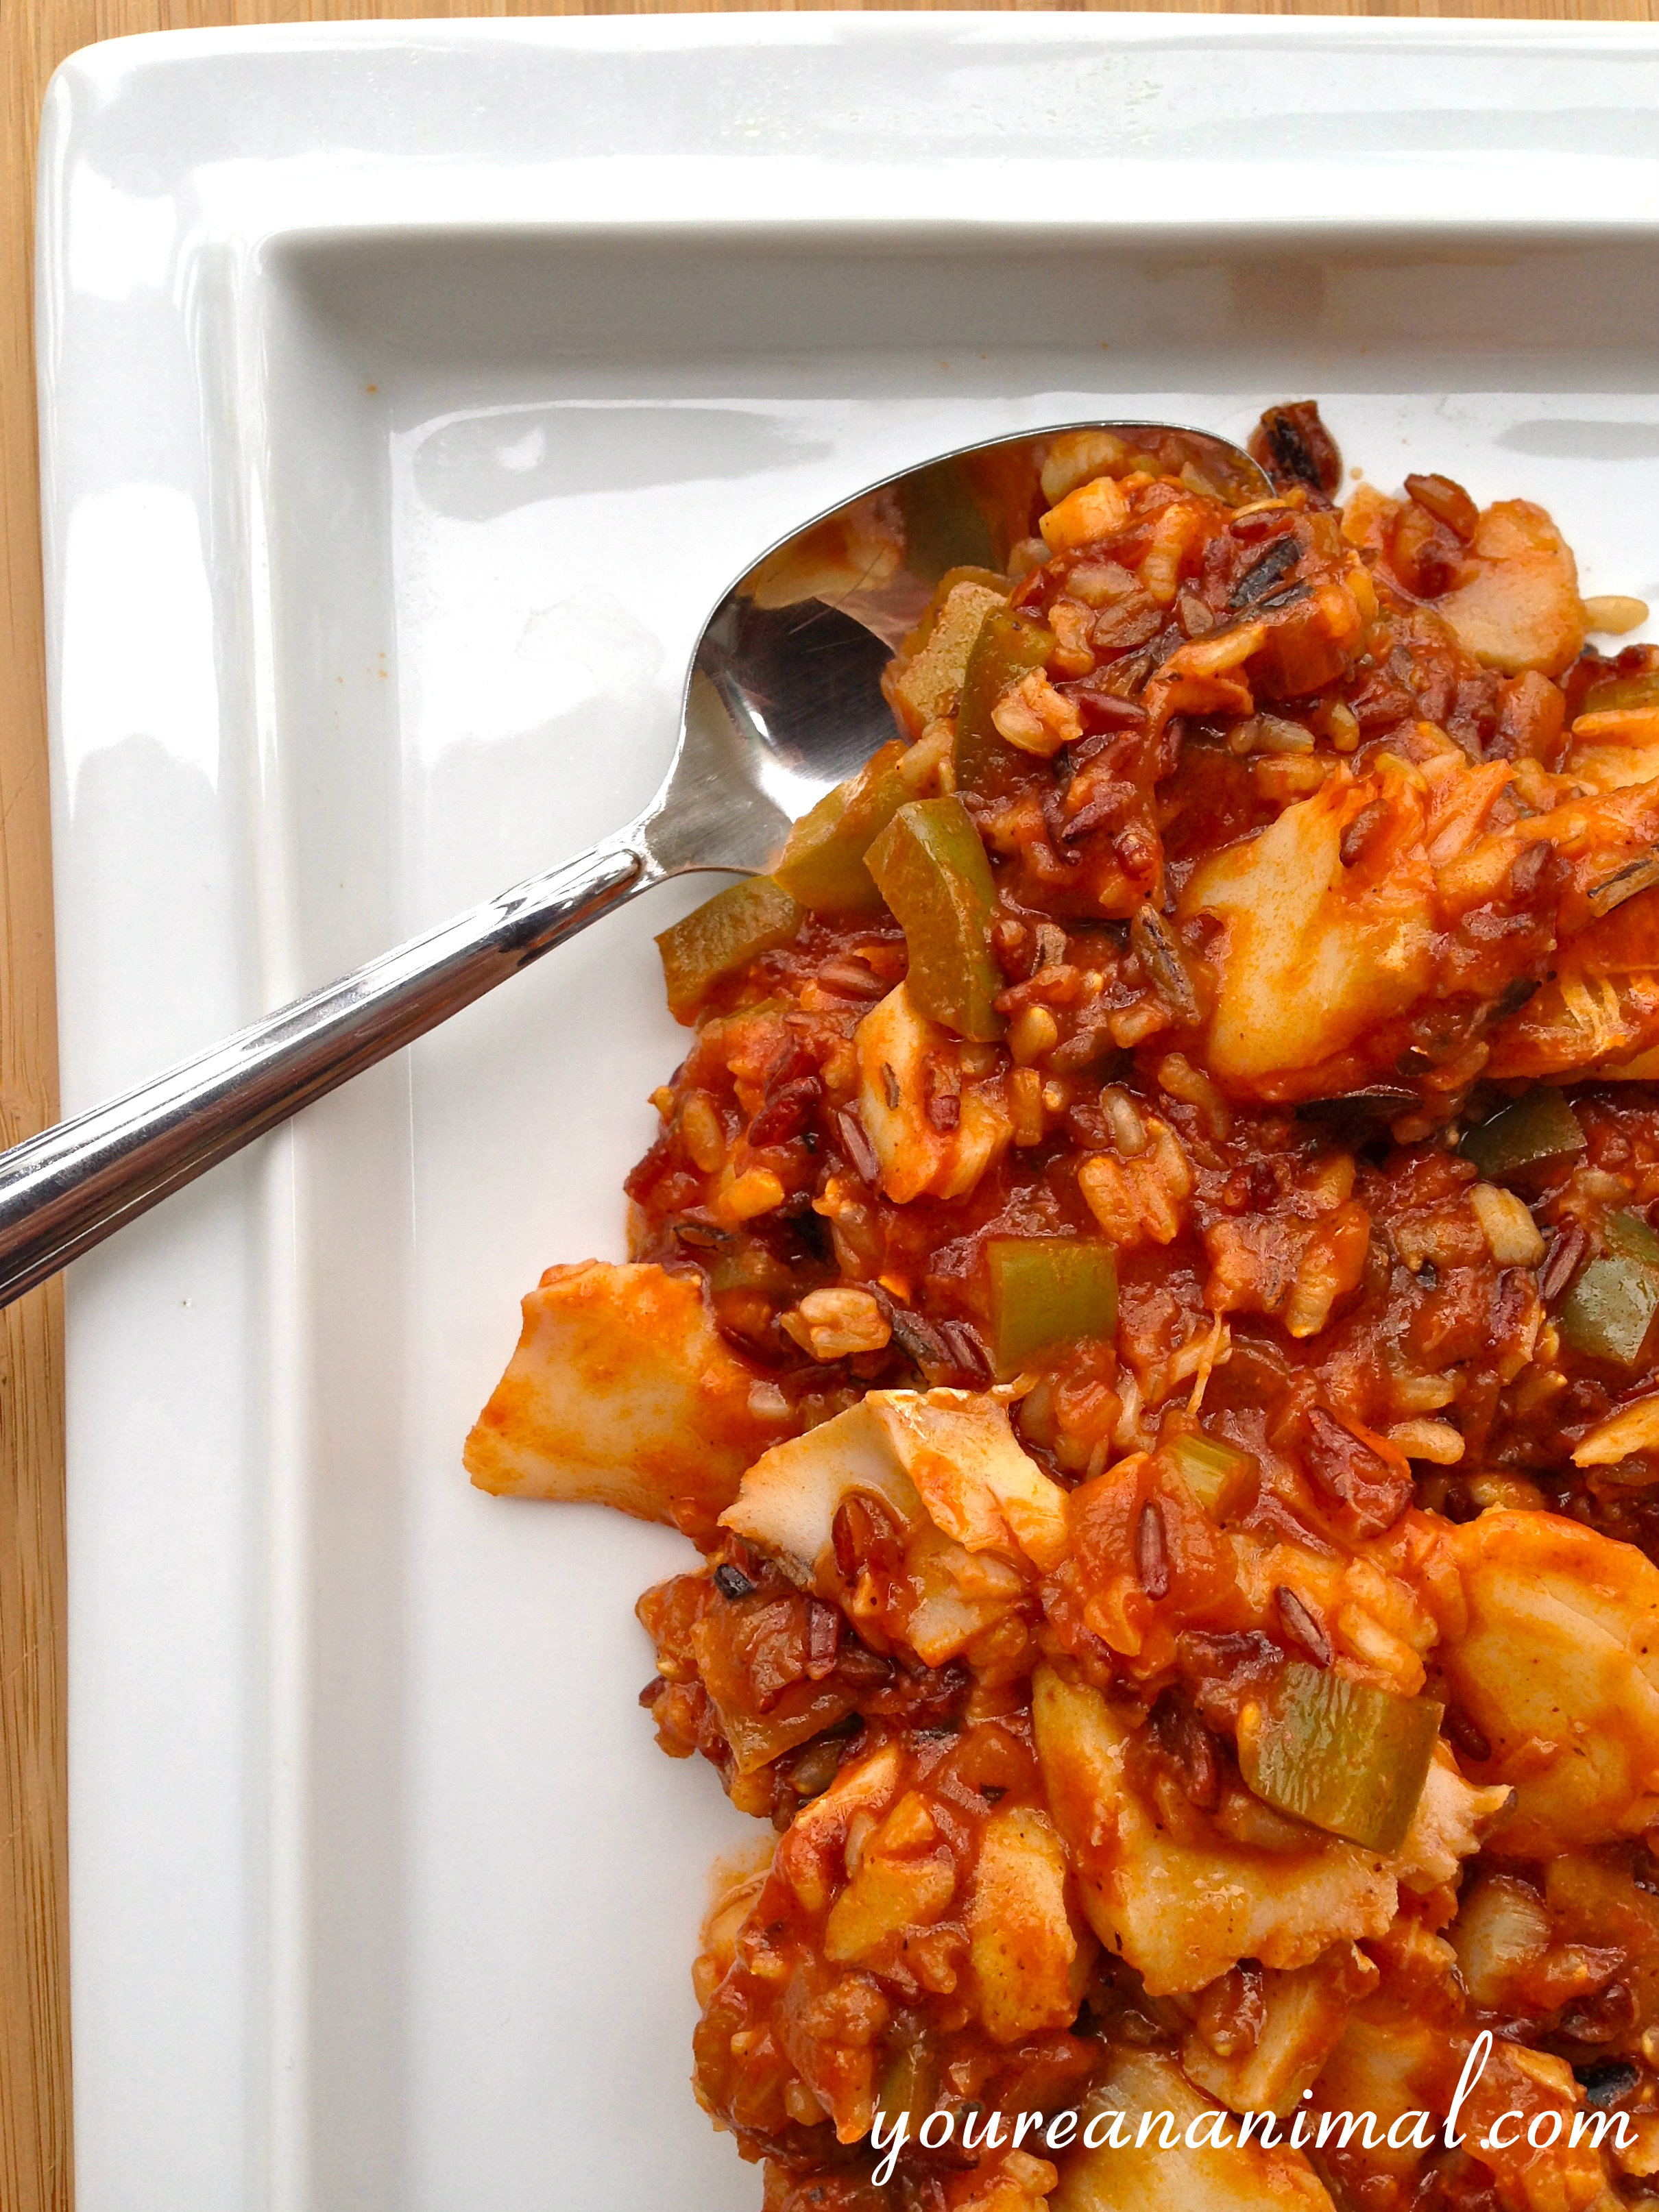
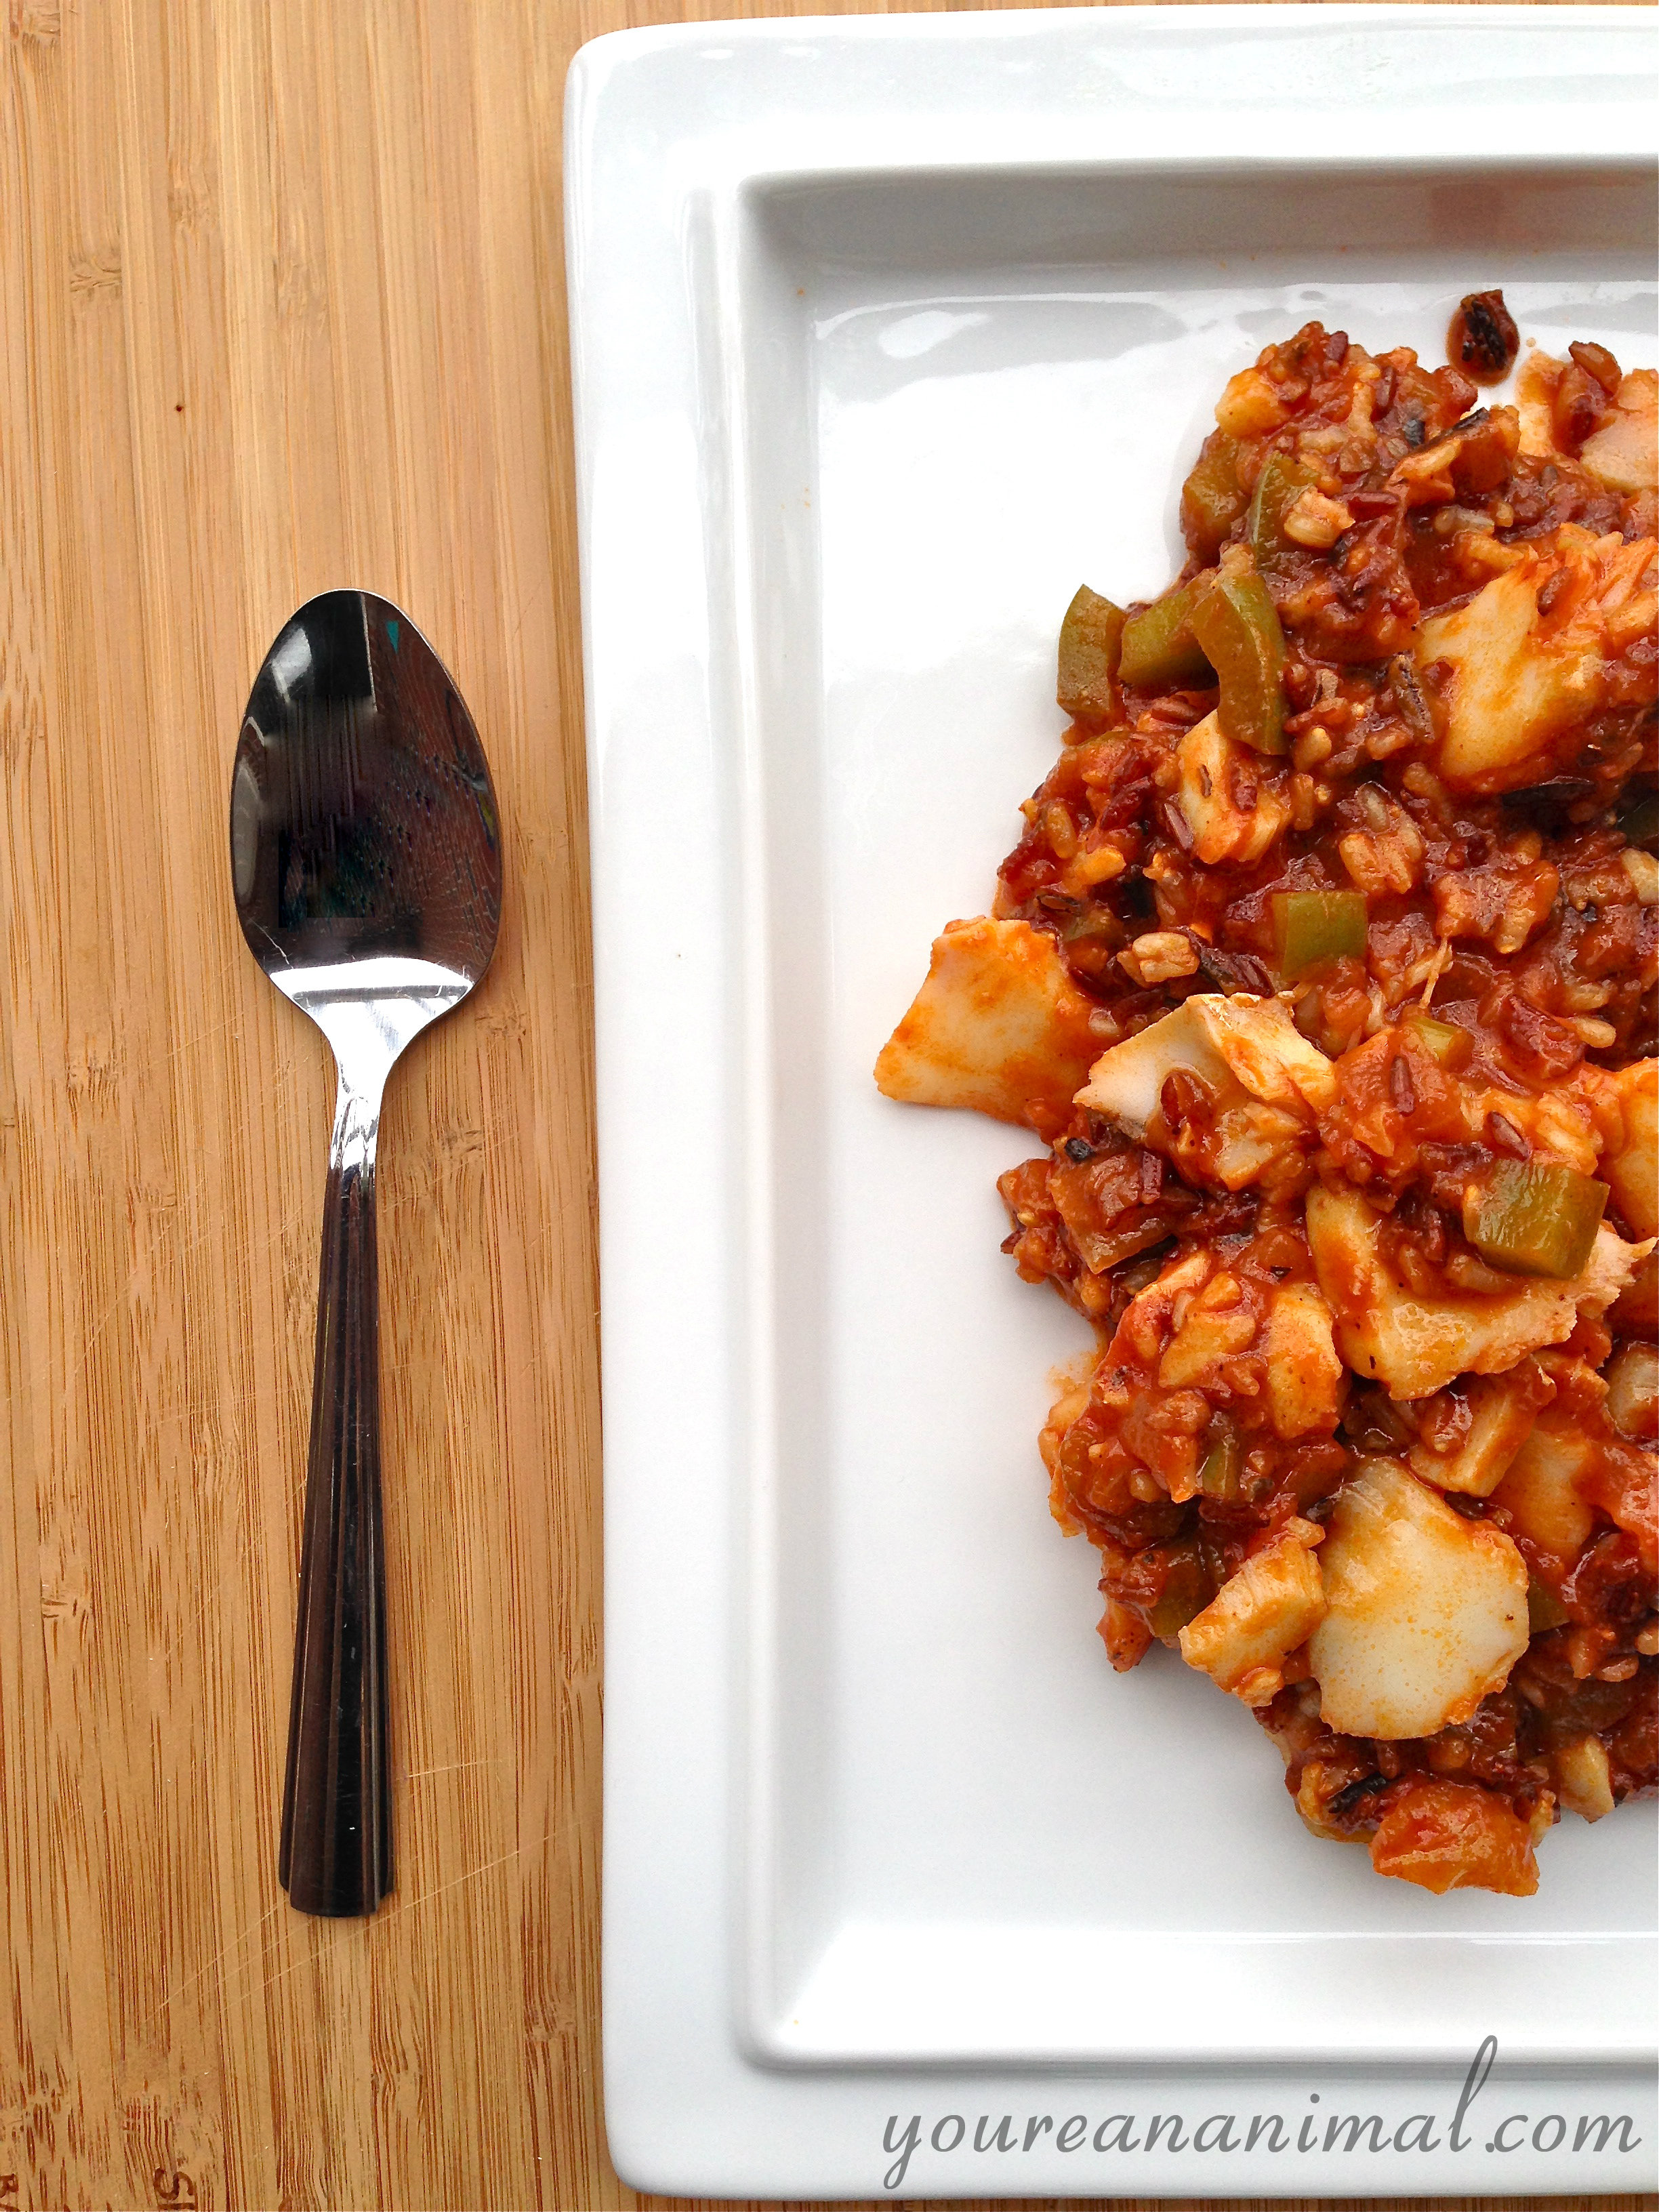
Oh my my. I could eat this for every meal for a week, no joke. This recipe came from our need to stretch our budget a little bit farther, as money has been a little bit tight. So instead of housing $20 worth of cod in one sitting, we decided to draw it out by putting it in this oh-so-yummy-in-my-tummy jambalaya-esque stew. Now hear me out, you Nawlins die-hards. I say jambalaya-esque because I know it is not a tried and true jambalaya recipe, and I am sure there are rules and regulations that I know nothing about when it comes to cooking a traditional jambalaya. But that being said, the flavors and composition are definitely a solid nod to the Louisiana specialty, so I will leave it at that. This stew though is one of those comfort foods that makes you want to curl up on the couch with a big ol’ bowl and watch a movie with wine and a blanket. Now if that isn’t a cozy thought, I don’t know what is. Warm, hearty, filling, and flavorful. Plus it makes a lot of food, so perfect for a family meal or for leftovers! Both Andrew and I get two full meals out of this recipe. And bonus! This is absolutely one of those meals that actually tastes even better the next day. You can easily substitute any protein in this recipe, or add sausage, chicken and shrimp for that more traditional jambalaya mix, but if you’re like us and want to get some quality seafood and make it last, I would definitely suggest sticking with the cod!
This whole week was devoted to preparing for a little obstacle race we like to call the Spartan Race. And by “little obstacle race” I mean actually one of the most physically grueling events I have ever put my body through. So in an effort to bulk up a little before the race, we ate way more carbs/grains than usual, including rice in this jambalaya. However, we found a sprouted rice trio (link in recipe below) that we loved with this meal, didn’t make our tum-tums ache, and filled us up to the brim, so it turned out well.
So… let’s talk about this Spartan Race. For those who have never heard of such a thing, maybe you should keep it that way. Just kidding, kind of. Yesterday we did the Virginia Super Spartan, which is the middle level of their 3 race options in terms of distance. The catch, however, is that this particular race happened to be at Wintergreen, which is a ski resort here in Virginia. And the race took place on the double black diamond mountains. Which means we spent 5 hours hiking/slipping up and down a muddy (it rained) 7.2 miles of mountains, with challenging obstacles strategically placed throughout. We heard several people saying this race was harder than many of the “Beast” level Spartan races, because while those races are longer in distance, they aren’t usually on mountain sides. Oh and also NBC filmed it. Which to me says it was “something special.” Yeehaw. We made it over the finish line, but just barely. Needless to say, I’m spending most of today on the couch.
Cod Jambalaya
about 1 lb of wild cod
1 small yellow onion, chopped
1 green pepper, chopped
2 stalks of celery, chopped (make sure the pepper and celery are chopped to approximately the same sized pieces)
approximately 1 tsp each of celery salt, paprika, chili powder, garlic powder and onion powder
approximately 1/2 tsp each of salt, black pepper, and italian seasoning
cayenne pepper to taste (I only use a couple dashes, but I’m not a fan of spicy foods)
Preheat the oven to 400 degrees. Sprinkle the cod with a pinch of the spice mix.
Cook the cod in the oven for approximately 15 minutes, or until the cod has split open. Let rest once cooked.
In a large pot with a lid, saute the onion until soft and translucent.
To the pot, add the water, chicken stock, and rice. Bring the mixture to a boil, then reduce to simmer.
Cover and cook the rice for about half of the designated time on the package (about 15 minutes for the Truroots Sprouted Rice Trio).
Half way through cooking the rice, add the peppers, celery, tomato sauce, and spice mix, and stir to incorporate.
Replace the lid on the pot, and cook the rice mixture for the remaining time based on the package (for the Truroots trio, about 10 minutes).
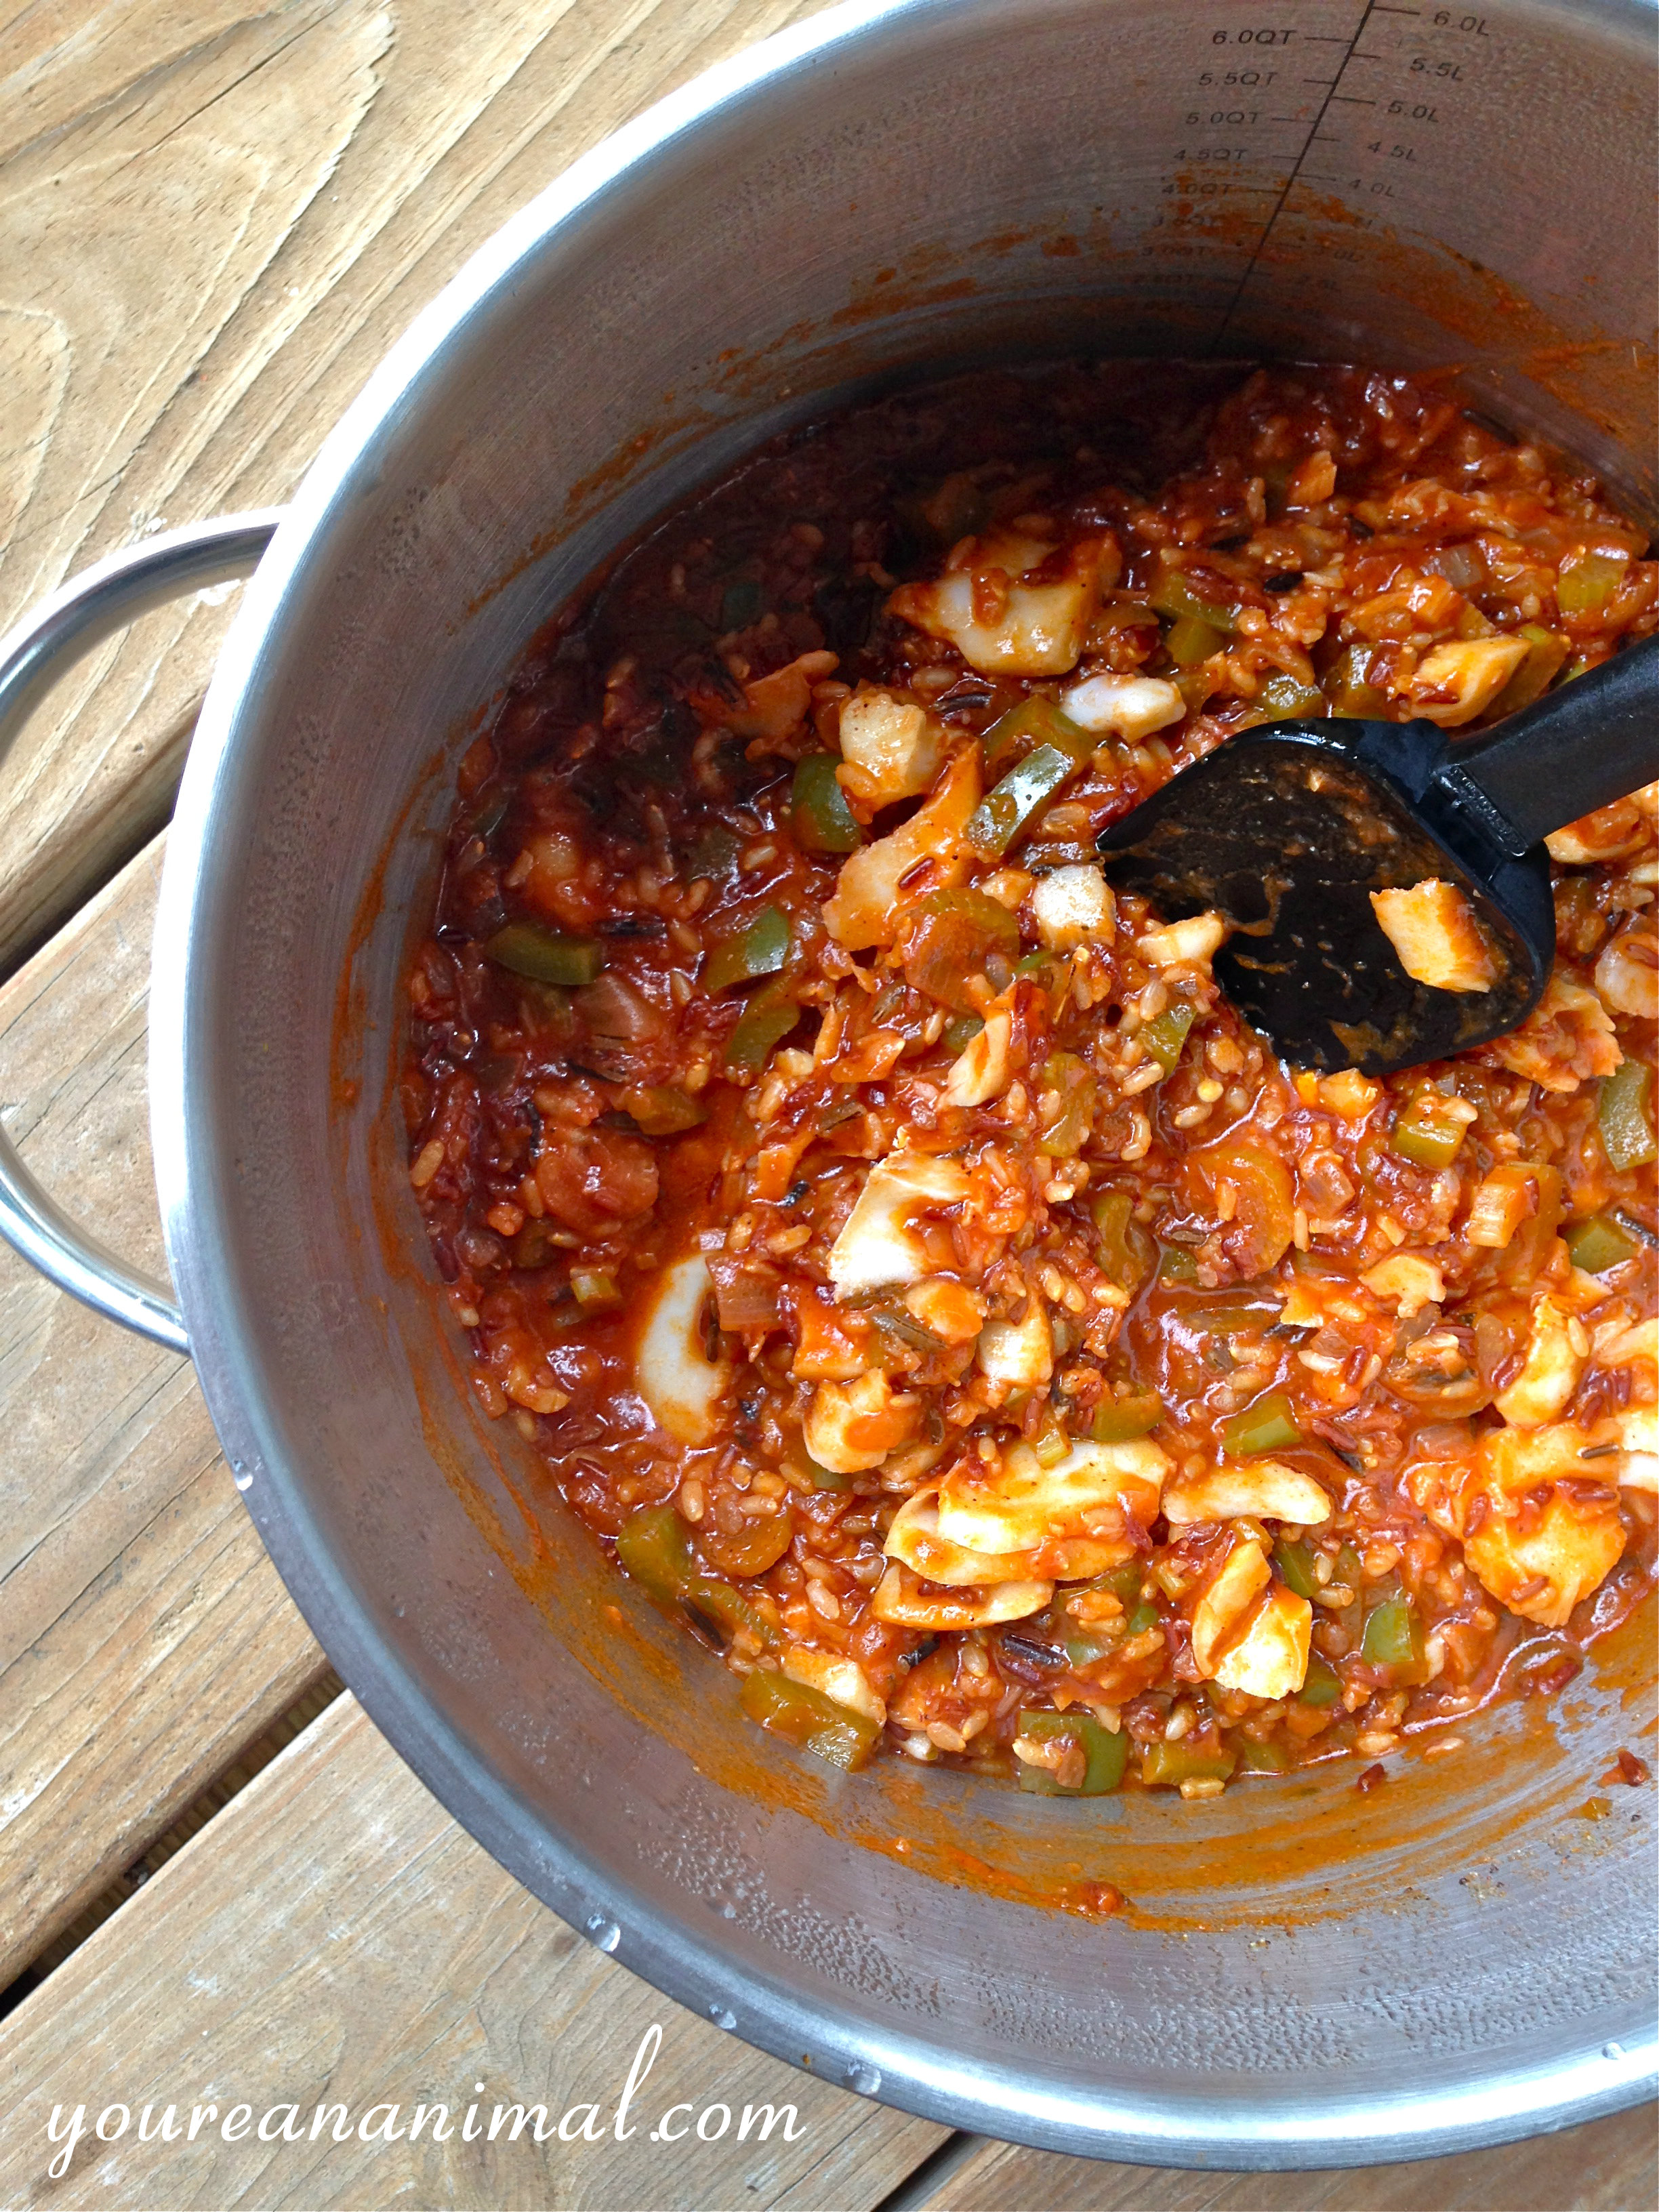
Turn off the heat, and add the cod, breaking it into large chunks, and folding it in.
Replace the lid of the pot once again, and allow the mixture to steam, without added heat, for another 10 minutes.
Most of the liquid should be absorbed by the rice, but some will remain for a thick, saucy mixture. Once done steaming, stir one last time to fluff the rice and incorporate all of the ingredients. Enjoy!
Please note that some of the links in the above post are affiliate links that will take you to an Amazon.com page. If you choose to purchase a product featured in this post using an affiliate link, you will be directly supporting You’re An Animal. Thanks!
It's time to take care of yourself.
It's time to nourish your wild side.
Are you always spending your energy on everyone else, and have nothing left for yourself? Let us remind you why YOU matter, and why the people in your life deserve to receive your best, healthiest self. Sign up for our newsletter and you'll instantly get a copy of our FREE eBook, Take Control: Your 7-Day Challenge to Reclaim Energy and Reduce Stress. You deserve it!
Nourish Wild, LLC and nourishwild.com is intended for educational and recreational purposes only. Please consult your physician before making any health or lifestyle changes.
)